

You've opened the window to clean the glass, grabbed the screen tabs, and found that one corner won't budge. Pulling harder feels like the obvious next step, but that's how a routine cleaning job turns into a bent frame or torn mesh. The right approach is to identify what holds the screen, secure the opening, and release the hardware before moving the panel.
Learning how to remove window screens safely is mostly about knowing where to apply pressure and when to stop. A snug screen needs controlled movement. A stuck screen needs a diagnosis.
Identify Your Screen Type Before You Pull
| Screen type | Where to find the release | Main risk to avoid |
|---|---|---|
| Pull-tab single-hung | Two tabs on the bottom rail | Bending the frame by pulling one tab |
| Spring-clip or pin double-hung | Spring retainers on both side frames | Tearing the mesh with a tool |
| Channel-mounted or exterior | Lip in the track, or perimeter screws | Prying a retained panel |
| Tabless friction fit | No visible hardware | Forcing a tight fit and dropping the screen |
Identify the release method before testing the frame. The window style gives you a starting point, but the hardware determines which direction the screen moves. Two similar-looking windows can have different screen retainers.
Inspect the bottom rail, both side frames, the track, and the corners. Look for fabric or plastic tabs, retractable pins, rotating clips, and screw heads. On a tabless screen, check for concealed springs before assuming it's held only by friction.
Separate the screen from the window assembly
The window screen overview describes screens as insect barriers, not fall-protection devices. Their lightweight, removable construction lets you service them separately from the sash, but it also means you must never lean against them or treat them as guards.
A screen frame should release without disturbing the window's structural frame, glazing, or perimeter sealant. If your proposed removal method involves pulling on those components, you haven't found the correct release point.
Practical rule: Find what retains the screen before deciding which way to pull.
Photograph the hardware while it's still installed. Then attach removable painter's tape to the rigid frame with the room, window position, and top edge marked. Screens that look interchangeable may fit their original openings differently.
If removal is part of a cleaning project, review the window-screen cleaning method before starting so you have a suitable washing and drying area ready.
What to Secure Before Removing a Screen
An accessible window opening is the main hazard, not the screen itself. The U.S. Consumer Product Safety Commission reports an average of about 8 window-fall deaths annually among children age 5 and younger, with approximately 3,300 children in that age group receiving emergency-department treatment each year.
Screens can release under body weight. Don't let their presence make an open window seem protected.
Prepare the opening and work area
- Secure the sash first. Keep it closed while preparing. Open it only when you're ready to reach the hardware, and confirm it stays securely in position.
- Remove climbing aids. Move chairs, furniture, and boxes away from the opening.
- Separate children and pets. Keep them in another room where they can't enter the work area.
- Clear the landing area. Remove cords, tools, and anything that could catch your feet while you're holding the frame.
- Use a stable working position. Never stand on a chair or window sill, and don't lean outside to reach a release.
The illustrated sequence applies once the room and opening are controlled.
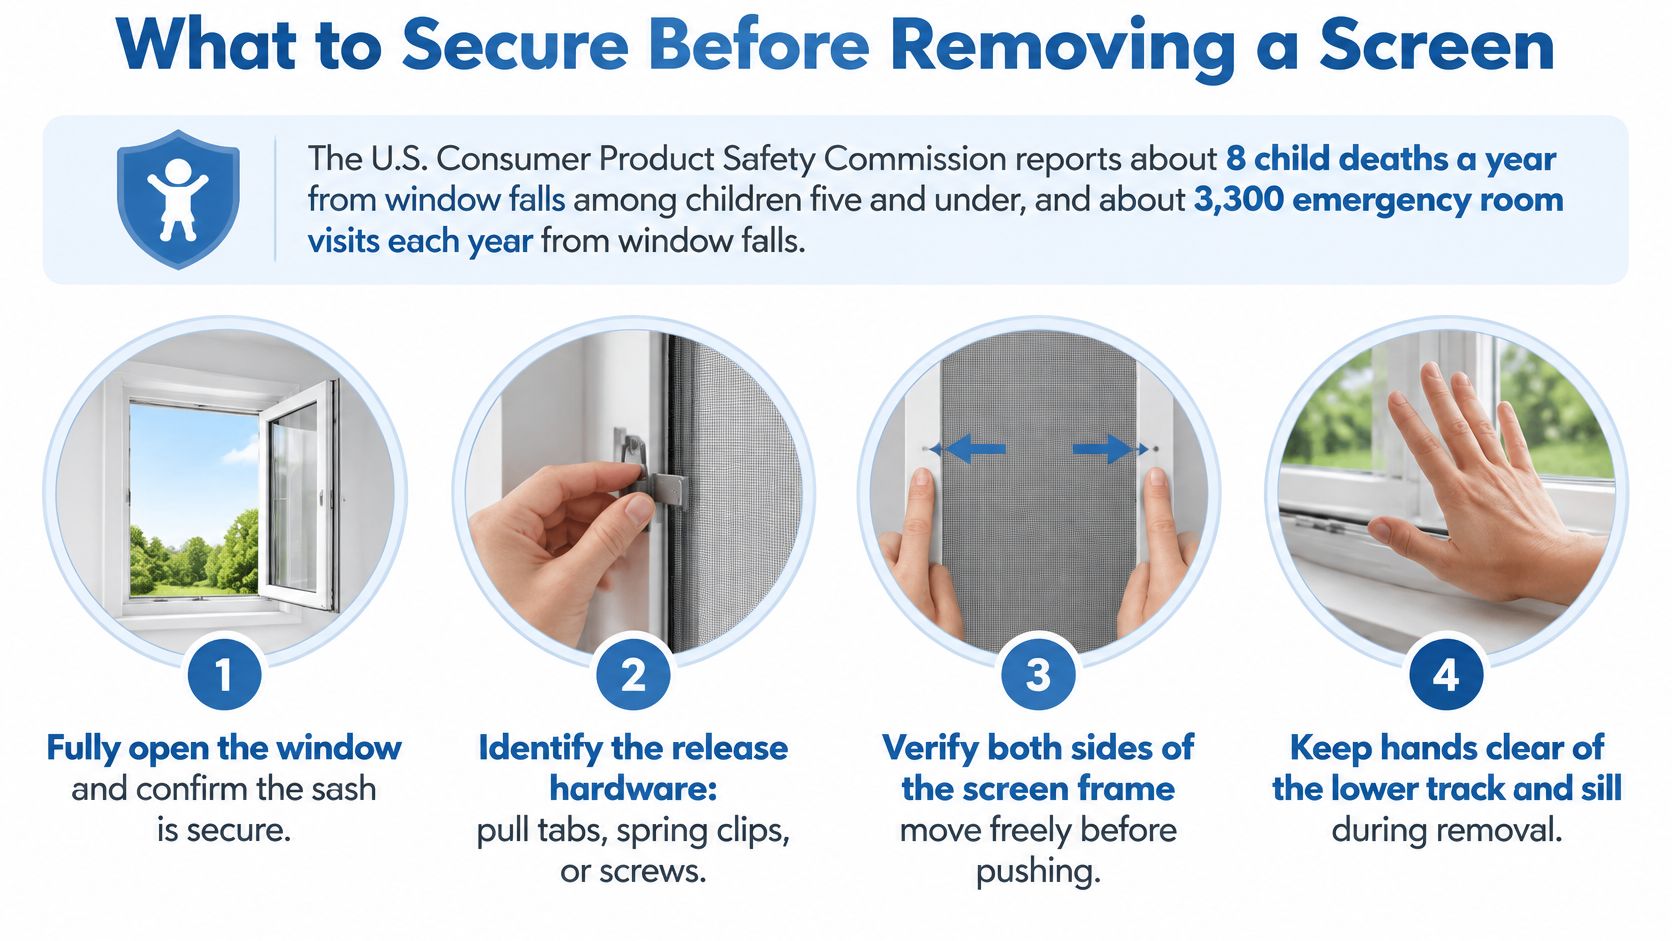
Choose the screen's storage location before releasing it. Lay it flat on a protected surface or stand it upright with adequate support, outside foot traffic. Don't balance it on a corner or leave it where someone could step through the mesh.
Close and lock the window whenever you leave the work area. Where fall prevention is needed, window guards or stops, not insect screens, are the appropriate controls.
How to Remove a Pull-Tab or Spring-Clip Screen
Use the sequence that matches your hardware, not whichever direction feels easiest to pull. The Milgard screen-removal instructions describe drawing the bottom tabs toward the center while lifting on applicable single-hung designs, then pushing the screen outward before withdrawing it. That's a model-specific movement, not permission to push every screen outside.
Release the hardware without twisting the frame
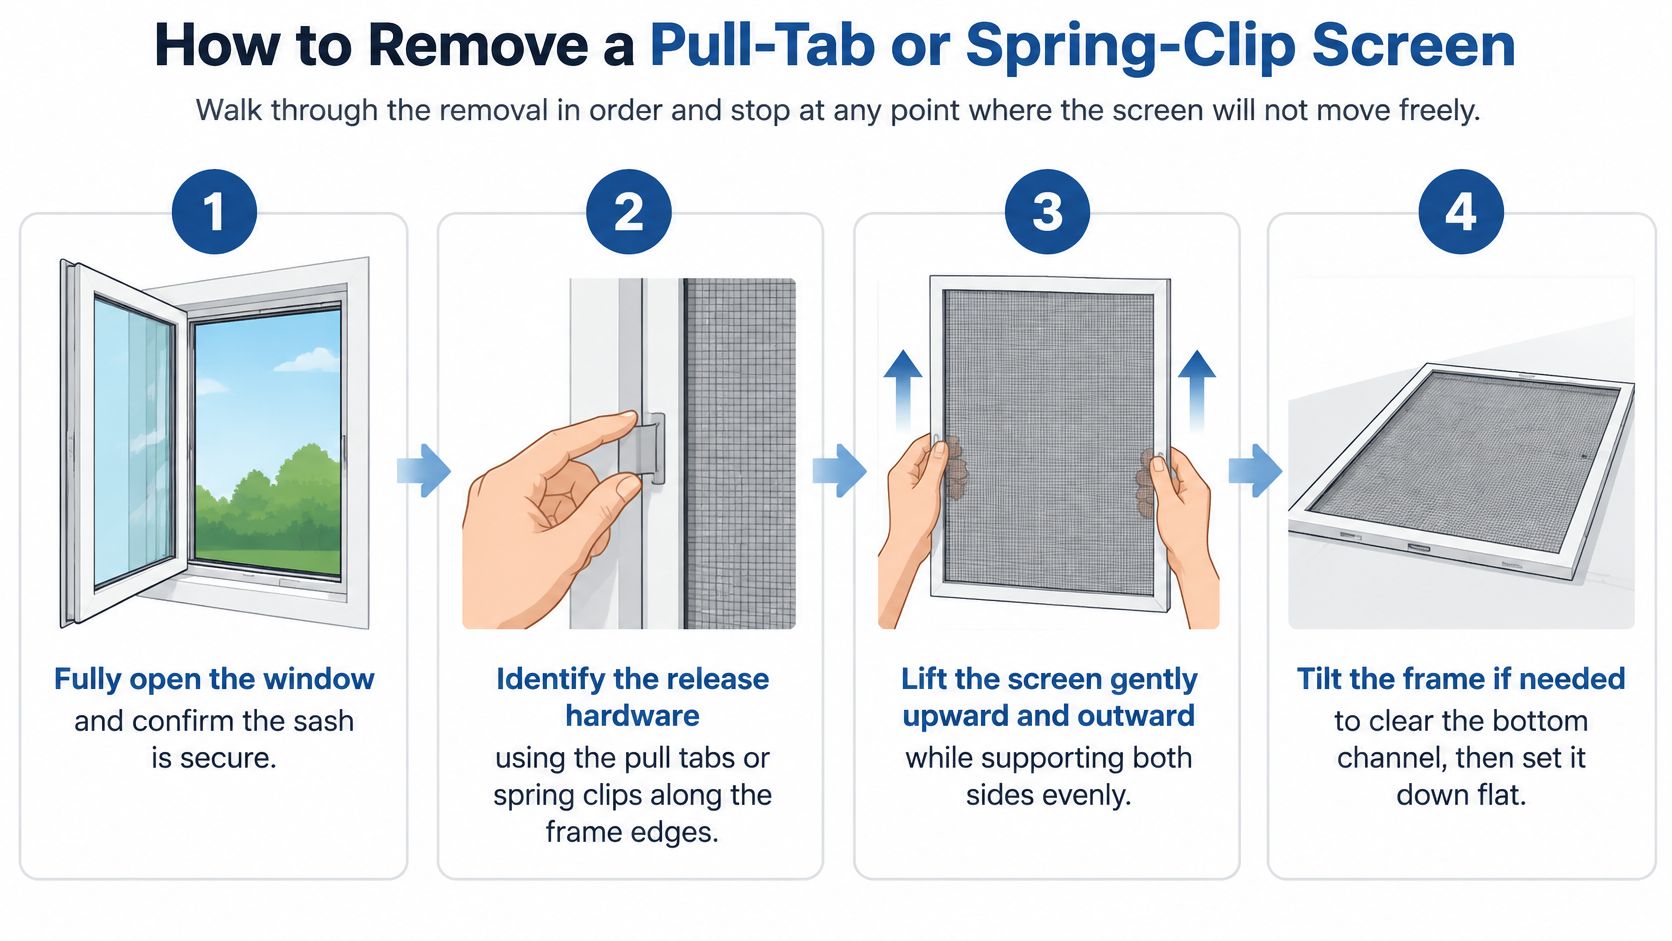
Fully open the window and confirm the sash is secure. Give yourself enough clearance to handle the rigid frame without trapping your fingers beneath the sash. If the sash drifts or won't stay open, address that problem before touching the screen.
Locate every retaining point. Match the tabs, clips, or pins to the release arrangement you identified. Don't mistake a loose pull tab for proof that the nearby latch has disengaged.
For a compatible single-hung pull-tab screen, grasp both bottom tabs together. Draw them toward the center while lifting, maintaining equal pressure so the bottom rail stays straight. Pulling only the easier side can rack the frame while the opposite corner remains captured.
Guide the released bottom edge outward, then withdraw the screen along its designed path. Keep control of the rigid rails as the edge clears the opening, and pivot only enough to bring it through. Don't twist diagonal corners in opposite directions or let the panel hang from a tab.
For a double-hung spring-retained screen, release the side retainers and guide the lower edge inward where the design permits. The Fixr double-hung removal guide describes moving the lower corner toward the spring side, bringing that corner through, and then repeating at the upper corner. Tilt the sash inward only if the window manufacturer's design calls for it, and never force an outward-removing screen toward the room.
Transfer the screen to its prepared resting place. Support the frame with both hands rather than carrying it by brittle tabs or mesh. Keep its room and orientation label attached so reinstallation doesn't become a trial-and-error exercise.
The illustration shows the general handling sequence, but the actual retainers determine the direction of movement.
Check the release before committing
A clean release leaves the rails straight and the mesh undisturbed. Both retained edges must disengage before you pivot the panel, even when one corner passes through the opening first.
If the frame starts bending before the edge clears, stop moving the frame and inspect the retention point.
You shouldn't need a sharp tool against the mesh or a hard tug on a tab. Resistance beyond light, controlled pressure calls for inspection, not another attempt with more strength.
Remove Tight, Exterior and Stuck Screens
A stuck screen is a diagnosis problem before it's a force problem. Check whether the tabs move equally, whether the rails are bowed, and whether a hidden screw or clip remains engaged. Then examine the contact edges for paint, oxidation, mineral deposits, or compacted dirt.
The Zen Windows screen-removal guide discusses checking clips and spring hardware when a screen won't release. The important distinction is between normal spring resistance and a frame that's bonded, damaged, or installed out of square.
| Symptom | Likely cause | Next action |
|---|---|---|
| Tabs or clips move unevenly | One side still latched or bent | Free the stuck side slowly, then recheck alignment |
| Frame visibly bowed | Earlier prying deformed the frame | Stop and plan frame repair or replacement |
| Screen won't lift after clips release | Paint, corrosion, or mineral deposits bonding the frame to the track | Clean accessible track edges with a soft tool; wipe on a light, compatible dry lubricant only if permitted |
| Spline loose along one edge | Leverage has pulled the spline out of its groove | Stop and reseat or replace the spline, or call a professional |
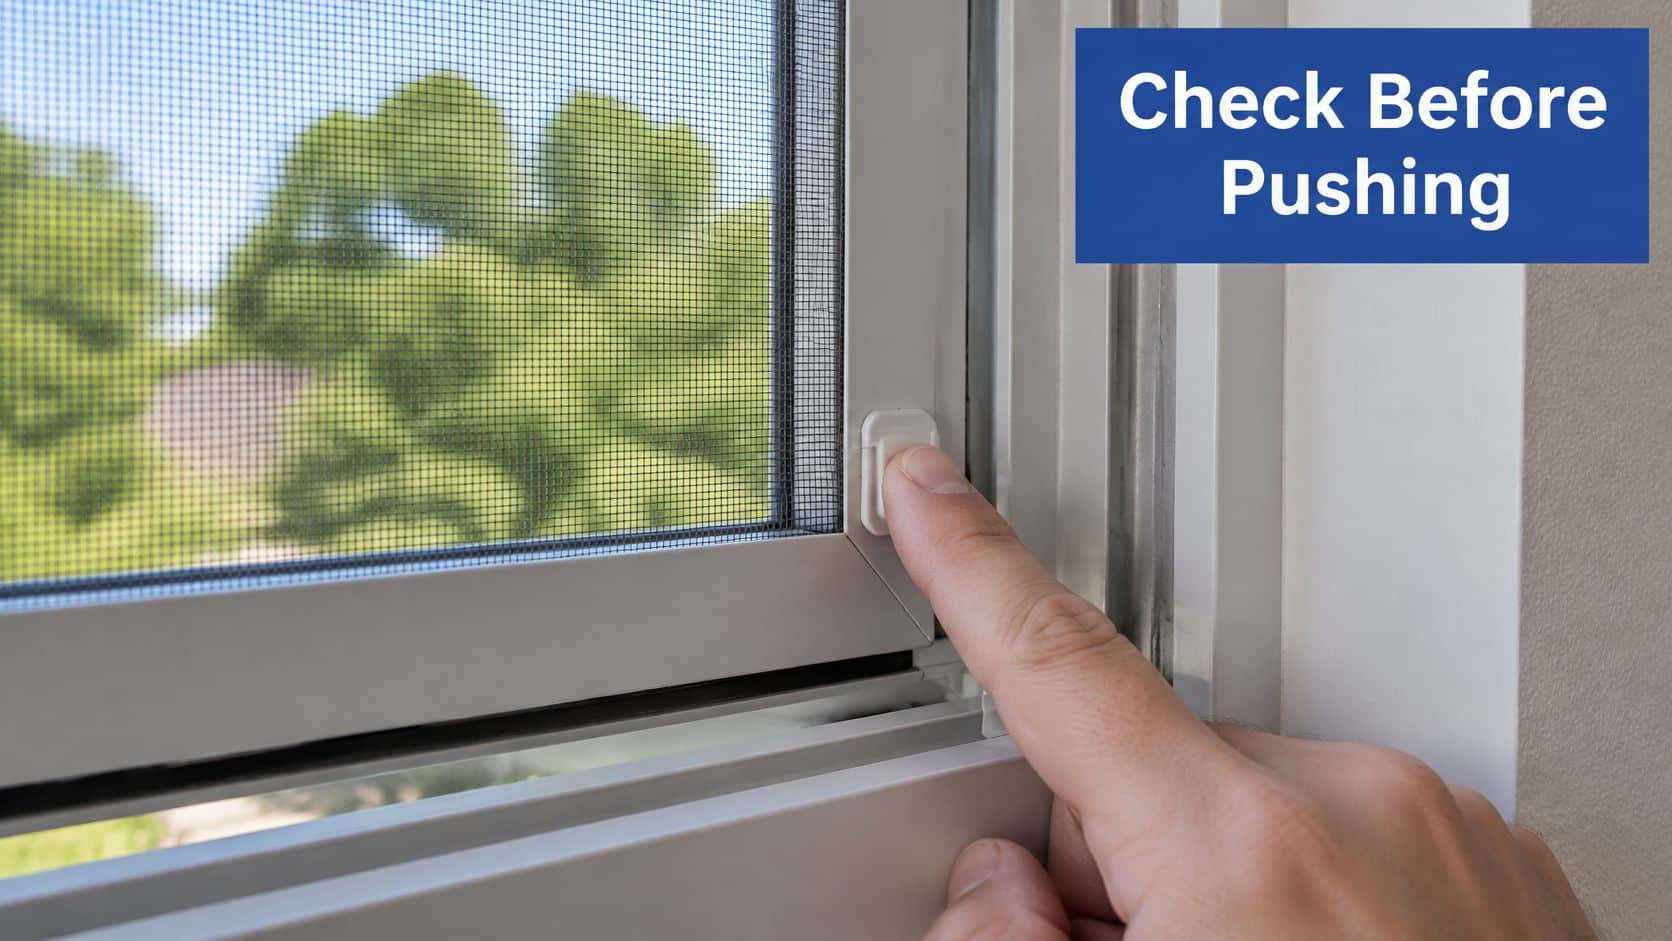
| Clips still engaged | Hidden retaining screw or unseen clip | Locate the fastener before applying any force |
Stop immediately if corners separate, the track deforms, or the spline, the cord retaining the mesh, starts pulling out. Lubricant won't fix a bent rail or release a painted joint by itself.
Check the release point closely before applying pressure.
Release channel-mounted screens carefully
Once you've confirmed there are no engaged screws or clips, push the frame upward into the upper channel. Clear the lower lip, then guide the bottom outward while supporting the panel.
A broad, thin putty knife can help at a stubborn lower edge only when the panel is otherwise free. Keep the blade parallel to the frame to spread pressure, protect the finish, and never use the mesh as a handhold.
Don't cut perimeter window sealant to free an insect screen. If inspection reveals an installation or sealing problem, Breaking Glass Co.’s guidance on avoiding drafts and water intrusion callbacks provides useful context for keeping window installation work separate from screen maintenance.
Resolve access before releasing the panel
For portable ladder access, the Sensible Digs removal guide describes OSHA's commonly cited 4:1 setup, placing the base approximately 1 foot from the wall for every 4 feet of vertical height. Use level footing and reposition instead of leaning sideways.
Establish a clear drop zone and arrange a controlled handoff if needed. A helper receiving the panel doesn't make an unstable ladder safe.
If the screen is above the first floor or you can't see its track, pause and plan the access. The guidance on cleaning hard-to-reach windows can help you distinguish a reachable maintenance task from work requiring appropriate equipment.
Clean the Track and Reinstall the Screen
Phoenix's dry conditions make track cleaning part of screen removal, not an optional extra. Arizona State University's Phoenix climate overview describes low rainfall and relative humidity, with the area averaging about 86% of possible sunshine annually. Dust remains in grooves, and strong sunlight makes leftover marks easy to notice.
Remove grit before seating the frame
- Vacuum first. Use a soft brush attachment on the mesh and track so loose dust doesn't become muddy residue.
- Wash the mesh with mild soapy water and a soft brush. Rinse gently and allow it to dry completely.
- Detail the grooves. Work a small brush and damp cloth into track corners, then wipe away loosened grit. Follow the window-track cleaning steps for stubborn buildup.
- Check that the frame is square by comparing its diagonal measurements. Don't force a distorted frame into a clean opening.
- Reinstall in reverse order for that design. Seat the top first where applicable, compress the spring side or engage the retainers, and confirm even seating.
- Test the fit lightly. Press the middle of the rigid rail, not the mesh; the panel should remain seated without rattling.
Clean with controlled moisture, not a stream of water driven into the track.
Flooding grooves can leave dirty residue in recesses and push water where it doesn't belong. Keep drainage paths clear rather than coating them with lubricant or sealant.
A draft around the window is a separate issue from screen fit. HIBCO ROOF LLC's window resealing guide for Columbus homeowners offers context for that different maintenance task.
Check and clean the tracks each season, adjusting attention to how quickly grit accumulates.
Decide Whether to Remove It Yourself or Book a Crew
DIY removal is reasonable for an accessible ground-floor screen with visible releases, an undamaged frame, and a sash that stays securely open. You should be able to complete the movement without leaning outside, improvising a platform, or forcing the rails.
Book professional help for upper-floor openings, exterior ladder access, bowed frames, and commercial or high-rise work. Under OSHA's powered-platform requirements, employees working on covered platforms need compliant fall-arrest systems, and employers must maintain written emergency plans. That work requires more than familiarity with screen clips.
Prepare useful details before calling
- Identify the screen. Photograph the hardware and any visible damage.
- Describe the access. Note the room, floor height, and whether the screen faces a walkway.
- Explain the resistance. Say whether a clip won't retract, the frame won't lift, or a corner is separating.
At South Mountain Window Cleaning, LLC, our team members undergo extensive window-cleaning safety training. We serve Phoenix, Scottsdale, Paradise Valley, Chandler, Tempe, and Gilbert, Arizona.
Our residential window cleaning services include inside and out window cleaning, screen cleaning, screen repair, track cleaning, window tinting, ceiling fan cleaning, coach light cleaning, and mirror cleaning. A damaged screen may need repair rather than another removal attempt.
South Mountain Window Cleaning, LLC provides residential, commercial, and high-rise window washing, with screen and track care available to help you avoid forcing a stubborn panel. Visit South Mountain Window Cleaning, LLC to request service and share your screen photos and access details. Customers in Phoenix and Scottsdale can call (480) 519-9327 to discuss the job before attempting a difficult removal.