
You're standing in the driveway, looking at vinyl siding that looked fine last spring and now has a film of desert dust, a few green mildew patches near the shaded side, and streaks that won't rinse off with a hose. In Phoenix, Scottsdale, and the rest of the Valley, that's a normal problem, but the fix isn't to crank up the pressure and hope for the best. Vinyl siding can handle cleaning, but it can't handle abuse, and the wrong nozzle, angle, or dwell time can push water behind the panels and turn a cosmetic job into a wall-cavity problem.
A careful wash starts with technique, not force. The safest approach is to keep the nozzle about 3 feet from the wall during testing, then use a low-pressure, wide-angle spray if that distance clears the dirt without damage, and stay in the range of roughly 1,300 to 1,600 PSI or, depending on the machine and job, up to about 2,400 PSI only when the siding and conditions allow it. The basic cleaning pattern still matters too, detergent from the bottom up, let it dwell for about 10 to 15 minutes, then rinse from the top down so dirty runoff doesn't streak clean panels, as outlined in this practical house-washing guide from Bob Vila.
If you're comparing siding materials while deciding whether the house is due for a wash or an upgrade, the overview of siding cost, durability, and maintenance from Superior Home Improvement is a useful reality check. And if you're unsure whether your home is a DIY candidate at all, South Mountain Window Cleaning has a separate discussion on whether you should power wash vinyl siding that pairs well with the hands-on guidance below.
Why Vinyl Siding Needs a Careful Approach
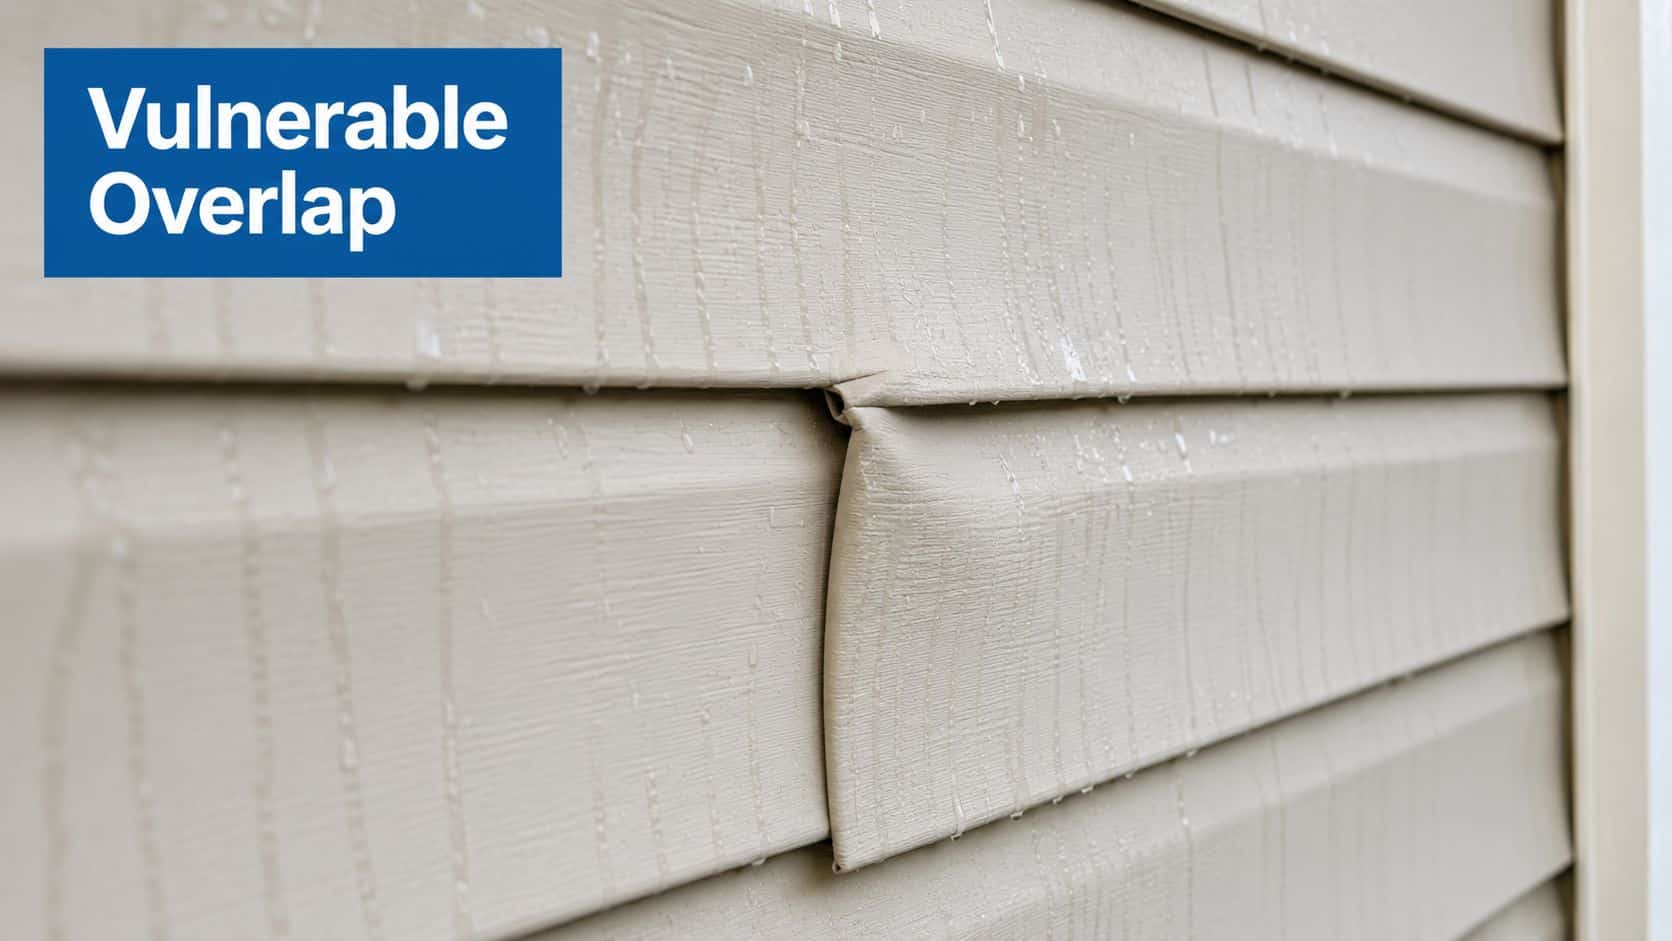
A homeowner usually notices the problem the same way every time. The south side of the house looks chalky from UV exposure, the shaded side has a little green growth, and the lower panels hold onto a dusty line after monsoon winds roll through. Vinyl siding is durable, but it's also layered, and those overlapping laps can trap water if you spray upward or too close.
That overlap is the reason the whole job demands restraint. Too much pressure can force water behind the panels, where it can sit in places you won't see until there's staining, swelling, or worse. A concentrated jet can also mark the surface finish, especially on older or thinner siding, which is why the safest mechanics rely on controlled distance, a wide fan nozzle, and a steady downward angle rather than brute force.
In Arizona, the challenge is layered on top of that. Dust sits on the siding, UV exposure dries residues fast, and monsoon grime can leave a stubborn film that looks worse the next day if you wash in the wrong part of the day. If you want a more formal look at the trade-off between upkeep and replacement costs, the material comparison above is worth a look, and the washing process itself should stay conservative enough to protect the wall assembly.
Practical rule: if you can clean the panel with less pressure and better chemistry, that's the right move. Vinyl rewards patience, not force.
The biggest mistake I see is treating vinyl like concrete. Concrete can take punishment. Vinyl wants a measured rinse, a mild cleaner, and a technician who respects the panel joints.
Preparing Your Home and Protecting What Matters
Before any water hits the wall, I walk the perimeter and look for trouble. Loose panels, cracked corners, gaps around trim, and damaged caulk change the plan immediately, because spraying into those areas can drive moisture where it doesn't belong. If a section is already broken, it's smarter to avoid it or repair it first than to discover hidden leakage after the wash.
Clear the exterior before you start
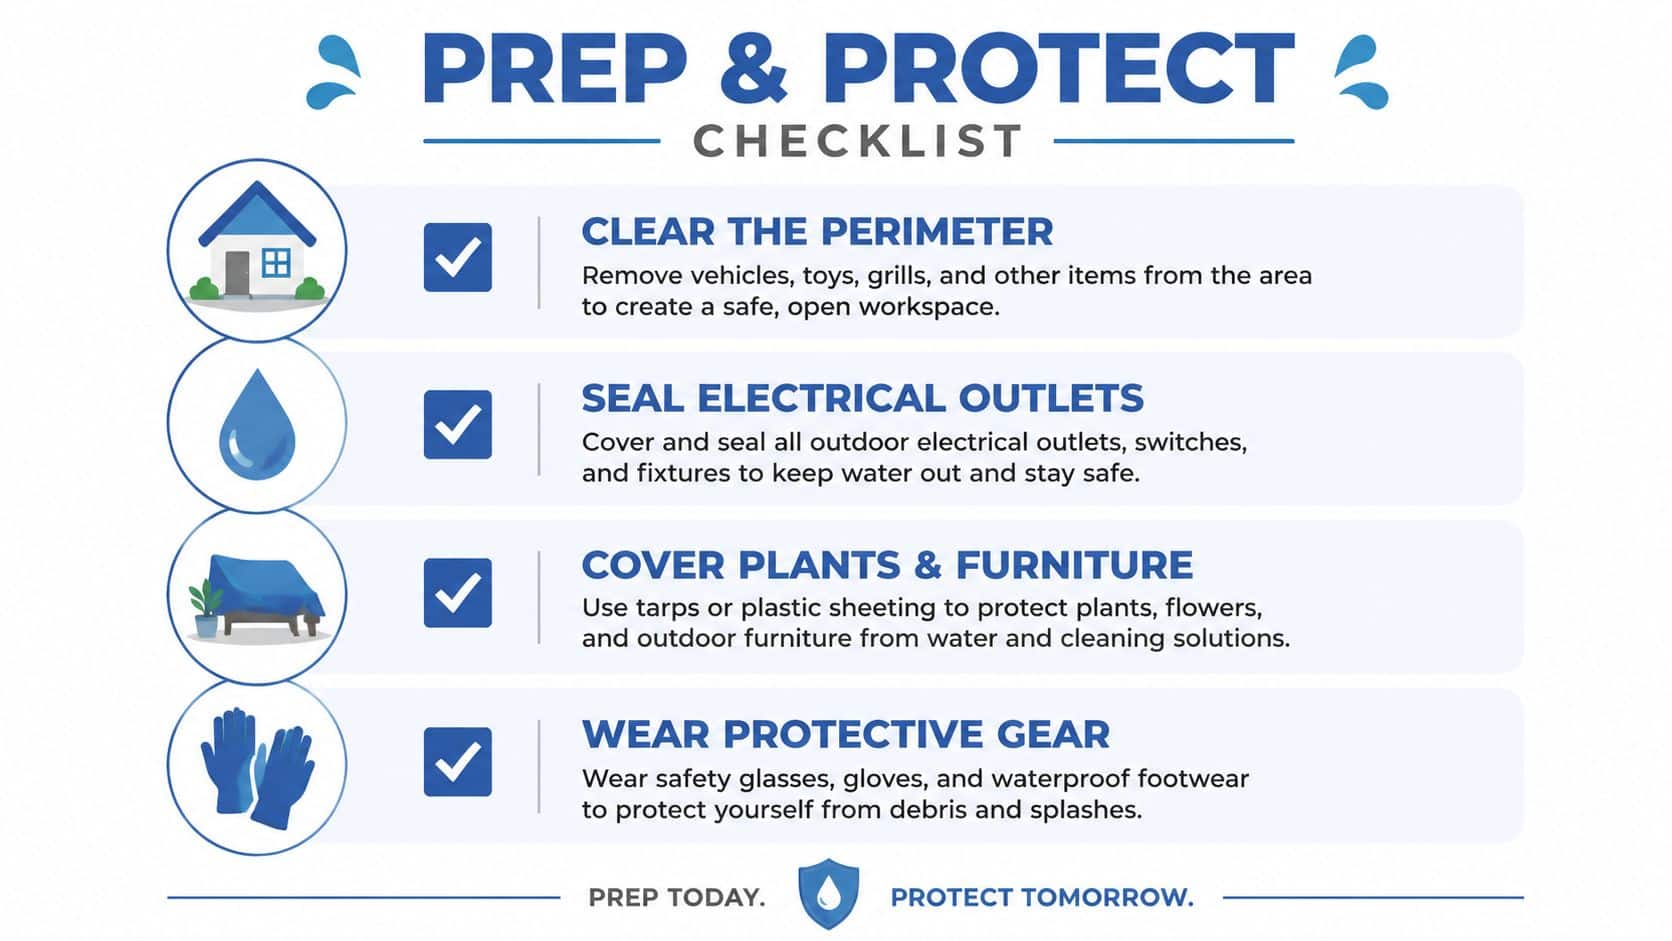
Start by moving patio furniture, grills, and décor away from the walls. Cover anything that has to stay put, especially cushions, electrical fixtures, and nearby surfaces that could collect overspray. Windows and doors should be shut tightly, and outlets, junction boxes, and light fixtures need extra attention because water intrusion around electrical components is a bad trade for a cleaner facade.
Landscaping deserves the same respect. A quick pre-soak on plants helps dilute runoff, and tarps can protect delicate shrubs if the spray path runs close to them. For a related safety pass on the rest of the exterior, South Mountain Window Cleaning's guide on how to clean gutters safely is a helpful companion piece.
Wear the right gear and set up access correctly
Eye protection isn't optional, because grit and rebound can come back at you fast. Closed-toe shoes help with traction on wet concrete, and gloves are worth wearing when you're handling detergent or moving around metal fixtures. If you need a ladder for hand scrubbing, keep it on stable ground and never overreach to chase a stain, because shifting your balance is a faster way to get hurt than any nozzle choice.
Don't start washing until you've done a full walk-around. Finding a cracked panel after you've already soaked the wall is how small siding issues become expensive repairs.
The prep phase is where DIY jobs win or fail. A clean wash on vinyl starts with dry planning, not a wet wand.
Soft Washing vs Powerwashing for Vinyl Siding
Soft washing and powerwashing aren't interchangeable, even though homeowners often use the words that way. Soft washing uses lower pressure with cleaning solution to do more of the work, which is why it's a better fit for mildew, algae, and older siding that shouldn't be blasted. Powerwashing can still be useful on vinyl, but only when the siding is in decent shape and the goal is routine dust removal rather than heavy biological cleanup.
The strongest equipment benchmark for vinyl sits in a cautious middle zone, roughly 1,300 to 1,600 PSI with a 25° or 40° tip, with some setups going higher only when the machine, siding quality, and task justify it. The same technical guidance warns not to push past about 2,000 PSI on thinner or lower-quality siding, because the pressure can loosen panels or drive moisture behind them. That's why the wand angle matters as much as the gauge reading.
Soft washing vs powerwashing comparison
| Factor | Soft Washing | Powerwashing |
|---|---|---|
| Pressure | Low pressure, gentler on panels | Higher pressure, more risk if misused |
| Best use | Mildew, algae, older or brittle siding | Routine dust and light surface soil |
| Cleaning action | Chemistry does more of the work | Water force removes more surface grime |
| Risk level | Lower chance of panel damage | Higher chance of water intrusion if aimed wrong |
| Technique | More dwell time, less force | More careful nozzle control needed |
For a deeper look at method differences, South Mountain Window Cleaning's page on what is soft washing fits neatly alongside the practical comparison from Cultivate House Detailing.
What matters in real life is condition. Fresh vinyl with light dust often responds well to low-pressure rinsing and mild detergent. Chalky, stained, or mildew-prone siding usually cleans better with a soft-wash mindset, because the chemistry can break down the film without punishing the panel surface.
The Complete Washing Process From Soap to Rinse
The wash itself works best when you treat one section like a small project instead of trying to do an entire wall at once. I like to pre-wet one small area, apply detergent, and rinse it before the soap has a chance to dry out. In Arizona heat, that timing matters because residue shows up fast once the solution starts flashing dry on the panel.
The solution should stay simple. Routine dust usually comes off with warm, soapy water, while heavier buildup may call for a diluted general-purpose cleaner, and stubborn exterior contamination sometimes needs a bleach-based mix used carefully. One mainstream cleaning guide recommends a dilution of about 1 part cleaner to 15 parts water, roughly 1 cup per gallon, while another suggests 1 part mildewcide wash plus 1 part bleach to 10 parts water for tougher buildup, and the point in both cases is the same, let the chemistry do the work before you ask the nozzle to help.
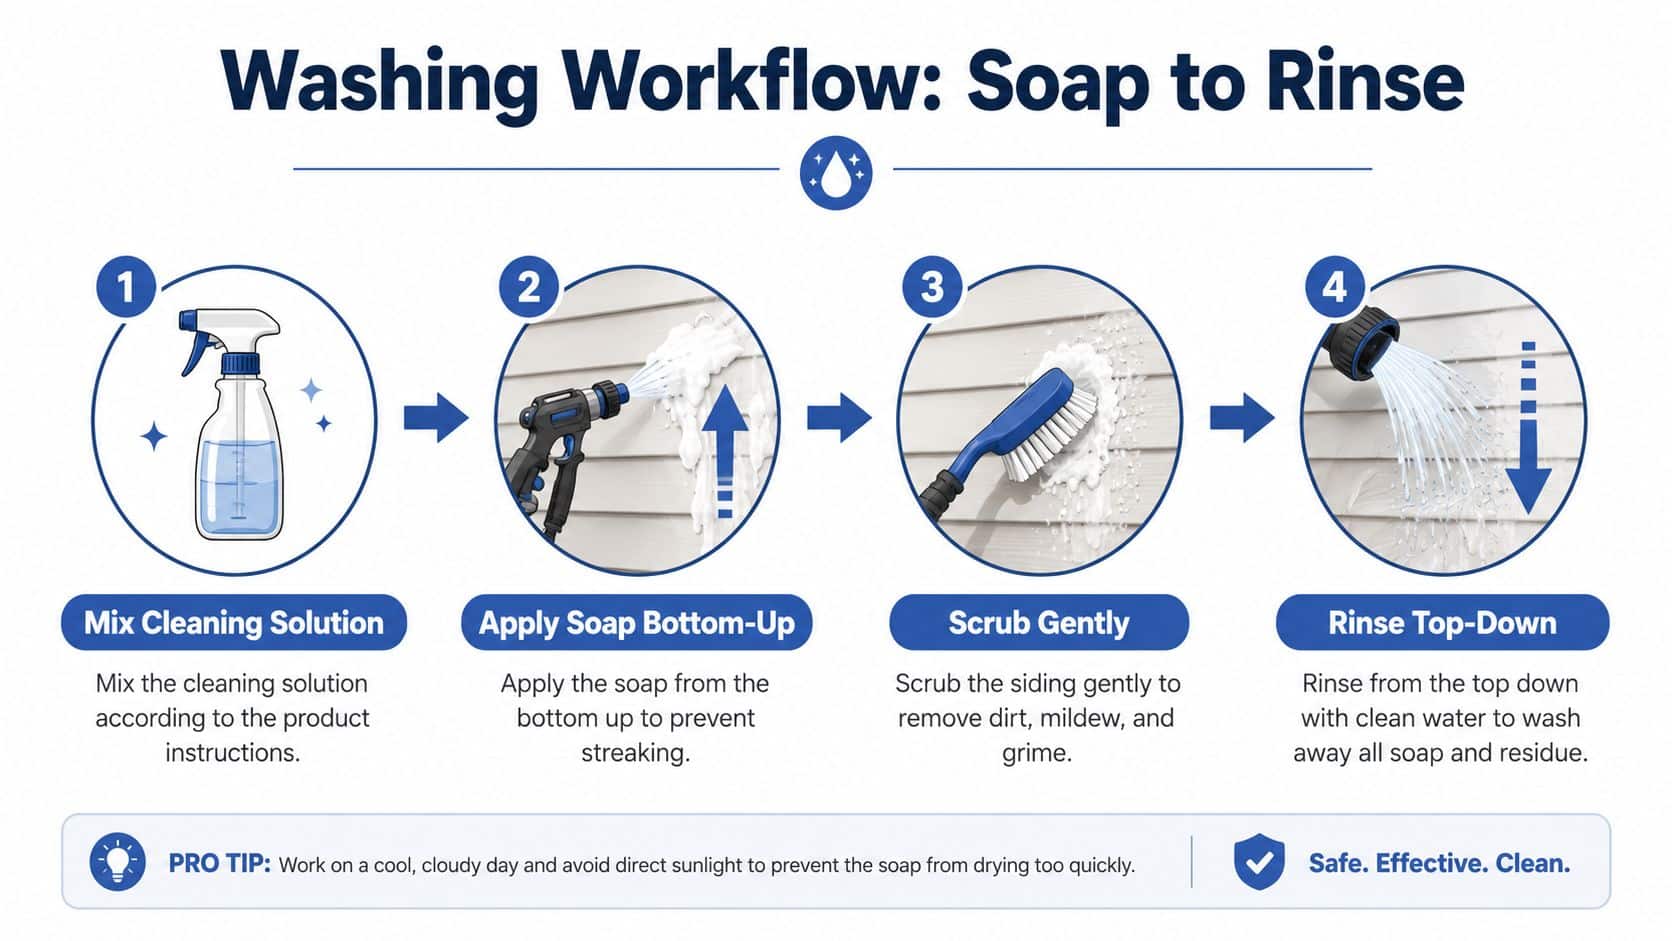
The best pattern is still bottom up for soap, top down for rinse. Soap from the bottom up keeps you from chasing dirty runs over areas you've already cleaned, then a top-down rinse carries the loosened grime off the wall in a controlled sheet. That combination is the core reason vinyl washes come out even instead of striped.
Washing Workflow, Soap to Rinse
- Mix cleaning solution: use warm, soapy water for routine maintenance or a diluted cleaner for heavier grime.
- Apply soap bottom up: work in a controlled pattern so streaking doesn't run over cleaned sections.
- Scrub gently: use light hand pressure where needed, especially on corners and shadowed areas.
- Rinse top down: finish with a wide, even rinse so residue leaves the siding clean.
For the spacing, the clearest field rule is to work in 2 to 3 foot sections and keep the detergent on the wall for only about 10 to 15 minutes before rinsing. The section-by-section approach from Angi's vinyl siding guide is the one that holds up when the desert sun is working against you.
If you're washing on a hot day, start early. Early morning gives the solution more working time and lowers the chance of streaking, which is a real issue in high sun and low humidity.
Common Mistakes That Damage Vinyl Siding
The myth that more pressure means a better clean causes most of the damage I see. Vinyl doesn't need a needle jet to come clean, it needs a controlled spray, the right chemistry, and enough patience to let the detergent loosen the dirt first. Once people understand that, a lot of expensive mistakes disappear.
What goes wrong most often
- Using excessive PSI: high pressure can crack panels, loosen laps, or drive water behind the siding.
- Spraying upward: an upward angle pushes water into the overlap and toward the wall cavity.
- Soaping the whole wall at once: dried detergent in Arizona heat leaves streaks and residue.
- Skipping a test patch: one hidden panel can tell you whether the pressure or chemical mix is too aggressive.
- Using the wrong tip: a narrow stream concentrates force and increases the chance of puncture or gouging.
The safest adjustment is usually to reduce force before increasing it. A wide-angle tip, controlled distance, and straight or slightly downward spray give the water room to clean without digging into the siding. That's also why technicians test an inconspicuous spot first, because every house has a different mix of age, exposure, and surface condition.
A clean test patch tells you more than a full wall does. If the siding starts moving, the pressure is too high and the nozzle needs to back off.
Chemicals deserve the same restraint. Harsh, undiluted bleach can discolor or embrittle vinyl over time, which is why mild detergents and properly mixed solutions are the safer default. If you're already unsure about panel condition, oxidation, or prior patchwork, the risk of doing it wrong rises fast.
The biggest mistake in the Valley is timing. Sun-baked siding can dry detergent before it has a chance to work, so what looked like a thorough wash becomes a striped mess that needs to be redone.
Arizona Climate Considerations and When to Call a Professional
Vinyl siding in Arizona doesn't age like vinyl in a humid region. Dust storms, monsoon debris, intense UV, and fast evaporation all change how a wash behaves on the wall, which is why generic advice from cooler markets often falls short. A home that needs a gentle rinse in spring can need a more deliberate soft wash after monsoon season, especially if the lot sits near construction, desert landscaping, or a dirt road.
That climate reality also changes cadence. Some Valley homes need cleaning more often than homes in milder places because dust accumulation never really stops, and direct sun makes residue show up faster. For timing and seasonal planning, South Mountain Window Cleaning's note on the best time to power wash a house matches what works in practice, early starts and cooler conditions help a lot.
If you're deciding whether to do it yourself, the break point is usually access and contamination level. Single-story siding with light dust buildup is a reasonable DIY job if the panels are sound and you can reach everything safely. Two-story walls, visible mildew, oxidation, or soft spots around trim are better left to a professional with soft-wash equipment and the judgment to protect the siding.
For homeowners comparing service options in the Valley, South Mountain Window Cleaning, LLC is one of the local names that handles exterior cleaning across Phoenix, Scottsdale, Paradise Valley, Chandler, Tempe, and Gilbert. If you're also weighing yard cleanup or curb appeal work around the house, it can help to compare local landscaping services Prescott and coordinate the outdoor maintenance schedule instead of doing the same area twice.
If the job feels borderline, that's usually your answer. A trained crew can finish the wash faster, keep the pressure in the safe range, and save you from turning a dusty wall into a costly siding repair.
If your vinyl siding is due for a careful wash in Phoenix or anywhere else in the Valley, contact South Mountain Window Cleaning, LLC for a professional exterior cleaning approach that fits Arizona dust, sun, and siding conditions. Their team handles house washing, pressure washing, and other curb-appeal services with trained technicians and insured service, so you can get the siding clean without gambling on damage.