
The bin comes down off the garage shelf, half the strands are dead, and the neighbor's roofline is already glowing. There's a ladder leaning against the wall and a free Saturday afternoon. What's missing is a decision about the roof itself.
Hanging Christmas lights on a roof is an access problem before it's a decorating problem. Most of the run can go up from the ground with a pole and clips. The part that can't needs a plan, and the plan starts with an honest look at the weather, the ladder and the shingles under your feet. Here's the order that works: check the gear and power, decide whether the roof is worth the climb, run the lights properly, troubleshoot what fails, and price a crew if the answer on the roof is no.
Gear and Power Checks Before You Start
A dead strand found halfway along the eave means the same stretch of roof gets climbed twice. An indoor cord in wet grass can trip the circuit the moment the first plug seats. Both of those show up on the driveway if you look before the ladder leaves the wall.
The strands spent ten months in a hot garage. The cord in the kitchen drawer was never rated for rain. The outdoor outlet's test button may not have been pressed since the house was built. Ten minutes of checking stops those two early endings: a dark section along the gutter, and a circuit that trips as soon as the first strand goes in.
Treat the table as a go or no-go. A failed row means the climb waits. You do not go up to see whether a bad cord or a dead outlet "works better" at the eave. The roof is the hazard, and a pole from the ground still covers most of the run.
| Roofline light gear and power checks | ||
|---|---|---|
| Item | What to check | Why it matters |
| Light strings | Marked for outdoor use with a UL, ETL or CSA listing | Indoor strings overheat and fail in rain |
| Roofline clips | Plastic, sized to your gutter or shingle edge | Avoids nails and staples that pierce insulation |
| Extension cord | Outdoor-rated, undamaged, no splices | Protects against moisture and short circuits |
| Telescoping pole | Reaches the eaves from the ground | Lets you place most lights without climbing |
| Ladder | Side rails extend at least 3 feet above the edge, firm feet | Keeps the top stable where you reach onto the roofline |
| GFCI outlet | Test button trips and resets before use | Cuts power quickly if a fault occurs |
The firm-support rule
Lights need something that does not move. Fasten the run to solid fascia, a gutter, or the wall so wind cannot pull it loose. Skip any fastening that pushes a nail, staple, or wire through the insulation.
The Consumer Product Safety Commission holiday decorating guidance makes the same point: secure outdoor lights to firm supports such as trees, walls, or the house, look for laboratory marks from UL, Intertek, or CSA, and reject strands with damaged sockets, bare wires, or loose connections. A short can start a fire. That is why the display gets switched off whenever the house is empty or everyone is asleep.
OSHA's ladder rules require portable ladder side rails to extend at least 3 feet above the upper landing surface, so a ladder whose top rung sits level with the gutter gives you nothing to hold. If the rails stop flush with the edge, or the feet rock on the concrete, leave the ladder down and finish what the pole can reach.
Test every strand on the driveway
Plug each strand in flat on the concrete, where you can see the whole length at once. Watch for dark sections, cracked sockets, bare wire, and connectors that pull apart with a light tug. Set the failures aside before they get near the roof.
The Christmas light setup page follows this same ground-level order if you want it open while you work.
I treat a GFCI that will not trip and reset, or a cord that is indoor-only, as a stop. A power fault does not get safer once you are standing at the gutter.
How to Hang Roofline Lights Step by Step
The install itself is the simple part once the prep is done. Two rules keep it simple: measure and test everything at ground level, and never pull a run tight enough that it fights the clips.
Here's the sequence in one view.
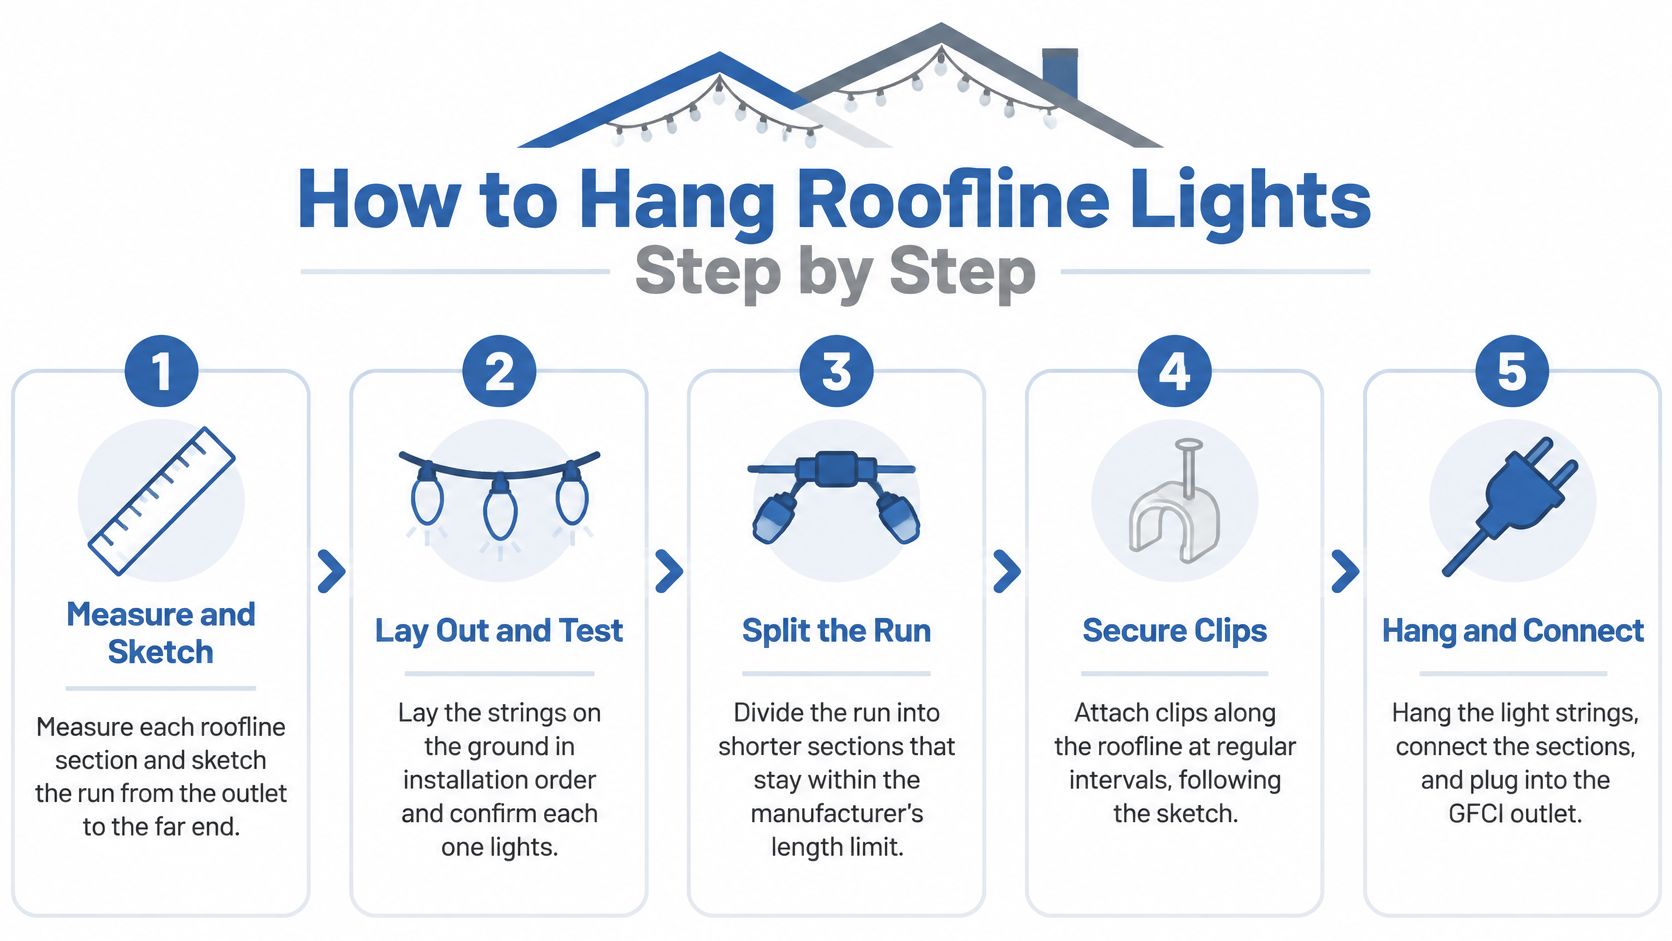
- Measure and sketch the run. Walk the roofline with a tape, note each straight section and corner, and mark the distance to the outlet. A sketch means you cut, connect and coil on the ground instead of guessing at the top of a ladder.
- Lay the strings out in installation order. Start with the section nearest the outlet and work outward along the driveway. Plug each strand in as you lay it, checking for cracked sockets, frayed insulation, loose connections and damaged plugs, and pull the failures out of the line.
- Split the run into sections. Every string has a maximum connected length printed on its tag. The National Park Service decorating guidance offers a conservative benchmark of no more than three mini-light strands or 50 screw-in bulbs linked together unless the manufacturer specifies otherwise, and the manufacturer's number always wins.
- Clip from the power entry point outward. Attach purpose-made plastic clips at even intervals along the fascia, gutter edge or shingle tab and keep the cable straight rather than pinched. Clips hold the run without piercing insulation, which nails and staples can't promise. Standing-seam and metal roofs take a different profile, and clips for metal roofs covers which one grips your seam without scratching it.
- Settle the access question before you climb. If the eave is reachable from the ground, do the whole first pass with a pole. If a section needs a ladder on soft ground, a sideways stretch or a step onto the roof, leave that section dark for now.
- Angle every connector downward. Water collects at the lowest point of a connection, so point each plug and coupling so it drains instead of pooling.
- Feed slack, don't stretch. A taut line pops out of clips in the first gust. Give each span a few inches of slack and let the clip carry the weight.
- Turn corners in a wide arc. A kink breaks conductors inside the insulation where you'll never see the damage until the strand dies in January.
- Connect at the outlet and test in daylight. Run an outdoor-rated cord straight into the GFCI receptacle with no daisy-chaining, then switch the whole run on before dark so a dark section gets fixed with the sun still up.
A healthy run looks boring: every section lit, no flicker when you nudge the wire at each clip, connectors hanging dry above the ground, and no cord crossing a walkway. If you're following along on video, this walkthrough shows the same clip-and-slack approach in real time.
When to Stay Off the Roof Entirely
A ladder against the wall makes the roof feel reachable. Reachable isn't the same as safe, and the injury figures are blunt about it. CPSC data recorded 18,400 holiday-decorating injuries treated in U.S. emergency departments from November 2016 through January 2017, with falls accounting for 38%, strains or sprains 18% and lacerations 14%, plus two reported ladder-fall deaths. Those numbers come from the CPSC and NIST holiday decorating hazard demonstration, and they describe a task where the fall is the main event, not the exception.
A ladder that reaches the gutter does not make the roof safe to walk. Access and footing are two different questions, and only the second one decides whether you go up.
If ladder work is unavoidable, the mechanics are fixed. Firm, level ground under the feet. The base secured against slipping. Three points of contact at all times, your body centered between the rails, and nothing above the top rung. A second person steadies the base and hands up materials so your hands stay free. Long strings never travel up with you.
The gap between decorating and roof work matters legally too. U.S. Army safety guidance on holiday decorating notes that OSHA's fall-prevention rules treat roof hazards differently from ordinary ladder use, and roof-level work can call for a harness, lifeline or guardrail, plus protection around skylights and openings. A homeowner isn't going to rig a lifeline for one string of lights, which is the point: if the conditions call for that gear, the job belongs to someone else. If the fascia feels soft, the shingles are brittle, or the gutters sag, get a professional roof inspection before anything leans on that edge. Every one of those conditions turns a decorating job into a repair bill.
| Site conditions and the action to take | |
|---|---|
| Site condition | Action |
| Wet, icy, frosted or windy | Wait for dry, calm weather and work from the ground |
| Steep pitch or fragile shingles | Use a pole from the eaves or hire an insured professional |
| Skylights or openings near the run | Skip the roof section or hire a professional |
| Overhead power lines near the eave | Stop and keep the ladder and cords clear of the lines |
| Soft, sloped or uneven ground | Do not set a ladder; move the job to a flatter spot or hire help |
| Long reach or sideways overreach needed | Move the ladder or stop; reposition rather than stretch |
Troubleshooting, Testing and Takedown
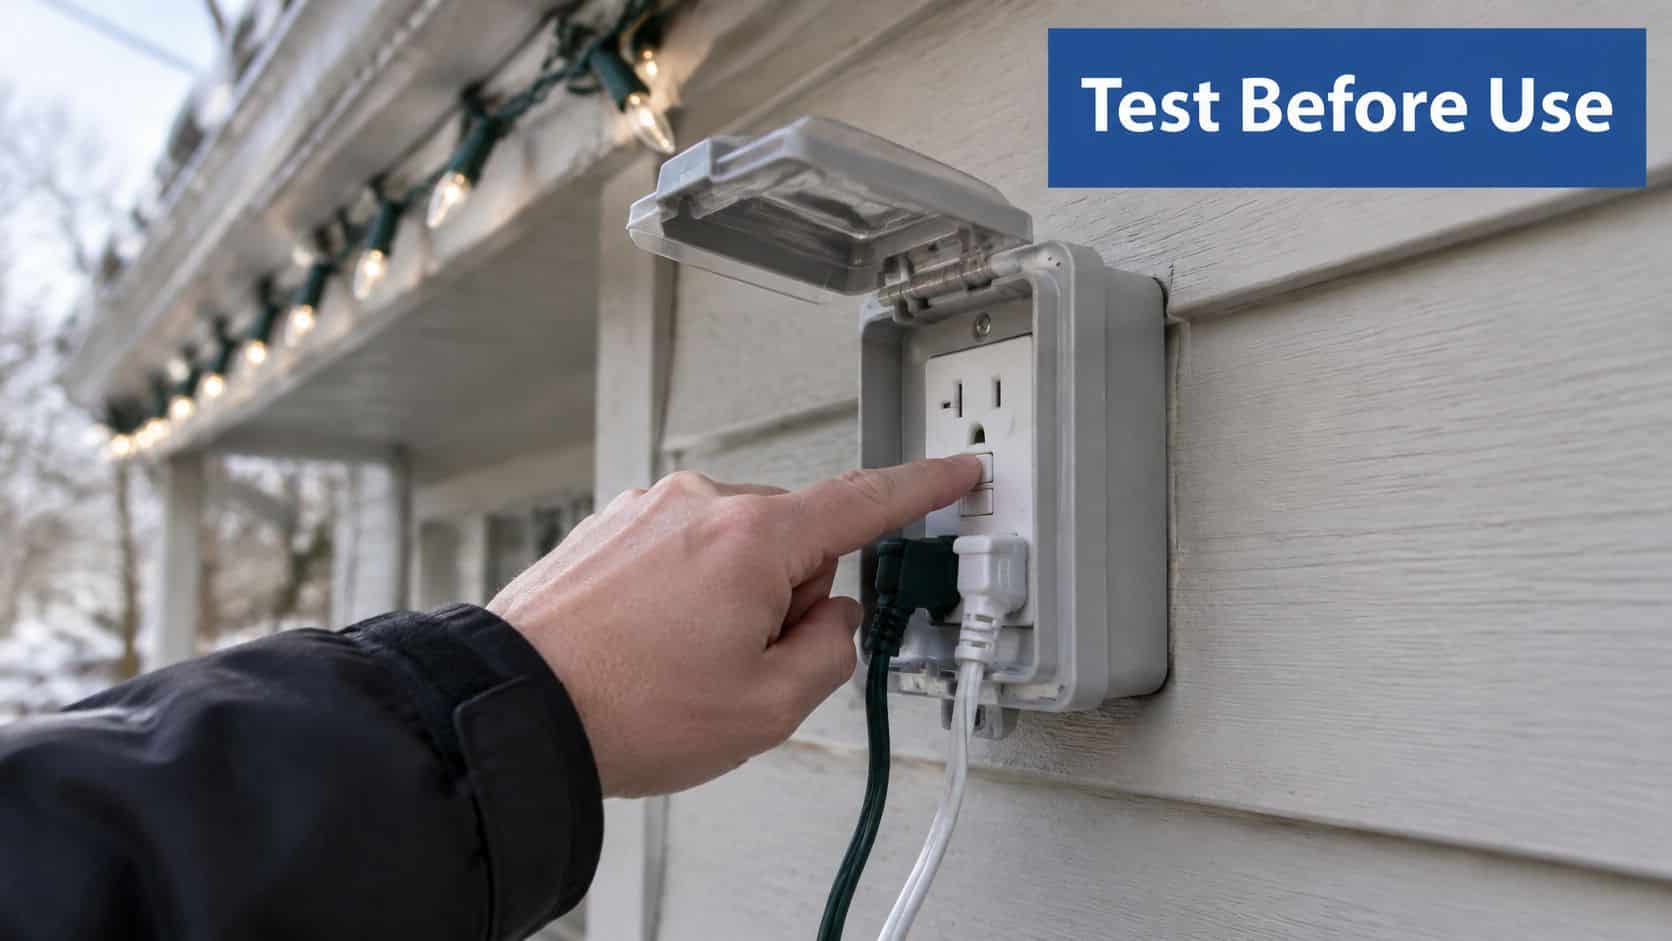
The test that matters most after the lights are up takes two seconds. Press the GFCI test button, confirm it trips, then reset it, and repeat before each use and at whatever interval the manufacturer recommends. The National Fire Protection Association guidance on holiday lighting treats GFCI protection for exterior receptacles as essential, and it wants extension cords rated for the environment, free of splices and damage, and plugged directly into an approved receptacle rather than connected end to end.
Fault-finding order for a dead or flickering section
Work from the smallest part outward and you'll usually find the fault in a minute:
- Socket first. A loose or corroded bulb socket kills a whole section. Reseat or swap the bulb.
- Connector second. Pull the coupling apart, check for water, corrosion or a bent pin, dry it, and reconnect.
- Cord third. Flex the cord near each clip. If the section flickers, the conductor is damaged and the strand gets replaced, not spliced.
- GFCI trip after rain. Unplug the run, dry every connector, check the cords for nicks, and reset only when everything is dry.
Repeat trips in dry weather point to a real fault in the circuit, and that's a job for a licensed electrician rather than another extension cord. A good electrical troubleshooting service will trace the circuit instead of guessing.
Takedown: pull the clips and lights within a week or two of the season ending, coil each strand loosely in a loop rather than around your elbow, and check for cracked sockets and frayed insulation before the bin goes back on the shelf.
What Roofline Light Installation Costs Locally
Phoenix pricing is the number most Valley homeowners will compare against. Angi's 2025 Phoenix estimate put a roof light installation at $128 to $1,020, with dangerous jobs potentially adding about 20% for specialized equipment such as extended-height ladders or scaffolding.
The range is wide because the light count barely moves the price. Height, pitch, access and how much equipment has to come off the truck are what change the number.
| Reported roofline light installation costs | ||
|---|---|---|
| Scenario | Reported range | What changes the price |
| Phoenix roof, Angi 2025 | $128 to $1,020 | Dangerous jobs can add about 20% for specialized equipment |
| Basic installation, 2025 reports | $250 to $1,500 | Standard roofline with simple access |
| Larger or intricate installation, 2025 reports | $750 to $5,000 | Multi-story homes, steep pitches and custom designs |
Wider 2025 reporting lands in the same territory. KSAT's 2025 look at holiday lighting put basic roofline installations at $250 to $1,500 and larger or more intricate installations at roughly $750 to $5,000. Angi's Kansas City figures came in at $150 to $1,200. Same work, different market, similar spread.
Quote check: ask whether removal is included, whether ladder and roof-access equipment are in the price, and whether the crew tests the GFCI outlet before connecting anything.
Those three questions separate a real quote from a low bid that grows once the crew sees a two-story gable. Our Christmas light installation cost breakdown walks through what drives the number on a Valley home.
Decide Between a DIY Install and a Professional Crew
You are at the ladder with a box of clips and a two-story gable overhead. Run the check before the first clip goes on the fascia.
A DIY install fits a single-story roofline with a low pitch, eaves you can reach from the ground with a pole, no skylights, and no power lines near the run. Hire it out when the roof is multi-story, steep, has skylights or openings, or needs a long ladder setup. Those are the conditions where a fall is a real outcome, not a maybe.
If the roof fails that check, hand the work to a crew with the right equipment and insurance. South Mountain Window Cleaning, LLC serves Phoenix, Scottsdale, Paradise Valley, Chandler, and Gilbert. Our guide to finding professional Christmas light installation services near you covers what to ask before you book.
Pass the check and you still own the clips, the timer, and the January takedown. Fail it and stay on the ground.
South Mountain Window Cleaning, LLC installs, maintains, and removes custom cut professional grade LED Christmas lighting, and the Christmas light service is all inclusive, so the roofline work happens without you on a ladder in December. The same team handles residential, commercial, and high-rise window cleaning, power washing, and solar panel cleaning. Cleaning team members undergo extensive window cleaning safety training. Get a free quote and schedule your Christmas light installation at South Mountain Window Cleaning, LLC.