
If you want to clean windows like a true professional, you need the right gear. It really comes down to three key items: a high-quality squeegee, a microfiber strip washer, and two buckets. Forget the paper towels and spray bottle—that’s the amateur way.
The professional method, which our crews at South Mountain Window Cleaning use every day, is simple: apply a basic solution of water and a little dish soap with the washer, then pull it all off with the squeegee using smooth, overlapping strokes. The result? A perfectly streak-free finish, every time. This technique completely avoids the lint and static that paper towels are notorious for leaving behind.
Gathering Your Professional Window Cleaning Toolkit
Ever wonder how commercial buildings in Scottsdale or those beautiful homes in Paradise Valley get that invisible-glass look? It’s not about scrubbing harder; it’s about having the right equipment. The jump from a streaky, amateur finish to a professional result is all in the toolkit. The first step is ditching the paper towels and the blue mystery spray.
Honestly, common household methods often create more problems than they solve. Paper towels leave behind a frustrating amount of lint, and over time, their texture can even create tiny scratches on the glass. Plus, many of those store-bought cleaners contain ammonia. That’s bad news for window tints and can even degrade your window seals over time, leaving a sticky film that just attracts more of that Arizona dust.
Why Your Tools Matter More Than a Chemical Cleaner
A professional setup isn’t about harsh chemicals. It’s about a simple, effective system that physically removes dirt instead of just smearing it around. The whole idea is to scrub the grime loose and then wipe it away completely, leaving absolutely nothing behind on the glass.
To do that, you just need a few key pieces of gear.
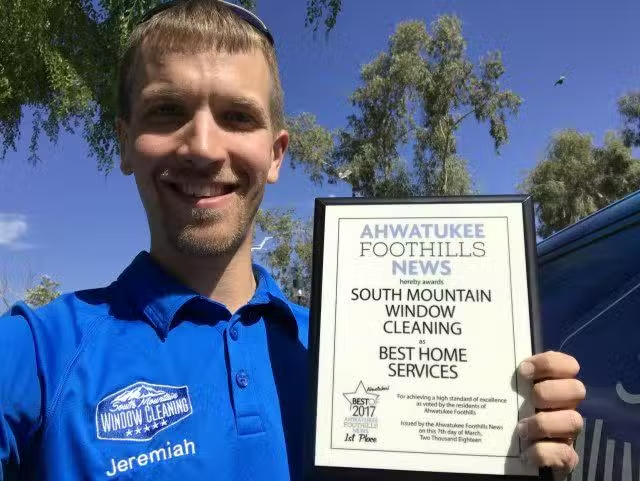
To really get that pro-level clean, you need to think like a pro. That means building a toolkit with purpose-built equipment. We’ve put together a checklist of the absolute essentials our own crews at South Mountain Window Cleaning rely on every day.
The Pro Window Cleaning Checklist
| Tool | Why It’s Essential | Insider Tip |
|---|---|---|
| High-Quality Squeegee | This is your most important tool. It physically scrapes the dirty water solution off the glass, leaving a perfectly clear surface. A good one has a replaceable rubber blade. | Opt for a brass or stainless-steel handle. The extra weight gives you far better control and pressure compared to flimsy plastic models. |
| Microfiber Strip Washer | Sometimes called a T-bar scrubber, this holds a ton of cleaning solution and gently scrubs away dirt without a single scratch. | Before putting it on the glass, give it a gentle squeeze to remove excess water. This prevents drips and keeps the process neat. |
| Two Buckets | One bucket holds your soapy cleaning solution, and the other holds clean rinse water. It’s a simple but game-changing system. | Never rinse your dirty washer in your clean solution bucket! This is the #1 mistake that leads to streaks because you’re just reapplying dirty water. |
| Lint-Free Microfiber Cloths | You’ll want a small stack of these for detailing—wiping your squeegee blade between passes and cleaning up drips on frames or sills. | Keep one cloth dry and dedicated just for wiping the squeegee blade. A dry blade is a streak-free blade. |
Having these four items on hand is the foundation for getting flawless results on any window.
The secret to a professional clean isn’t a magical spray; it’s the mechanical removal of dirt. A great squeegee in skilled hands will always outperform the most expensive chemical cleaner applied with a paper towel.
Choosing Your Cleaning Solution
While the tools do the heavy lifting, you still need a good solution to act as a lubricant and help break down grime. The good news? You don’t need anything fancy or harsh. In fact, most pros, including our teams at South Mountain Window Cleaning, stick to a super simple mix.
Just add a small squirt of basic dish soap—think a teaspoon or so—to a gallon of warm water. That’s it. The soap acts as a surfactant, cutting through grease and helping your squeegee glide effortlessly across the glass. It’s cheap, effective, and safe for every type of window.
The real key is to avoid going overboard with the soap. Too many suds will be a nightmare to remove and are a primary cause of streaks. You’re looking for just a slight shimmer on the water’s surface, not a bubble bath. This simple but powerful approach will have you cleaning windows in Phoenix, Tempe, or Gilbert with the confidence of an expert.
For very different situations, like high-rise jobs that require a whole other level of safety and access gear, the equipment changes. You can learn more about the specialized equipment for high rise window cleaners on our blog.
Mastering the Squeegee for a Flawless Finish
Once you have your professional toolkit assembled, it’s time to master the single most important tool in it: the squeegee. This is where the magic happens.
Moving from amateur, streaky results to a professional, invisible-glass finish all comes down to technique, and the squeegee is at the heart of it. Just pulling it down the glass won’t cut it, especially under the unforgiving Arizona sun where every little imperfection gets magnified.
To get that truly professional clean, you need to learn the methods that stop streaks before they even start. It’s a physical process of removing 100% of the dirty water from the glass in one fluid motion. It takes practice, but once you get the hang of it, you’ll toss those paper towels for good.
The Foundation of Squeegee Success
Before you even make your first pass, a couple of foundational habits will set you up for a perfect finish. These are the small details that professionals in areas like Chandler and Gilbert rely on to deliver flawless results every single time.
First, always “cut in” the edge. After you’ve applied your cleaning solution, grab a dry microfiber cloth and wipe a thin, one-inch strip down one side and across the top of the pane. This creates a dry zone, giving your squeegee a clean place to start and stop. It’s a simple trick that prevents dirty water from seeping out from the edges and creating new streaks.
Second, get a feel for the right angle. You want to hold the squeegee at about a 30-degree angle to the glass. Think of it like a snowplow—if the blade is too steep, it will chatter and skip. Too flat, and it just slides over the water instead of clearing it away. That 30-degree sweet spot ensures the rubber blade makes firm, even contact.
This infographic breaks down the simple, effective flow of the pro window cleaning process, centered around these key tools.
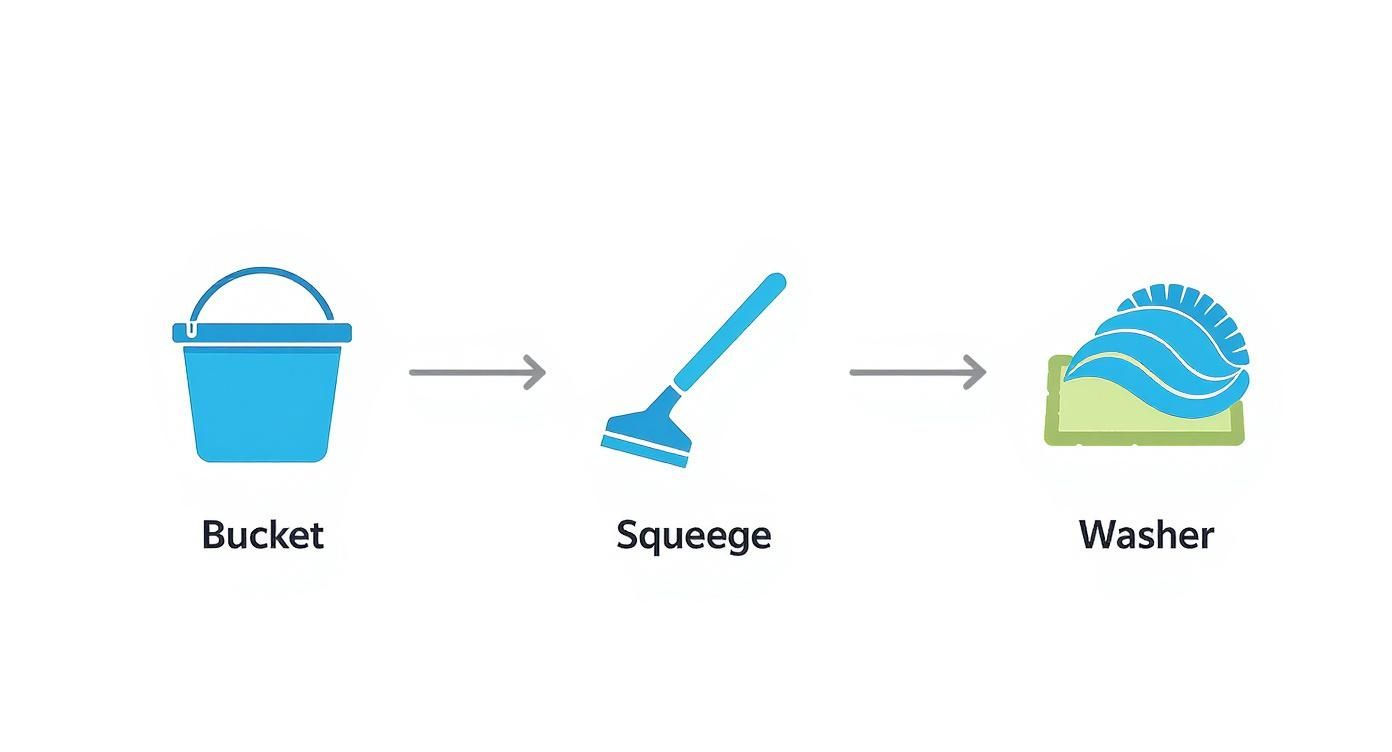
As you can see, each tool—the bucket, the washer, and the squeegee—plays a critical role in a streamlined, effective system.
Executing the Professional Fanning Method
Forget those basic up-and-down strokes that leave ugly horizontal lines. The technique the experts use is called the “fanning method” or the “S-Method.” It’s a continuous, overlapping motion that cleans the entire pane without lifting the squeegee off the glass until the very end.
Here’s how you pull it off:
- Start at the Top: Place your squeegee in the top corner of the dry zone you “cut in,” with the blade angled slightly downward.
- The First Pass: Pull the squeegee straight across the top of the window. When you hit the other side, don’t lift it. Instead, pivot your wrist to turn the squeegee down for the next pass.
- Create the ‘S’ Motion: Now, pull the squeegee down a bit, then snake back across the pane in the opposite direction. The key here is to overlap your previous stroke by about an inch. This overlap is absolutely crucial for preventing streaks between your passes.
- Continue the Pattern: Keep making these overlapping, snake-like passes down the window until you reach the bottom.
- Finish Clean: On your final pass at the bottom, pull the squeegee straight across and finish in the corner, lifting it off the glass cleanly.
The Golden Rule of Squeegeeing: After every single pass—or after cleaning a full pane with the fanning method—you must wipe the rubber blade clean with a dry, lint-free cloth. If you skip this, you’ll drag a line of dirt right across your next pass, instantly ruining that streak-free finish.
Tips for a Perfect Squeegee Finish
Even with the right technique, a few common issues can trip you up. Keep these tips in your back pocket to troubleshoot and perfect your method.
- Consistent Pressure is Key: Apply light, even pressure through every stroke. If you push too hard, the rubber blade will flex and skip. If you don’t push hard enough, you’ll leave water behind.
- Listen to the Blade: A squeegee working properly makes a faint, crisp sound as it glides over the glass. If you hear chattering or skipping, check your angle or see if the rubber blade is nicked or worn out.
- Final Detailing: Once the pane is done, use a clean microfiber cloth to quickly wipe away any water that has pooled along the bottom windowsill or edges. This finishing touch is what separates a good job from a great one.
Mastering the squeegee takes some patience, but it’s the most rewarding skill you can learn for maintaining your windows. It’s the core technique that allows companies like South Mountain Window Cleaning to efficiently service everything from single-family homes in Tempe to commercial buildings in Phoenix.
Executing the Complete Window Cleaning Process
A truly professional window cleaning job is about so much more than just the glass. It’s a whole system that tackles every single part of the window—frames, tracks, and screens—to leave the entire unit looking and working like new. This comprehensive approach is what separates a quick weekend wipe-down from a lasting, professional clean. It’s exactly how we at South Mountain Window Cleaning handle every job, whether we’re in Phoenix, Scottsdale, or anywhere else in the Valley.
Think about it: what happens if you only clean the glass? The very next rainstorm or gust of wind will pull all that built-up grime from the frames and tracks right back onto your spotless panes. All that hard work is gone in an instant. Following the right order of operations isn’t just about being neat; it ensures a polished result that looks better for longer.

This kind of meticulous detail is why the professional window cleaning industry is booming. The global market, valued at around USD 2.68 billion in 2023, is expected to skyrocket to nearly USD 5.34 billion by 2031. That trend shows just how much property owners are starting to value comprehensive, professional-quality results that go beyond a simple spray and wipe. You can dig into the numbers yourself by reading the full market research.
First Things First: Prepping the Area
Before you even think about mixing your cleaning solution, the first step is always prep. Taking just a few minutes here will save you from a major cleanup headache later on.
Start by laying down some old towels or a drop cloth at the base of your windows, especially inside. This is a non-negotiable step for protecting your carpets, hardwood floors, and window sills from drips.
Next, grab a vacuum with a brush attachment or even just a stiff paintbrush to clear out all the loose gunk. Get rid of the dust, cobwebs, and dead bugs hiding in the window tracks, sills, and frames. If you skip this, you’ll just be making mud as soon as you add water.
Insider Tip: For those impossible-to-reach corners in the window tracks, try this trick. Wrap a microfiber cloth around the tip of a butter knife or a flathead screwdriver. It’s the perfect DIY tool for digging out that stubborn grime packed into the crevices.
Always Tackle Screens and Tracks First
Here’s a rule the pros live by: screens always get cleaned before the glass. If you do it the other way around, you’re guaranteed to drip dirty water from the screens all over your perfectly clean panes when you put them back in. It’s a rookie mistake that instantly ruins a streak-free finish.
Here’s our go-to method for cleaning screens without damaging them:
- Pop Them Out: Carefully remove the screens from the window frames.
- Give Them a Gentle Wash: Lay them on a flat, clean surface like your driveway. Use a soft-bristle brush and a mild soapy water solution to gently scrub both sides.
- Rinse Thoroughly: Use a hose on a low-pressure setting to rinse them completely. High pressure can easily stretch or tear the mesh.
- Let Them Air Dry: Tap the frame a few times to knock off the extra water, then lean them against a wall or fence to dry completely before reinstalling them.
While the screens are drying, shift your focus back to the window tracks. You’ve already vacuumed them, so now you can use your track brush or a cloth dipped in your cleaning solution to wipe out any leftover dirt. Clean tracks don’t just look better—they help your windows slide open and shut smoothly.
The Final Touch: Detailing Frames and Sills
Once the screens and tracks are handled and the glass is sparkling, it’s time for the final details that tie the whole job together.
Grab a fresh, damp microfiber cloth and carefully wipe down the entire window frame—top, bottom, and sides. This cleans up any lingering soapy residue, smudges, or splashes that happened during the main cleaning process.
To finish, give the windowsill one last wipe with a clean, dry cloth to catch any last drips. This step-by-step process keeps dirt from one area from contaminating another and ensures every part of your window is spotless. It’s how you get that truly “finished” look that makes your whole home, from Paradise Valley to Tempe, feel brighter and cleaner.
Solving Arizona’s Toughest Window Cleaning Challenges
Cleaning windows in Phoenix or Scottsdale isn’t like cleaning them anywhere else. We’re dealing with a whole different beast here. The intense sun, the low humidity, and that fine desert dust create a unique set of problems that can quickly turn a simple chore into a frustrating battle against baked-on grime and stubborn spots.
From the relentless sun beating down in Paradise Valley to the dusty monsoon winds that whip through Gilbert, our climate is just plain tough on glass. It doesn’t take long for standard dirt to become a caked-on layer. And that hard water from the sprinklers? It leaves behind milky, mineral-based stains that a simple soap and water mix won’t even touch.
Battling Arizona’s Hard Water Stains
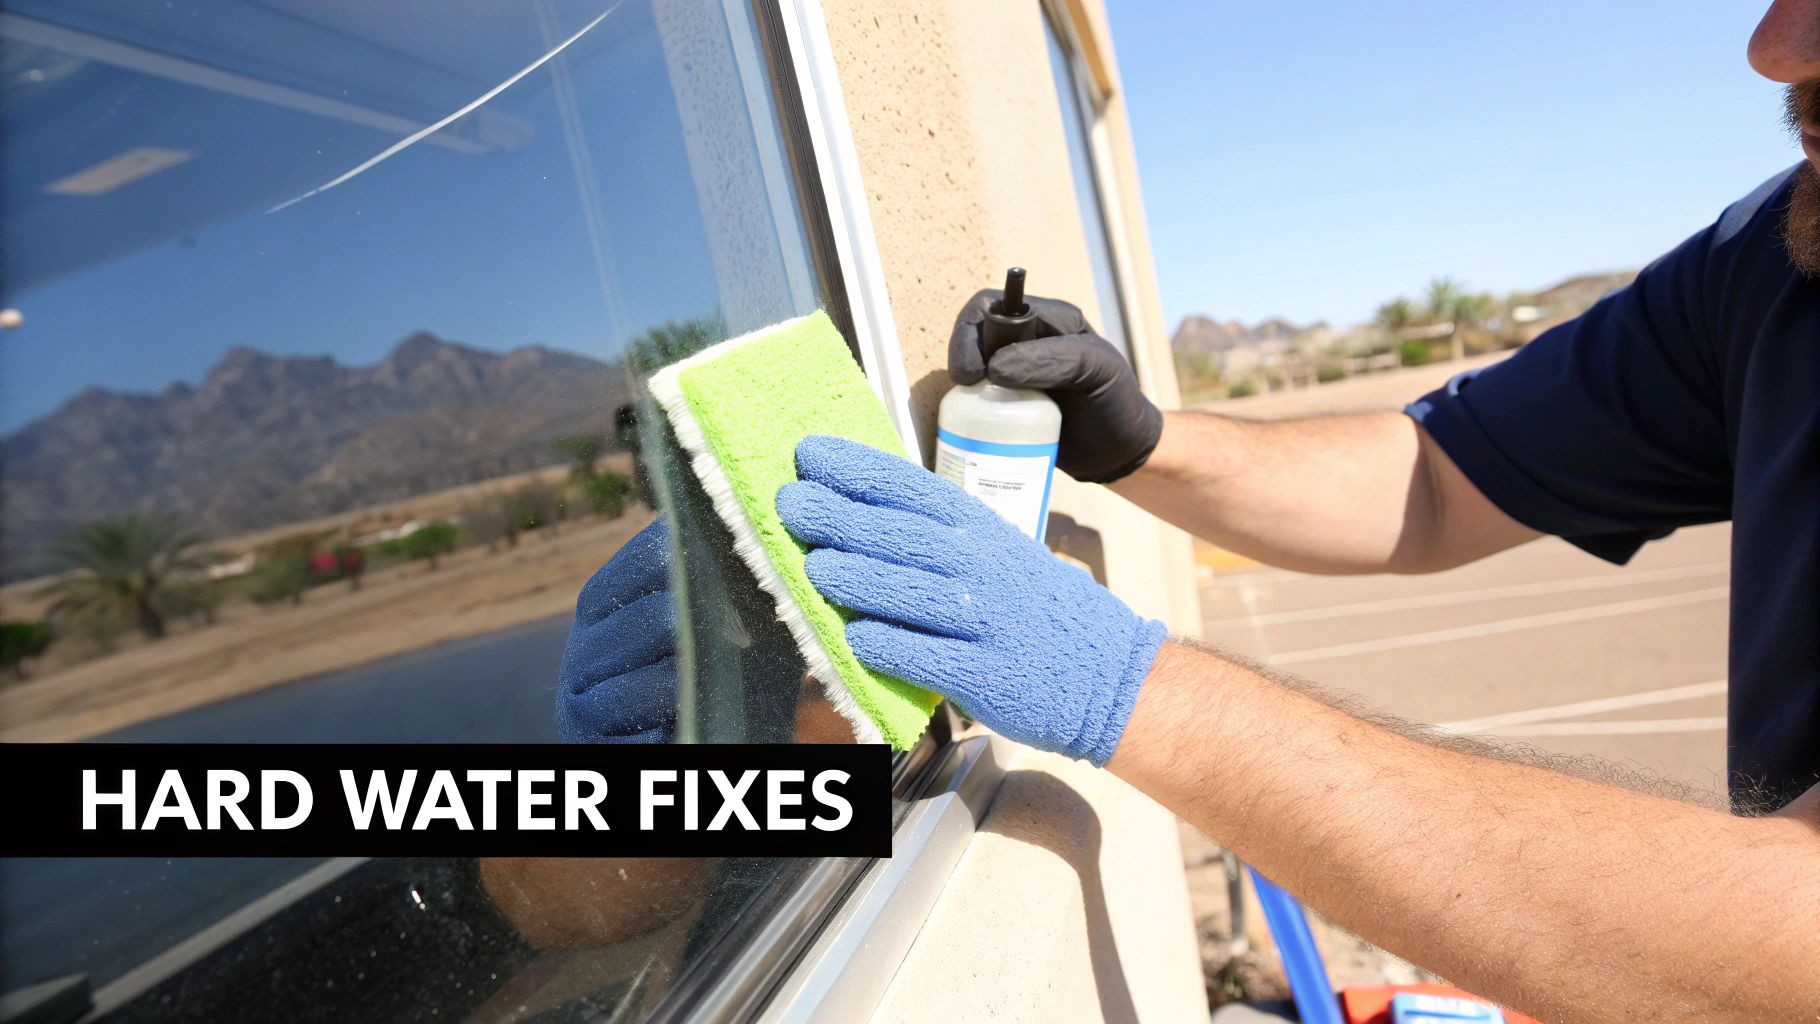
Let’s be honest: hard water stains are the number one enemy of clear windows in the Valley. When sprinkler water or hose runoff evaporates under our hot sun, it leaves behind ugly calcium and magnesium deposits. Over time, these minerals actually etch into the glass, creating a cloudy, white haze that completely ruins your view.
For light to moderate staining, you can often get great results with a bit of elbow grease and the right tools.
- Fine Steel Wool (#0000): This is the pro’s secret weapon. We can’t stress this enough: always use #0000 grade steel wool, because anything coarser will scratch the glass. Wet the window with your cleaning solution, then gently scrub the stained areas in a circular motion. The fine steel wool acts as a mild abrasive that breaks down the minerals without harming the glass itself.
- Specialized Removers: For those really severe, layered stains, you’ll probably need a commercial hard water stain remover. These products are usually mildly acidic and are designed to dissolve that mineral buildup. Just be sure to follow the product’s safety instructions carefully—this stuff can be potent.
Dealing with these advanced issues is a huge reason homeowners in the Phoenix area end up calling us. The window cleaning industry is a multi-billion dollar market, and that value shows just how much people value getting a perfect, professional finish, especially when facing tough challenges like Arizona’s hard water.
Tackling Other Stubborn Residues
Beyond mineral stains, Arizona windows are a magnet for all sorts of other tough-to-remove gunk. Maybe it’s overspray from a recent paint job or sticky residue from a nearby palo verde tree. You need a safe way to remove it without causing damage.
A new, single-edge razor blade, held at a low angle, is your best friend for carefully scraping off specks of paint, bug residue, or tree sap. But here’s the critical part: the glass must always be wet and lubricated with your cleaning solution to prevent scratching. Never, ever use a razor blade on dry glass. You’ll also want to avoid using it on any tinted film or tempered glass, as you can cause permanent damage.
Pro Tip: When you’re dealing with sticky sap, try dabbing it with a small amount of rubbing alcohol on a microfiber cloth before scraping. This helps break down the resin, making it much easier to lift off the glass.
Working With the Sun, Not Against It
One of the biggest mistakes we see people make is trying to wash their windows in direct, intense sunlight—something we have plenty of in Tempe and Chandler. The heat from the sun will make your cleaning solution evaporate almost instantly. You’ll be left with ugly, streaky soap residue before you even have a chance to squeegee it away.
To get a streak-free result, timing is everything. Plan your cleaning for the early morning or late afternoon when the sun isn’t so brutal, or even better, pick an overcast day. You can also work on the shaded side of your house, following the shade as it moves throughout the day. This simple strategy is one of the most effective ways to ensure a flawless, professional-looking finish. For more local tips, check out our guide on cleaning windows during monsoon season in Phoenix.
When to Trust a Professional Window Cleaner
There’s a real sense of accomplishment that comes from mastering a new skill, and cleaning your own windows like a pro can be incredibly satisfying. But we’ve been in this business long enough to know there are definitely times when the smartest and safest call is to put down the squeegee and bring in the experts.
Knowing when a job is bigger than a weekend DIY project isn’t just about saving yourself some hassle. It’s about protecting your home and, most importantly, yourself. Certain situations come with real risks or require a level of expertise that you only get from years on the job.
High-Risk and Hard-to-Reach Windows
The second a ladder comes into the picture, the game changes. That’s probably the most obvious sign you should give a professional a call.
Cleaning second-story windows, vaulted-ceiling glass, or those awkward skylights introduces a serious risk of falls. As professionals, our crews have the right gear—harnesses, water-fed extension poles, and sturdy, specialized ladders—but more importantly, we have the training to use it all correctly day in and day out.
A professional window cleaner is trained to manage the risks that come with working at height. They understand ladder safety, weight distribution, and how to navigate tricky architectural features, turning a dangerous job for a homeowner into just another day at the office.
It’s a job that requires a steady hand and a clear head. Safety and expertise are why so many homeowners and businesses across Phoenix trust a professional team instead of tackling high windows themselves.
When Specialized Problems Arise
Sometimes the challenge isn’t about height, but the condition of the glass itself. Years of baked-on desert dust, stubborn hard water stains from sprinklers, or the mess left behind after a renovation requires a lot more than soap and water. This is where a pro’s toolkit and experience really shine.
Think about these kinds of tough jobs:
- Post-Construction Cleanup: New windows look great, but they’re often covered in construction dust, specks of paint, or sticker residue. Trying to scrape this off without the right technique is a surefire way to leave permanent scratches on brand-new glass.
- Severe Hard Water Staining: When mineral deposits from sprinkler systems or hard water have etched into the glass for years, your standard cleaners won’t even make a dent. Pros use special compounds and fine-grade steel wool to polish the glass back to clarity without causing damage.
- Time and Efficiency: Let’s be honest, doing a truly professional-level job on an entire house can eat up your whole weekend. A skilled team from South Mountain Window Cleaning can typically get the same work done in just a few hours, and the results will speak for themselves.
When you’re weighing your options, it’s helpful to look at the fundamental differences and benefits of professional cleaning versus DIY methods. The core ideas—valuing expertise, safety, and efficiency—are just as true for windows as for any other part of your home.
Calling South Mountain Window Cleaning
If any of this sounds familiar and you’re in Phoenix, Scottsdale, Paradise Valley, or the surrounding areas, trusting a professional is the right move.
Our teams are licensed, bonded, and insured, giving you complete peace of mind whether we’re at a single-story home in Tempe or a commercial building in Chandler. We have the right equipment and experience to safely bring your windows back to life, saving you time, effort, and risk.
To get a feel for the detailed work we do, you can learn more about what a professional window cleaning service from our team includes.
Common Window Cleaning Questions Answered
Even when you feel like you’ve mastered the tools and techniques, certain questions always seem to pop up. Getting the right answers can be that last piece of the puzzle, turning a good window cleaning job into a great one and helping you sidestep those common mistakes.
Here are the answers to the questions we get asked the most from our clients across the Phoenix metro area.
How Often Should I Clean My Windows in Arizona?
Here in the Phoenix area, we tell our clients that a deep, professional cleaning at least twice a year is a great baseline.
But let’s be realistic—this is Arizona. Between the dust storms and the heavy monsoon season, many homeowners in places like Scottsdale and Chandler find that a quarterly schedule is much better. It’s what keeps that crystal-clear look and prevents stubborn mineral buildup from taking hold. Think of it as preventative maintenance; it stops that light layer of desert dust from baking into a caked-on film that’s a real headache to remove later.
Why Are My Windows Still Streaky After I Clean Them?
Ah, the dreaded streaks. It’s incredibly frustrating, but the cause is almost always simpler than you think. The number one culprit? Cleaning in direct, hot sunlight. The Arizona sun will evaporate your cleaning solution before you even have a chance to squeegee it off, leaving behind all that soap residue.
Other common reasons for streaks include:
- Putting way too much soap in your water bucket.
- Using a dirty squeegee blade or dunking it in dirty water.
- Forgetting to wipe the blade dry between each and every pass.
Honestly, the best way to get that flawless finish is to get comfortable with the “S-Method” we talked about earlier. It’s the most reliable technique for a smooth, continuous clean without leaving a single line.
Key Takeaway: Premature drying is the enemy of a streak-free shine. Always try to work in the shade or during the cooler morning hours. A little patience and the right technique will always give you better results than a rushed job in the hot sun.
Is It a Good Idea to Use Vinegar?
A simple mix of equal parts white vinegar and distilled water can actually be a pretty effective DIY cleaner, especially for cutting through light kitchen grease or grime. The acid in the vinegar is great for dissolving some of the films that regular soap might leave behind.
But, you have to be careful. If you have tinted windows, you’ll want to avoid vinegar. Over time, that acidic solution can potentially damage certain types of window films. And when you’re up against tough hard water stains, professional-grade products designed specifically to dissolve mineral deposits are going to be far more effective and safer for your glass. If you’ve cleaned and still see those stubborn spots, you might want to check out some tips for removing water stains from various surfaces.
Can I Safely Use a Razor Blade on My Windows?
We pros use new, single-edge razor blades all the time to deal with stubborn stuff like paint overspray, bug residue, or tree sap. But—and this is a big but—it requires the right touch to avoid permanently scratching the glass. It’s a tool of last resort and you have to be careful.
There are two non-negotiable rules:
- The glass must be WET. Keep it well-lubricated with your cleaning solution.
- Hold the blade at a very low, shallow angle against the glass.
Never, ever use a razor blade on tinted, tempered, or specially coated glass. It will cause damage. When in doubt, it’s always smarter to call an expert than to risk a costly mistake.
Getting that perfect, professional shine takes a bit of practice, but armed with the right knowledge, you can absolutely get there. And for those jobs that are just too big, too high up, or too stubborn, South Mountain Window Cleaning is ready to help. We offer expert residential, commercial, and even high-rise window washing services all across Phoenix, Scottsdale, Paradise Valley, Chandler, Tempe, and Gilbert.
Schedule your free quote today and let us make your windows disappear.