
You arrive at your storefront or walk outside your home and find spray paint across the wall. There's a pressure washer in the garage and a bottle of solvent on the shelf, but using either too quickly can turn a removable tag into damaged paint, etched glass, or a permanent shadow in the brick.
The first decision in how to clean off graffiti isn't which cleaner to buy. It's whether the surface will let paint sit on top or absorb it into its pores. Identify that difference, test carefully, and stop before the cleanup damages the material underneath.
Match the Cleaner to Your Surface
Is the surface porous, sealed, or painted? Most removal mistakes start when someone grabs a single spray and applies it to everything. A remover that releases graffiti from bare concrete can also strip the finish you wanted to keep on a painted door.
Try a little clean water on an unaffected area. Water generally beads on glass and intact sealed finishes, while bare brick, concrete, and stucco tend to absorb it and darken. Treat this as a screening check, not proof of compatibility, because weathered sealers and patchy coatings can behave unevenly.
The EPA Region 9 safer-graffiti-abatement presentation identifies benzyl alcohol for nonporous aluminum, steel, and glass; soy methyl ester for painted wood, vinyl siding, and fiberglass; and acetone-based products for porous masonry, concrete, pavement, stucco, and wood. These are starting categories, not permission to apply any product containing that ingredient.
Starting method and escalation by surface
Find your surface, begin with the gentlest option, and escalate only after a test shows that the existing finish remains intact.
| Surface | Start with | Escalate to | Avoid |
|---|---|---|---|
| Glass | Water and neutral detergent | Benzyl alcohol-based remover | Abrasive pads and razor blades |
| Metal such as aluminum or steel | Water and neutral detergent | Benzyl alcohol-based remover | Mixing removers |
| Painted wood, vinyl siding, fiberglass | Water and neutral detergent | Soy methyl ester remover | High-pressure stripping without a test patch |
| Brick and stone masonry | Low-pressure water, about 100–400 psi, fan tip, following the safer-abatement guidance | Acetone-based remover after a test patch | Acids, grinders and high pressure on historic brick |
| Concrete and pavement | Water and neutral detergent | Acetone-based remover | Mixing removers |
| Stucco | Water and neutral detergent | Acetone-based remover | High-pressure water that erodes the face |
Bare wood and painted wood require different judgments. On a painted fence, the challenge is releasing the graffiti without releasing the fence coating. On unfinished wood, pigment can lodge in the grain, and aggressive brushing can leave raised fibers.
Solvent-free doesn't mean damage-free. Lower-hazard chemicals, protective films, and carefully controlled water or abrasive systems can reduce reliance on solvents. Abrasion still needs a surface-specific assessment, especially around historic materials.
Never mix removers, because dangerous fumes can result. Don't add a second chemical to a wet first treatment because progress seems slow.
For textured walls, review the practical limits of pressure washing stucco before choosing equipment. Match the table row to the actual finish on your wall before buying anything.
Safety Gear, Runoff and Legal Deadlines
Get approval before touching the surface. Renters should contact the landlord or property manager, and commercial cleaners should document authorization from the owner or responsible party. Phoenix's Graffiti Busters program uses a signed permission slip, so don't assume that a visible tag gives anyone permission to treat private property.
For shared buildings, establish who approves the work and who keeps the records. ABCO Security Services Australia's resource on handling by-law breaches and AGM agendas offers useful management context for shared-property responsibilities, although Australian strata procedures don't establish Phoenix legal requirements.
Protect people and contain the waste
Prepare the work area before opening the remover. Once paint starts dissolving, you need somewhere safe for the contaminated liquid to go.
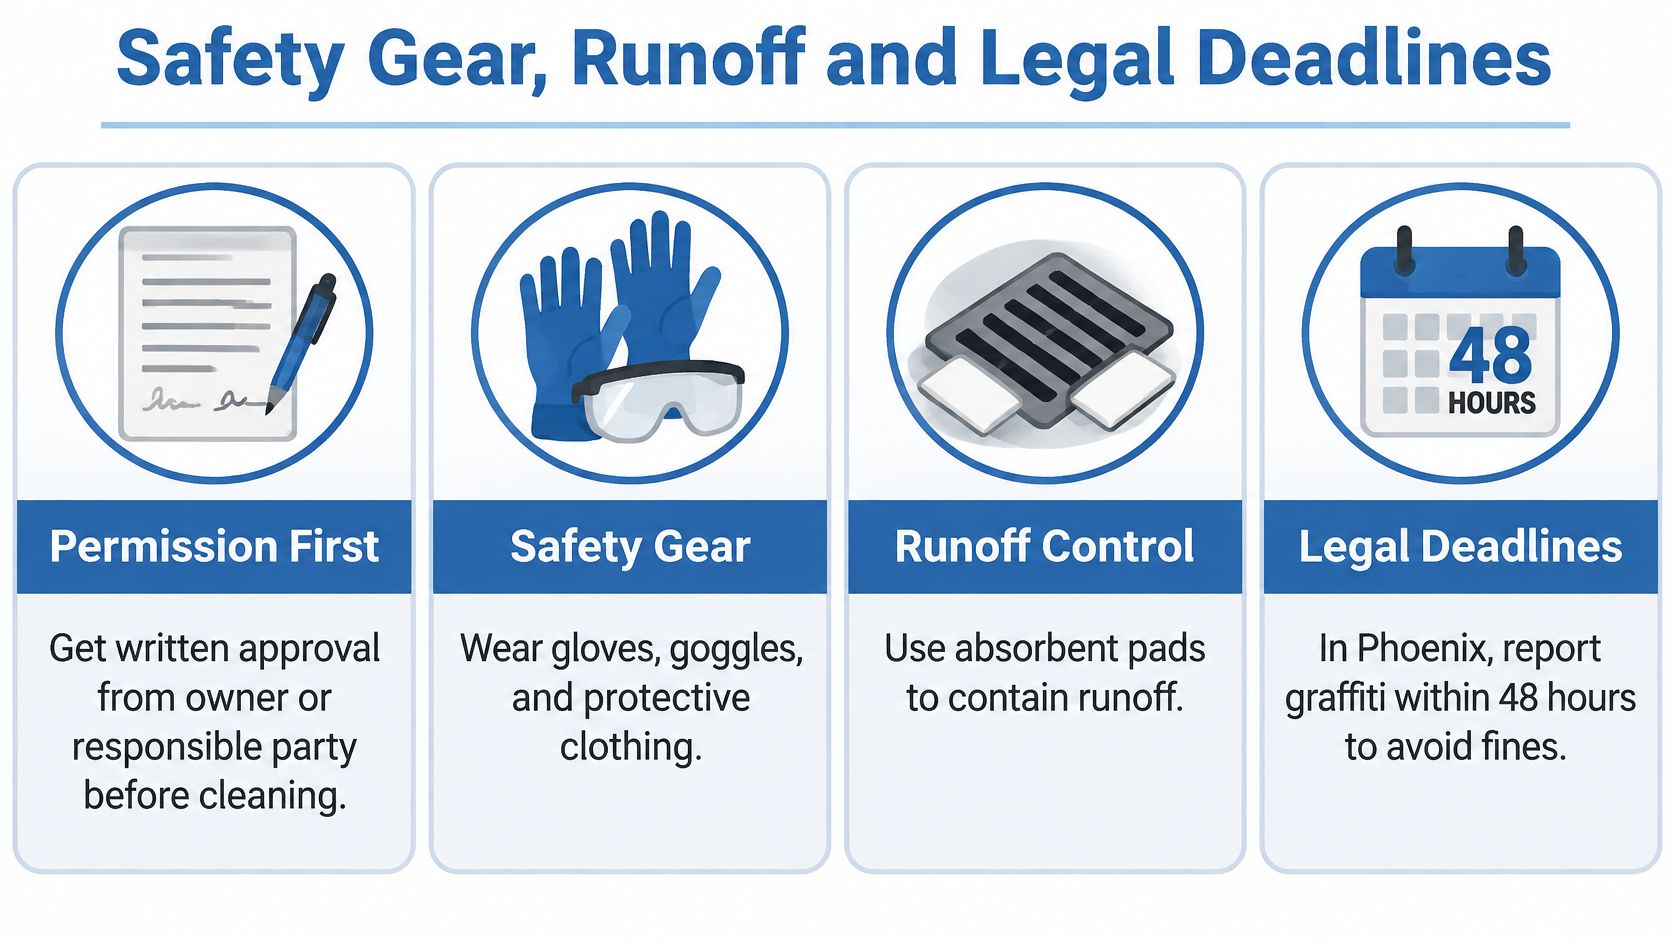
- Protect skin and eyes. Wear chemical-resistant gloves, splash goggles, and protective clothing selected from the product's Safety Data Sheet.
- Match respiratory protection to the product. A dust mask isn't protection against solvent vapor. If the SDS requires respiratory protection you can't properly select or use, hand off the job.
- Control vapors and ignition. Work with ventilation and keep flammable removers away from flames, sparks, and ignition sources.
- Keep chemicals separate. Don't combine removers or improvise mixtures with household cleaners.
- Isolate the surroundings. Protect nearby glass, metals, vegetation, drains, and pedestrian routes before spraying.
- Capture runoff. Use drain covers, absorbent socks, and suitable collection equipment. Use chemical-resistant hoses and sprayers rather than equipment that the remover could degrade.
- Finish the waste handling. Neutralize or rinse as specified, collect spent materials, and follow the SDS disposal requirements.
Use this checklist to organize the work area, but rely on the ordinance text below for Phoenix's legal deadline.
Treat a notice as an active maintenance issue
Under Phoenix City Code §39-10, a notice of violation can require graffiti removal within a maximum of 10 days after receipt, and the City may abate it and bill the owner or responsible party if it remains. That's a removal deadline following notice, not a general reporting deadline.
Don't postpone a noticed tag until the next routine cleaning visit. When coordinating power washing services, include the notice, access restrictions, surface photographs, and runoff concerns so the scope addresses more than appearance.
How to Clean Graffiti Step by Step
Set out a soft natural-bristle brush, clean water, neutral detergent, compatible remover, protective equipment, and runoff supplies before starting. The National Park Service graffiti-removal guidance recommends small trials and the least aggressive effective treatment, warning that paint can penetrate porous materials and leave a visible ghost.
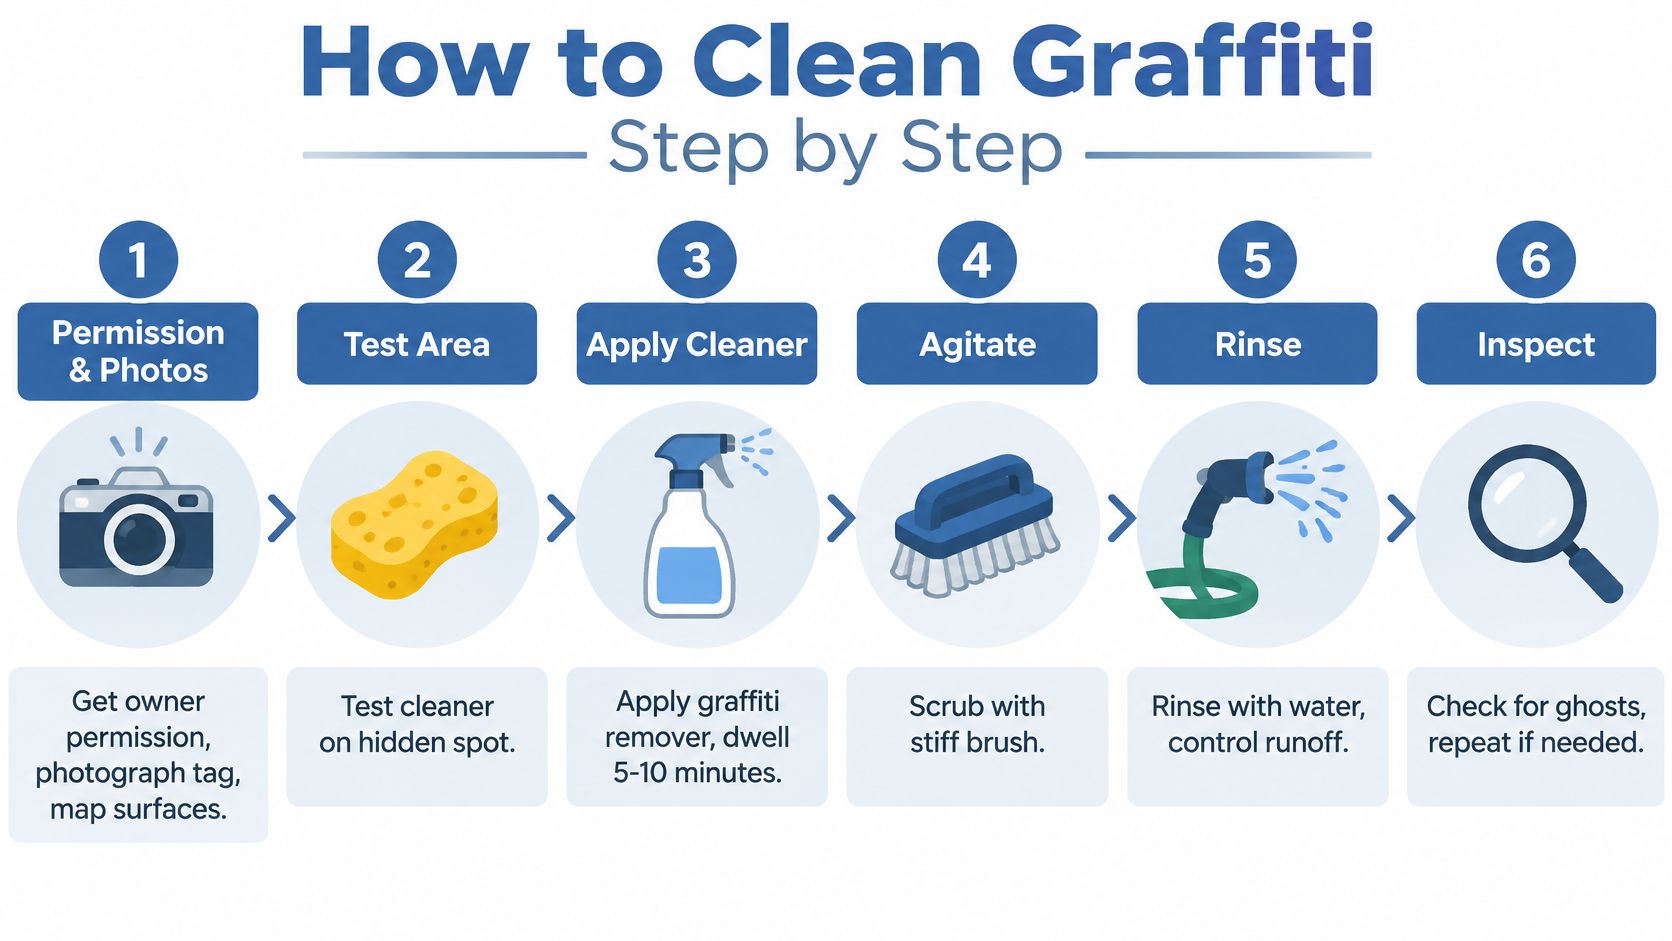
The visual below summarizes the sequence. Use the product's actual dwell instructions and a soft brush rather than treating a generic waiting period or stiff-brush illustration as suitable for every wall.
Follow a controlled removal sequence
Confirm permission and record the starting condition. Photograph the tag and map painted surfaces, bare masonry, glass, metal, plants, and drains nearby. This prevents accidental treatment of an adjacent material and gives you a useful before-and-after record.
Read the Safety Data Sheet and application directions. Check exposure controls, storage, equipment compatibility, runoff, and disposal before opening the container. The SDS describes hazards; the product directions establish how to apply and remove that formulation.
Make a discreet test patch. Choose a representative area no larger than 6 × 6 inches, including some graffiti and surrounding substrate. A hidden clean spot alone won't show whether the product removes the tag without lifting the original finish.
Try potable water and neutral detergent first. Apply with a soft natural brush and agitate lightly. If this removes the mark, there's no reason to expose the surface to stronger chemistry.
Apply a compatible remover only if needed. Use a soft brush, roller, or chemical-compatible low-pressure sprayer, targeting roughly a 10-mil wet film where the product's directions support that application. Keep the coating even rather than flooding the wall and spreading dissolved pigment.
Respect the manufacturer's dwell time. Start timing when application is complete, and work in sections small enough to prevent drying. On a sun-heated Phoenix wall, choose a cooler working period rather than trying to rescue baked-on remover afterward.
Agitate gently, then rinse completely. Use only enough brushing to release softened paint; when using an appropriate pressure washer, select a fan tip instead of a concentrated jet. For chemical washing, follow the specified bottom-up rinse sequence to control migration, while maintaining runoff collection.
Handle alkaline masonry treatments correctly. Pre-wet the masonry before application when required, then use the specified neutralizer after removal and rinsing. Don't substitute an improvised acid wash or assume clean-looking water means the chemistry is finished.
Inspect after the surface dries. View it in raking light, with light crossing the wall at an angle. Check for residual pigment, discoloration, mortar loss, lifted coating, and texture changes before expanding the treatment.
Judge the surface, not just the paint
Skipping the test patch, using a narrow pressure-washer tip, and letting remover dry are common ways to make a small job larger. For another perspective on separating unwanted paint from a finish worth keeping, the Painters North Shore removal guide is useful supplementary reading, not a substitute for your product instructions.
This video provides an additional visual reference for removal work.
Pass the whole test: Successful removal means the pigment is gone without a clean halo, discoloration, or changed surface texture.
Ghosting, Halos and Historic Masonry
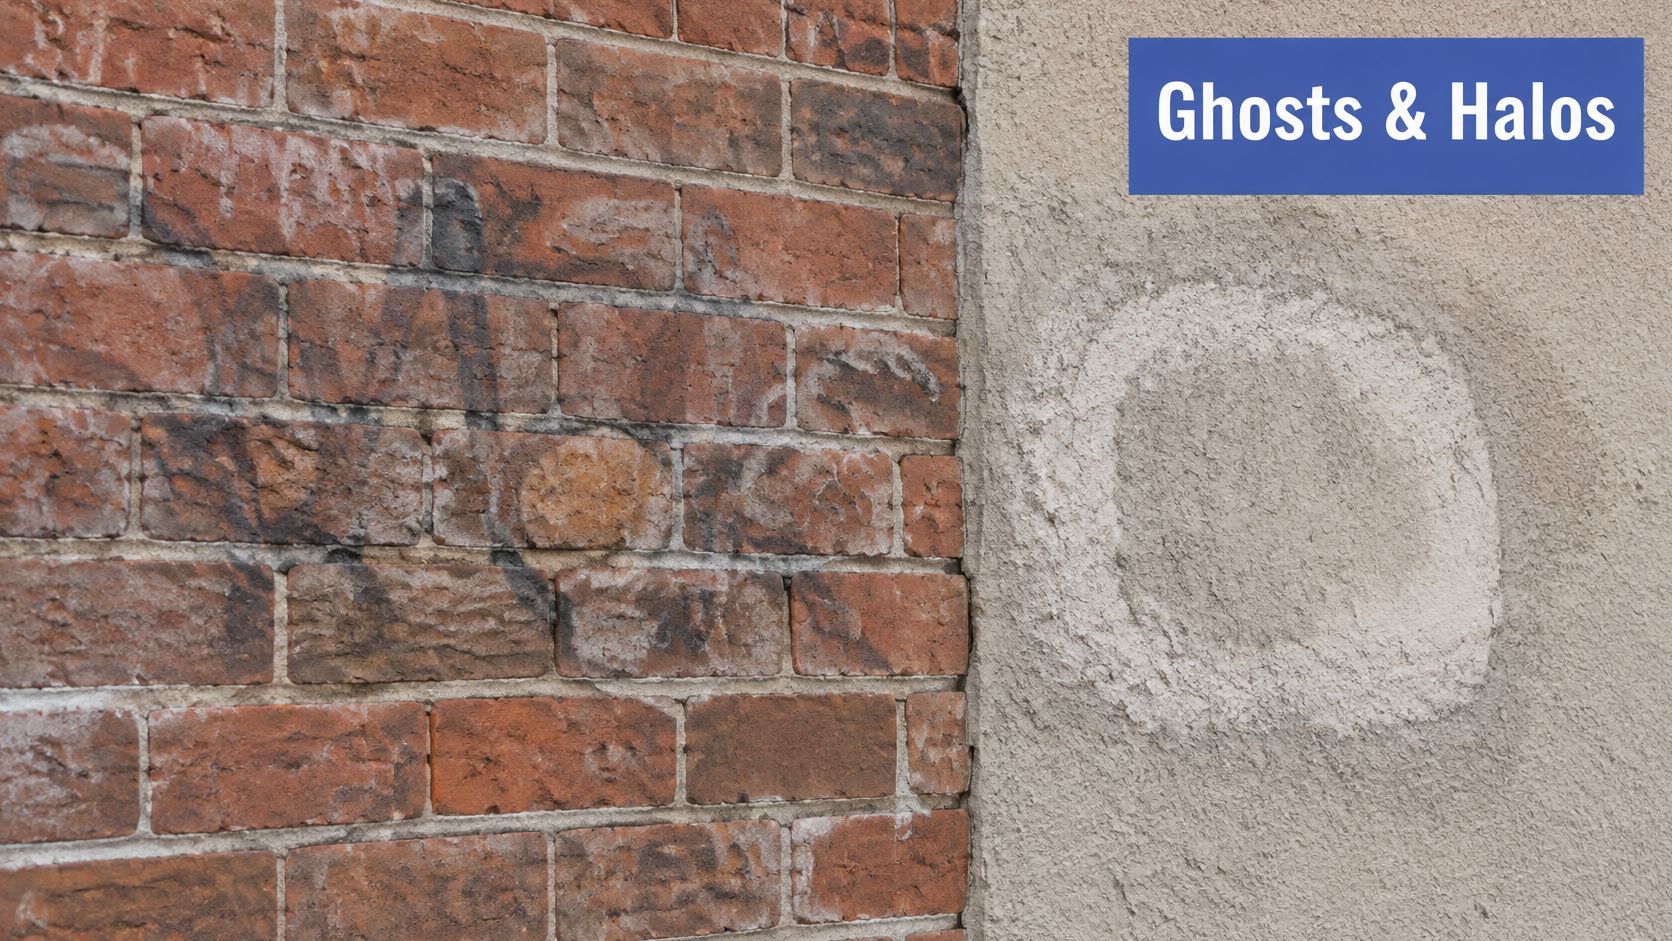
A ghost is the remaining outline or shadow of graffiti after the surface paint has lifted. A halo is a visibly cleaner or differently colored area around the treatment boundary. They can look similar from a distance, but treating both with more pressure is the wrong response.
With a ghost, residual pigment may remain inside pores. With a halo, you may have removed surrounding dirt unevenly, redistributed cleaner, stripped a coating, or changed the substrate itself. First establish which happened, because only some of those conditions are cleaning problems.
The textures in this image illustrate why a smooth-looking result can be difficult to achieve across different wall materials.
Diagnose the mark before another treatment
For residual pigment, return to a discreet trial with a stronger compatible formulation only if the substrate remained sound. Don't promise complete restoration: some shadows remain despite careful treatment, and further attempts can cause more harm than the stain.
For an uneven cleaning boundary, gently feather the rinse into the surrounding area and reassess after drying. If the area is lighter because you removed the original finish or brick face, blending with more cleaning only enlarges the damage.
Stop when the test changes the material, not when you run out of stronger products.
Historic masonry needs a different threshold
The National Park Service stone-building preservation guidance treats removal as a materials-compatibility task and warns that acids can dissolve or etch brick while mechanical methods can damage historic surfaces. Significant masonry should generally be treated by trained crews, with a conservator involved when the material or finish warrants it.
The vulnerable-masonry working range is roughly 100–400 psi at 3–6 gallons per minute, not the unrestricted output of an ordinary commercial washer. A machine's maximum rating isn't a cleaning target, and pressure alone doesn't describe the impact of nozzle choice, distance, or prolonged spraying.
- Stop for loose material. Sandy mortar, brick flakes, exposed aggregate, or fresh roughness mean the trial is damaging the substrate.
- Reject aggressive shortcuts. Avoid hydrochloric acid, hydrofluoric acid, grinders, and abrasive blasting unless a qualified conservator and written project specification explicitly approve them.
- Keep the original surface. Stronger pressure can force contamination deeper and remove the weathered face, leaving a repair larger than the original tag.
Before considering acid as a final fix, understand the risks of cleaning brick with muriatic acid. If the test patch shows substrate damage, stop and call a conservator rather than experimenting across the wall.
Keep Graffiti From Coming Back
Quick removal limits how long a tag remains visible. Under its redesigned response system, Chicago reported average graffiti-request handling of 3.62 days from June 1 through August 10, 2014, compared with 6.75 days during the same period in 2011, a 46% improvement.
That municipal result demonstrates faster service, not a guarantee that your building won't be tagged again. The practical lesson is to assign responsibility, keep approved supplies accessible, and avoid letting each incident become a new purchasing and authorization exercise.
Build a repeatable inspection routine
Use a monthly review to keep the system organized, with removal arranged promptly whenever someone discovers a new tag.
- Inspect and log. Walk each exterior wall and record every tag's location, discovery date, surface, and photograph.
- Maintain an approved kit. Keep suitable products, PPE, application tools, runoff materials, and a record of the accepted test panel.
- Use the established treatment. Apply the method approved for that finish, making a fresh compatibility check when conditions or products change.
- Schedule a follow-up. Set a two-week reminder to inspect treated areas in raking light and record any remaining shadow or finish change.
Consider protection without changing the appearance
A sacrificial anti-graffiti coating can make subsequent removal easier, but test a small panel before application. Check the dry surface for changes in sheen and color, and understand whether removal also requires renewing the protective layer.
Nearby decorative concrete deserves separate consideration. Concrete Resurfacing Products, Inc.’s guidance on how to protect stamped patios from chemical spills offers useful context for assessing chemical exposure around a cleanup area.
There's no universal removal success rate. Use the actual panel result, rather than a marketing percentage, to approve the method for the full wall.
Decide Whether to Clean It Yourself or Hire a Pro
Clean it yourself or hire a professional
Match the situation to your equipment, access, and ability to protect the existing finish before starting.
| Situation | Clean it yourself | Call a professional |
|---|---|---|
| Small tag on glass or sealed metal | Yes, with water then benzyl alcohol remover | Not needed for a straightforward, safely accessible job |
| Painted wall, one or two tags, test patch passes | Yes, with full PPE | Only if ghosting persists |
| Porous masonry or stucco with ghosting | Test patches only | Yes, trained crew with test plan |
| Historic brick or stone | No | Yes, with a conservator involved |
| Large multi-storey or high-rise facade | No | Yes, scoped and insured crew |
| Repeated tags across many walls | No | Yes, with a recurring maintenance schedule |
A manageable DIY job is small, accessible from the ground, and compatible with a product you can use safely. Stop if you can't identify the finish, protect the drainage route, or remove the graffiti without lifting the original coating.
Permission still comes first. The City of Phoenix graffiti-removal page states that private-property removal requires the owner's permission, and its Graffiti Busters program requires a signed permission slip from the owner or another responsible party.
What professional scoping should establish
A professional plan should identify the substrate, existing coatings, access method, chemical hazards, waste handling, and the accepted test result. Photographs should document the condition before work and show what the trial achieved, including any residual shadow the owner needs to accept.
High-rise work isn't the same cleaning process performed higher up. Access, falling objects, overspray, and protection of people below require a planned operation, not a ladder improvised beside a storefront.
A good handoff includes the unsuccessful test details, not just a photograph of the tag.
If you've already tried a remover, retain its container and record where you applied it. That helps the next cleaner avoid incompatible chemistry and distinguish pre-existing damage from changes caused during treatment.
For broader access and equipment considerations, review when to hire a professional to pressure wash your property. The deciding factor isn't whether you can rent a machine, but whether you can control what it does to the building.
At South Mountain Window Cleaning, LLC, we provide full-service residential and commercial window cleaning valley-wide, including high-rise window washing across Phoenix, Scottsdale, Paradise Valley, Chandler, Tempe, and Gilbert, Arizona. Our team members undergo extensive window cleaning safety training, and we provide fast, free quotes for cleaning needs.
Photograph the tag, confirm authorization, and decide whether a controlled test is within your capabilities. For a professional assessment, include close-up photographs, a wider view showing access, and details of any previous treatment, with a test patch as the first proposed cleaning step.
South Mountain Window Cleaning, LLC offers residential, commercial, and high-rise window washing, along with power washing for building exteriors and surrounding surfaces. If graffiti has affected your property, visit South Mountain Window Cleaning, LLC for a fast, free quote and share your surface photographs so we can discuss the appropriate cleaning scope before work begins.