
Most advice on exterior foundation paint starts with the wrong assumption, that every bare foundation should be coated because paint always improves it. In real work, that's not true. On concrete and stucco in hot, dry climates like Arizona, the better question is whether the wall is dry, stable, and worth coating in the first place.
A foundation can look unfinished and still be the right material to leave alone for a while. Paint can sharpen curb appeal and add a moisture-tolerant finish, but it can also trap problems if the wall is already moving, cracking, or holding water. The decision matters because exterior coating work is a major category, not a cosmetic afterthought, with HIRI reporting the professional segment grew 6.3% to about $14.6 billion for paint and preservatives, while professional paint sundries grew 7.9% to roughly $3.525 billion HIRI market watch on paint industry trends.
Is Painting Your Foundation a Good Idea
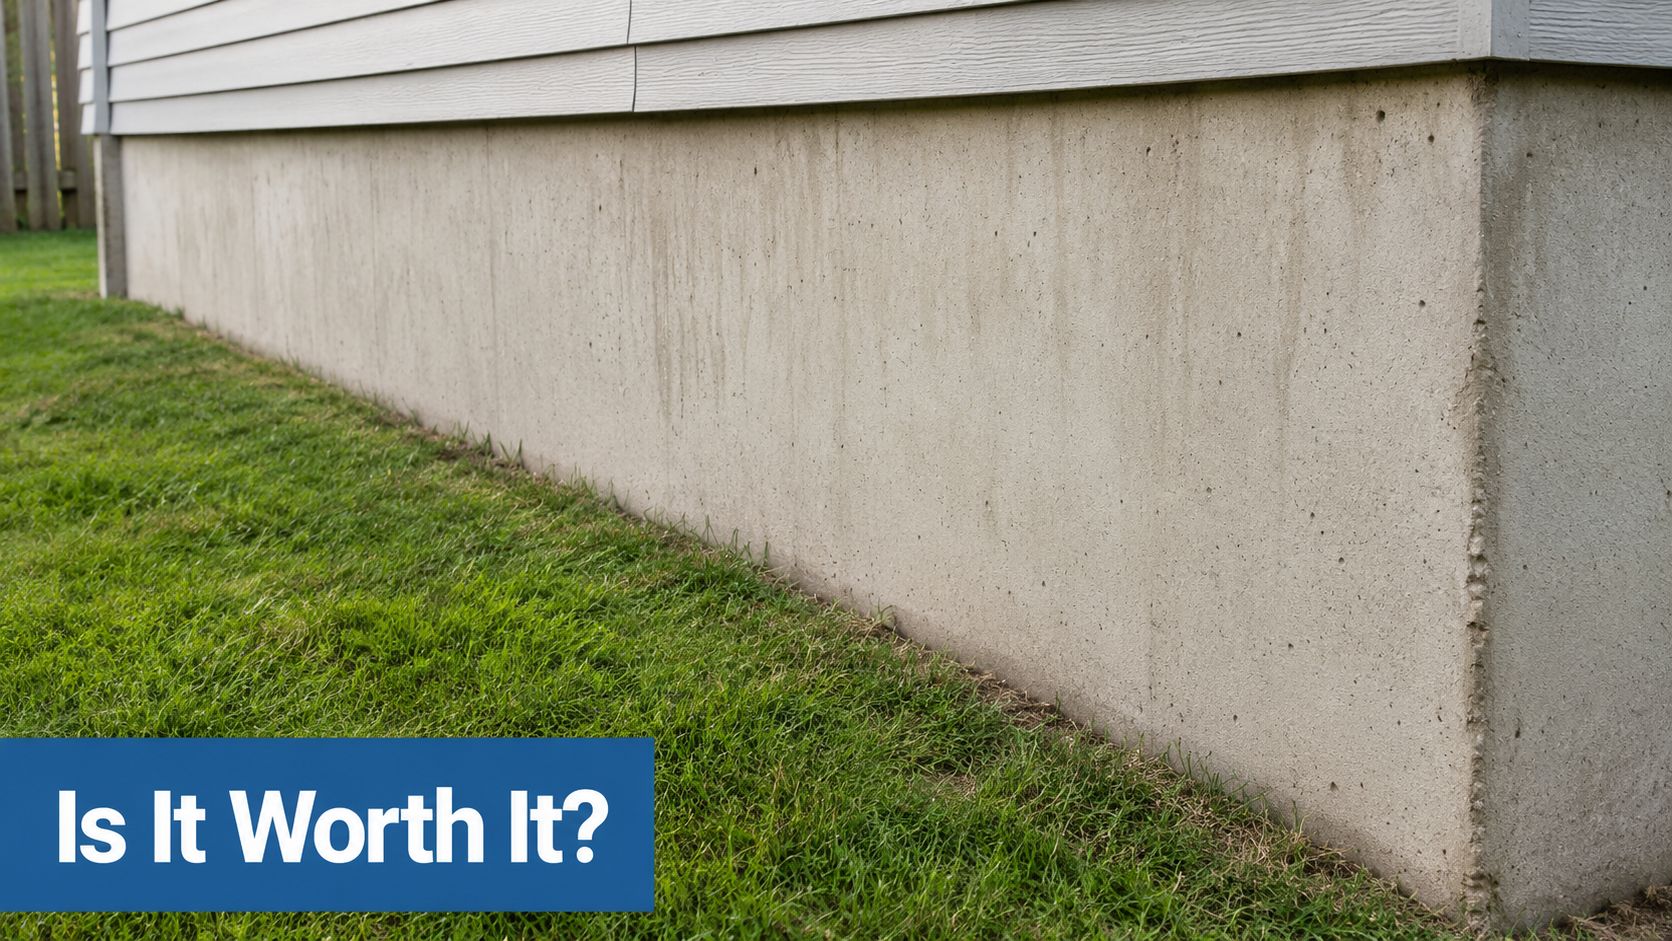
Painting a foundation makes sense only when the surface is sound, dry enough to coat, and worth finishing for appearance or protection. On concrete and stucco, a good coating can pull together patchy repairs, reduce the look of age, and make the base of the house read as maintained instead of neglected. It also has a place in a broader curb-appeal plan, alongside cleanup and exterior detailing, like the kind of work covered in this curb appeal guide.
When paint helps, and when it creates trouble
The mistake is treating paint as a fix for a failing wall. If a foundation is damp, spalling, or opening up with active cracks, coating it first only seals in the wrong conditions. Drainage, crack repair, and substrate repair need to come first.
Practical rule: if the foundation needs structural repair, drainage correction, or crack repair, handle that before a single coat goes on.
Concrete and masonry also behave differently from siding or drywall. They absorb moisture, sit close to soil and irrigation splash, and take direct sun that punishes weak coatings in hot, dry climates. In Arizona and similar sunbelt conditions, a finish can look good at first and still fail early if the prep is rushed or the wrong product is used.
That trade-off matters on the budget side too. Homeowners who spent at least $5,000 on a project had a median spend of $8,000 on exterior paints and stains, with an average just under $12,000 2026 exterior house painting cost statistics. Spending that kind of money only makes sense when the wall is ready for coating and the finish has a real chance of holding up.
A sound foundation that just looks uneven is a fair candidate for paint. A wet, moving, or damaged one is not. In that case, the better move is to correct the wall first, then decide whether coating adds value or only hides a problem for a short time.
Assessing and Preparing Your Foundation Surface
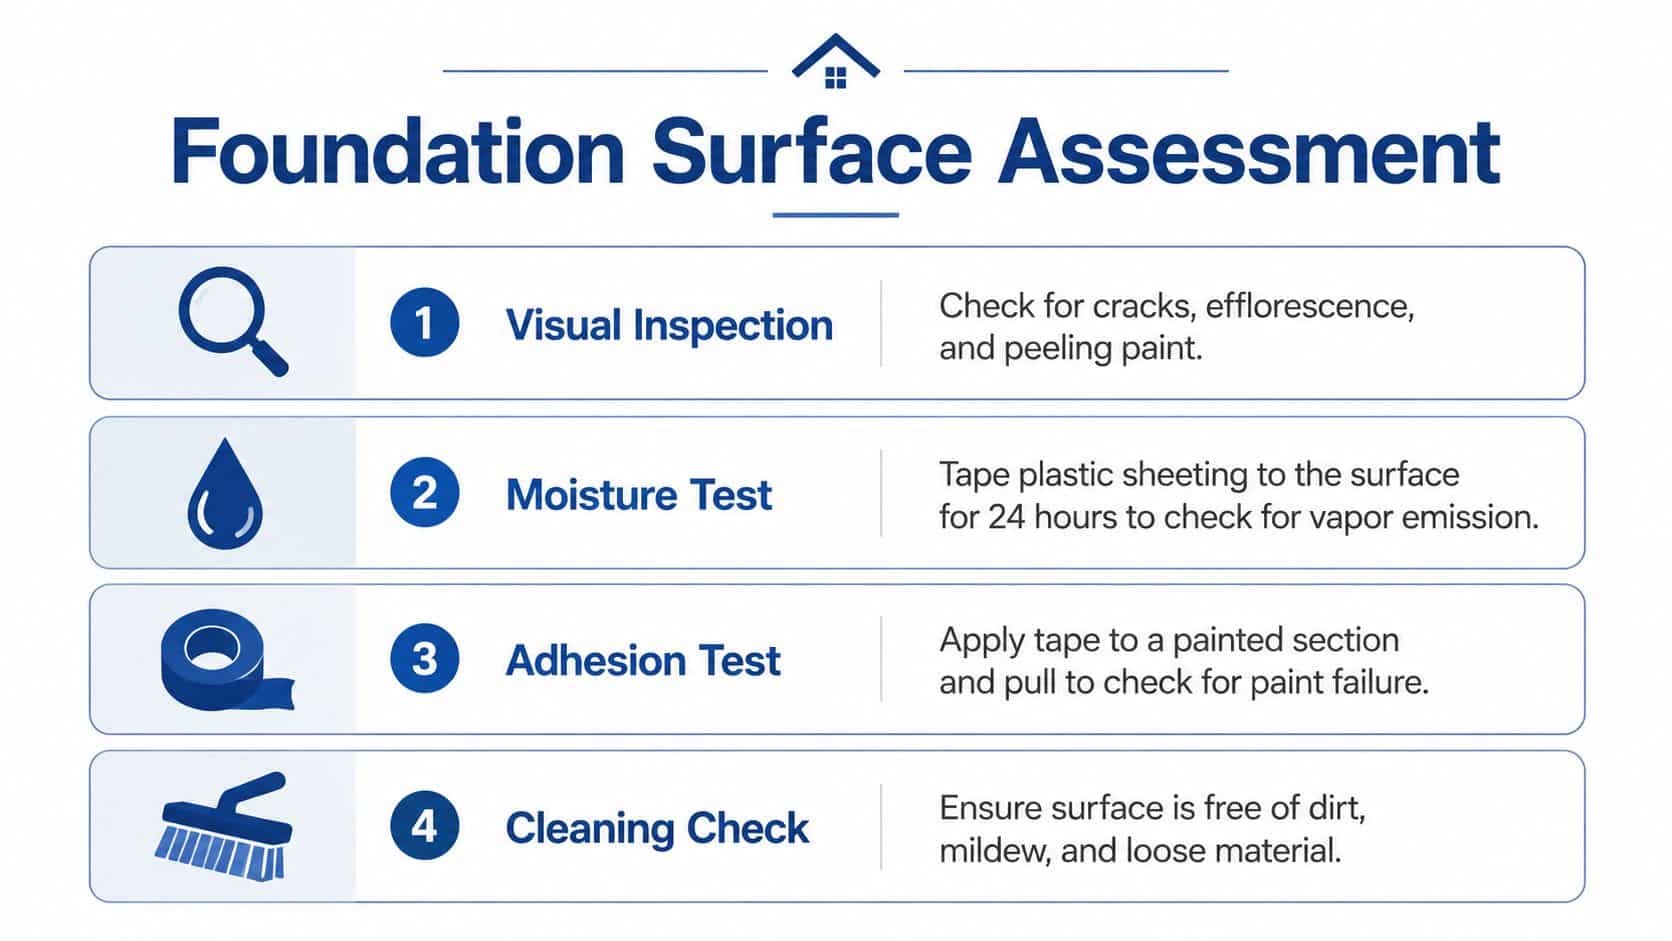
Prep is where foundation painting succeeds or fails. A lot of paint jobs that get blamed on “bad paint” trace back to moisture, contamination, or rushed surface work. Concrete and stucco need to be cleaned, checked, and repaired before coating begins, because once a finish goes over trapped moisture or loose material, the failure usually shows up early.
What to check before you open a paint can
Start with moisture. Exterior foundation paint specifications for concrete and stucco commonly call for the substrate to be at or below 12% moisture content before coating, and they also require the surface to be free of efflorescence, chalk, dust, dirt, grease, oils, and release agents SWA specification. A quick visual check misses too much. Use an electronic moisture meter, especially on shaded sides, below-grade sections, and spots near irrigation or hardscape runoff. In harsh sunbelt conditions, those areas often stay damp longer than the rest of the wall.
New concrete and masonry need time as well. Major specifications require concrete and masonry surfaces to be installed at least 28 days before painting and to be visually dry on both sides MPI exterior painting guide specification. Coating “green” concrete is one of the fastest ways to get blistering, adhesion loss, and early failure that shows up before the finish has a chance to prove itself.
Cleaning depends on what is on the wall. A wire brush is the right tool for loose residue, crusty efflorescence, and weak old paint. Pressure washing can work on heavy dirt or chalk, but only if the surface dries completely afterward. For a practical look at wash timing and surface care, this pressure wash a house guide is a useful companion, and the cement wall paint guide is a solid reference for coating concrete surfaces after prep.
A practical prep checklist
- Inspect the wall closely: Look for cracks, soft spots, and powdery residue.
- Remove weak material: Scrape or wire-brush loose coating, laitance, and salts.
- Clean contaminants: Wash off dirt, grease, mildew, and release agents.
- Verify dryness: Confirm the wall is dry on both sides where possible.
- Test moisture: Don't coat until the reading is within spec.
Coating over a damp wall doesn't create protection. It creates a failure schedule.
Choosing the Right Paint Type for Your Foundation
Foundation coating choices depend on the substrate and climate, not a one-size-fits-all approach. On concrete, stucco, and other masonry foundations, the coating has to handle porosity, alkalinity, and sun exposure without trapping moisture. For most exterior foundation work, 100% acrylic or exterior latex coatings are the practical starting point because they usually stick well, breathe better than hard films, and hold up in dry heat foundation coating datasheet.
Foundation paint types compared
| Paint Type | Best For | Coverage | Breathability | Climate Suitability |
|---|---|---|---|---|
| Acrylic masonry paint | General concrete and stucco foundations | Varies by porosity, often in the 250 to 400 sq ft per gallon range on a benchmark acrylic product | Good | Strong choice for mixed sun and moisture |
| Elastomeric coating | Hairline cracks and slightly more flexible surfaces | Heavier film, coverage depends on build | Moderate to lower than thin masonry paints | Useful where crack-bridging matters |
| Breathable mineral or silicate coating | Walls where vapor movement is a bigger concern | Product-specific | High | Valuable in harsh moisture-sensitive situations |
Acrylic masonry paint is the safest default for a lot of above-grade foundation work because it is forgiving, widely available, and easier to maintain after the first coat ages. Elastomeric coatings make sense when hairline cracking is part of the reality, because they can bridge small movement better than a standard thin masonry finish. Breathable mineral or silicate coatings are worth considering when the wall needs to shed vapor more than it needs a thick surface film, especially where long-term moisture behavior matters.
Coverage changes more than homeowners expect. Smooth siding can cover around 350 square feet per gallon, while rough stucco or brick can drop to about 225 square feet per gallon, which means texture and porosity drive both material use and labor exterior house painting cost statistics. On a foundation, that difference shows up fast in how far the coating spreads and how much back-rolling the surface needs.
Product choice also changes with the wall itself. A stiff, smooth concrete stem wall can take a different coating than a rough stucco base, and a patched area often needs a more forgiving finish than an untouched one. If you want a plain-language comparison point for substrate matching, the cement wall paint guide is a useful reference.
Before you buy by the bucket, match the coating to the job conditions. A foundation in a hot, dry climate needs a finish that resists chalking and still breathes enough to let vapor escape. A coating that looks strong on paper can fail quickly if it is too tight for the wall or too thin for the texture. For prep context that affects coating choice, see this wash deck before staining guide for the same basic rule contractors use on exterior surfaces, clean and dry surfaces perform better than rushed ones.
Primers and Application Techniques That Last
Primer is not optional on most foundation jobs that need to last. Concrete and masonry are alkaline, porous, and often dusty even after cleaning, so the finish coat needs help sticking and curing properly. A strong system usually starts with an alkali-resistant masonry primer and then two exterior latex finish coats, with deep or bright colors sometimes needing more build to look even.
Build the system in the right order
Start with the substrate, not the color. Prime first when the wall is porous, chalky, patched, or uneven, because primer locks down the surface and evens absorption. For non-traffic concrete surfaces, a common benchmark topcoat spec is MPI EXT 3.1K, which is a useful selection check when you are comparing contractor proposals or product data SWA specification.
Tool choice matters just as much as product choice. On rough concrete, a thick-nap roller pushes paint into the surface better than a short nap roller. A sprayer can speed coverage, but rolling afterward helps work the coating into pores and cuts down on patchy film build. On textured masonry, two or more thin coats are safer than one heavy coat because they improve adhesion and reduce uneven sheen TXST painting specification.
Contractor habit worth copying: thin coats, full dry time, then the next coat. Heavy passes look faster and fail sooner.
Color choice has a hidden cost, too. Deep and bright colors often need more coats to look uniform TXST painting specification, so a simple-looking color change can add labor if the substrate is mottled or repaired. A prep-first workflow keeps the coating system honest and gives the finish coat a real chance to perform.
For a related example of how surface prep affects finish quality, the process in this wash deck before staining guide follows the same logic. Clean, dry, and sound surfaces outperform guesswork every time.
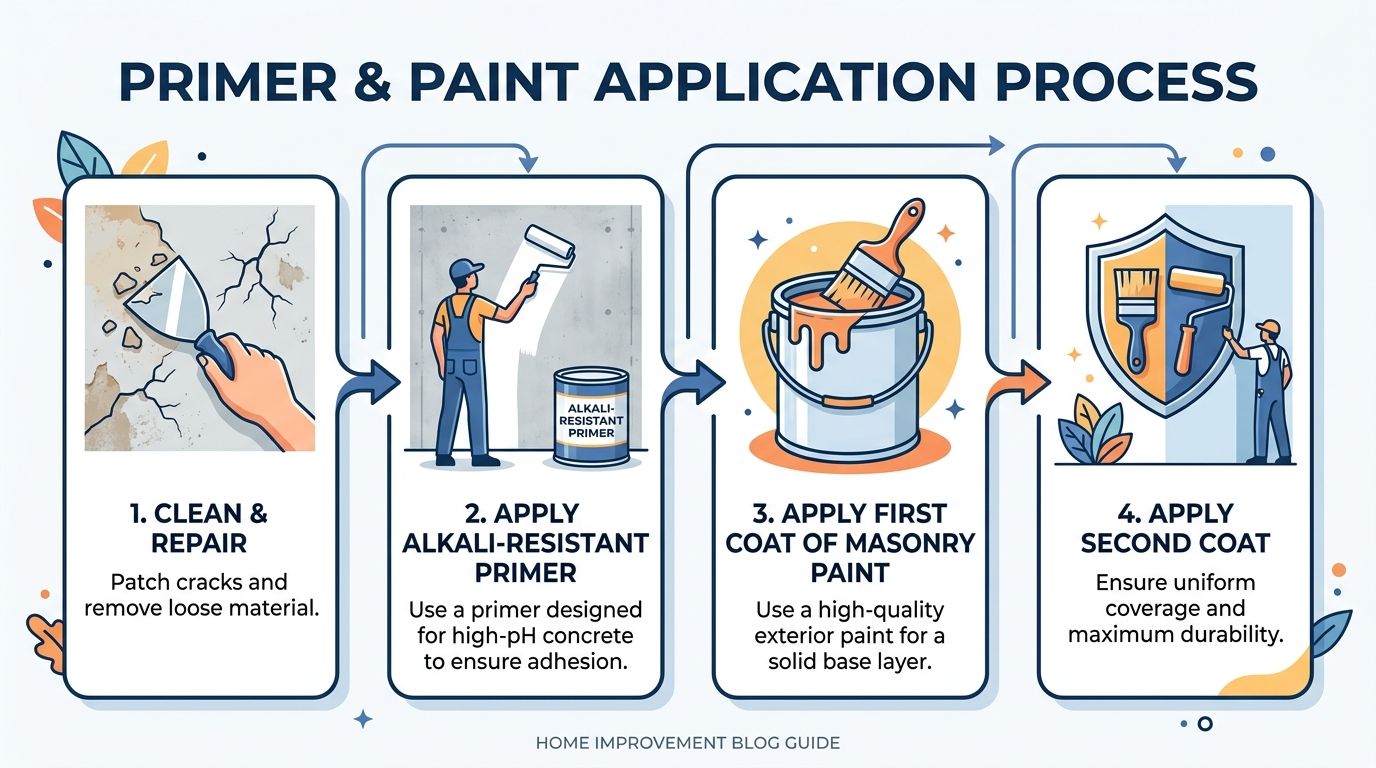
If you are comparing contractor bids, look for a detailed prep sequence and documented product specifications, not just a promise to paint the foundation. Clean, patch, prime, then apply finish coats with the right roller and a realistic dry-time plan. If the work is tied to moisture intrusion or staining from past leaks, coordinate it with foundation water damage repair Marion County before the coating goes on.
Drying and Curing in Hot and Dry Climates
Arizona changes the margin for error, not just the drying speed. Strong sun, hot surfaces, and low humidity can make a coat skin over before it bonds properly, especially on porous concrete that drinks in the first pass unevenly. The finish may look acceptable at noon, then start failing long before the coating should be done with the job.
Timing matters more than speed
Exterior specifications still call for paint to go on only when temperatures are above 50°F, and the substrate has to be dry before coating Behr professional master specification. Major industry guidance uses the same 50°F minimum and says exterior painting should not proceed unless ambient air or substrate temperatures are at least that point unless the approving parties say otherwise. In sunbelt work, crews also avoid direct sun on the wall whenever they can, because the wall surface can run hotter than the air.
For one professional acrylic exterior coating, the published window is touch dry in 60 to 90 minutes, recoat after 4 hours, rain resistance after 8 hours, and full cure in 30 days. The same data sheet notes drying times can double when relative humidity exceeds 50% coating datasheet. A wall can look ready long before the film has cured through.
Porosity changes coverage too. On the same benchmark coating, the usable range is 250 to 400 square feet per gallon, which shows how much the film build shifts with substrate absorption. If you stretch a gallon too far on thirsty concrete, barrier performance drops. If you pile it on too thick, cure slows and moisture can get trapped.
The field schedule that holds up is plain. Start early, keep the wall out of direct sun when possible, and respect recoat windows instead of racing them. In this climate, patience usually beats speed.
Common Foundation Paint Problems and How to Fix Them
Peeling usually points to one of two things, moisture behind the film or poor preparation. If the coating lifts in sheets, the wall probably wasn't clean, dry, or primed correctly. If it blisters after rain or irrigation, the wall is telling you the water source still exists.
Efflorescence is a different problem. Those white salts are coming through the masonry, and no coating permanently solves that without addressing the water movement that carries them there. Painting over it just gives the salts a new surface to show through.
What the failure usually means
- Peeling: Often prep or moisture.
- Blistering: Often trapped vapor or a damp substrate.
- Chalking: Usually UV breakdown or weak film integrity.
- Uneven fading: Often sun exposure and poor color retention.
- Salt staining: Usually moisture movement through the wall.
A foundation can also fail cosmetically without failing structurally. That's where homeowners get fooled into repainting too soon. If the issue is surface grime or fading, a cleaned-up finish may be enough. If the issue is cracking, spalling, or repeated salt bloom, the coating is only hiding the symptom.
Climate makes maintenance harder. Hot-cold cycling and intense UV exposure in sunbelt markets shorten the life of weak coatings and make cheap paint look tired quickly. The right response is not to keep adding paint. It's to stop, diagnose the source, and decide whether the wall needs repair before repainting.
Maintenance Schedule and When to Hire Professionals
Exterior coatings have a limited lifespan. In sunbelt conditions, the finish on a foundation wall usually wears faster than the same paint on protected siding, especially where the wall takes splashback, irrigation overspray, or harsh afternoon sun. Annual inspection keeps small failures from turning into bigger repairs, and it helps you decide whether the wall still deserves a coating or needs a different fix. The repaint interval varies by material and exposure, as noted earlier, but foundation walls in rough masonry or high-heat environments often need attention sooner than owners expect.
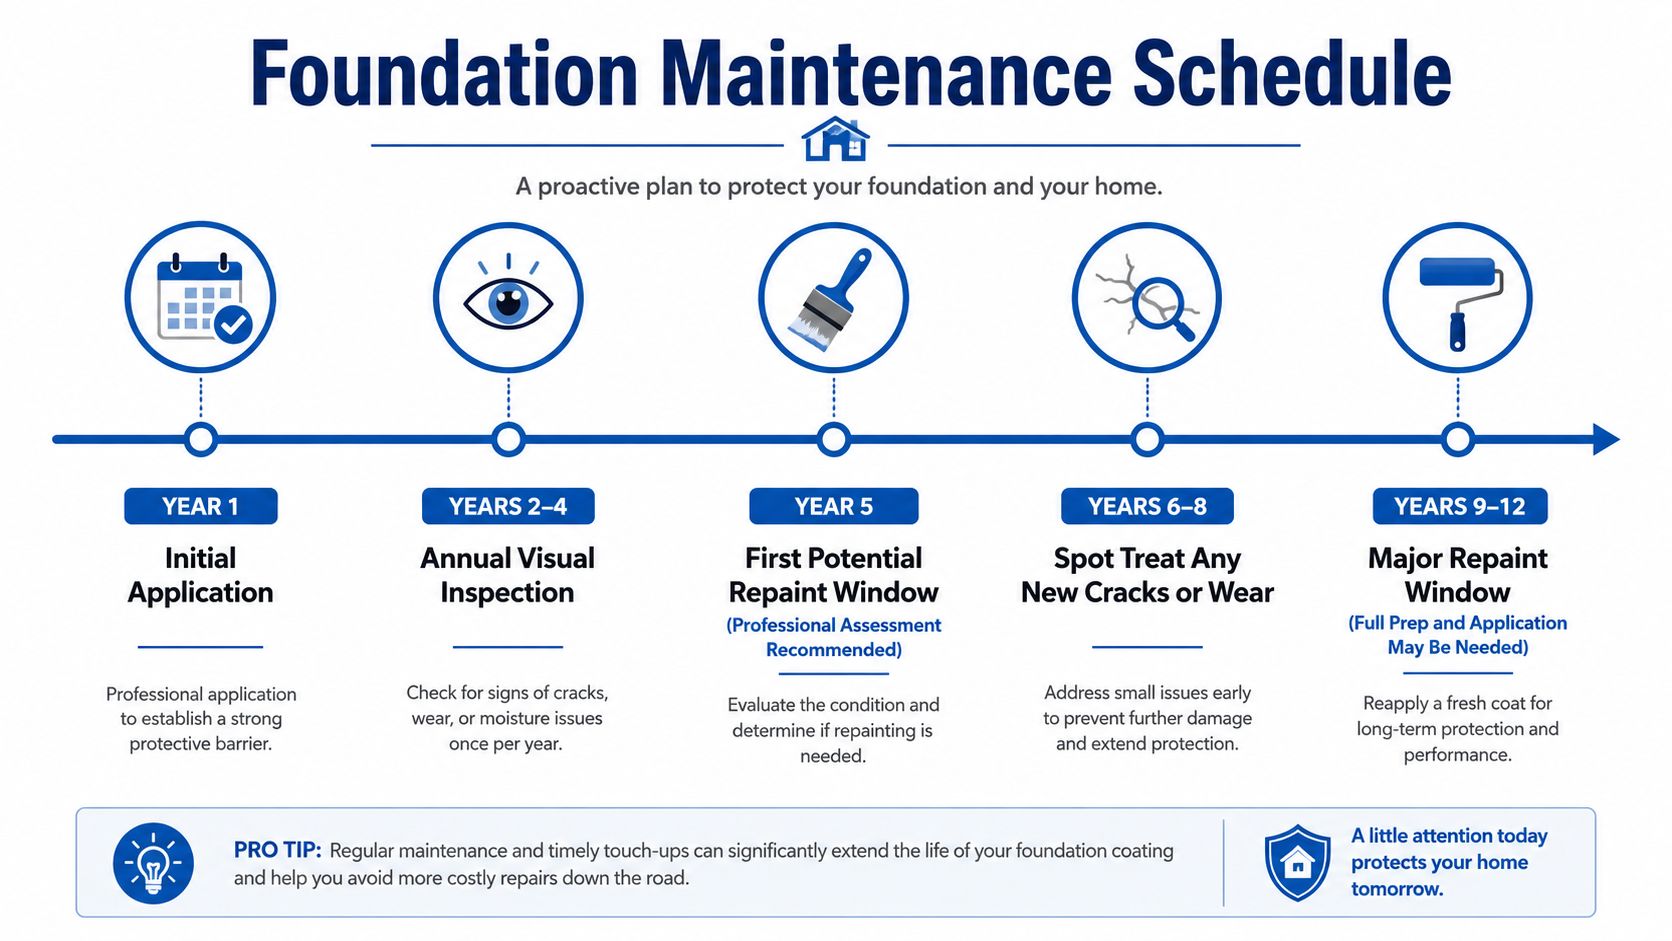
A practical maintenance rhythm
- Each year: inspect for cracks, peeling, salt bloom, and water staining.
- After irrigation changes or heavy runoff: check the splash zones first.
- Around the middle of the repaint window: get a professional assessment if the finish is fading or chalking.
- When cracking or moisture returns: stop treating it as a coating issue and address the underlying problem.
Small, accessible foundation walls with stable conditions can be handled by a careful homeowner if the prep is straightforward and the substrate is sound. Larger jobs deserve a pro, especially when the foundation wraps multiple sides, the surface keeps showing efflorescence, or moisture intrusion points to a repair issue rather than a finish issue. Licensed, insured contractors should be able to describe their prep sequence, primer choice, finish system, and moisture checks without hand-waving. If they cannot explain why the coating should hold on your specific wall, keep looking.
For properties where exterior care is part of a broader maintenance plan, house washing services can keep foundation walls cleaner between coating cycles. That does not replace paint, but it reduces buildup that makes a good finish look older than it is.
If your foundation is chalking, stained, or due for a proper exterior refresh in the Phoenix area, South Mountain Window Cleaning, LLC can help keep the rest of the exterior clean and inspection-ready. Visit South Mountain Window Cleaning, LLC to get help with exterior cleaning that supports a smarter foundation maintenance plan.