
You clean the deck. It looks better right away. Dust is gone, the boards brighten up, and it feels like stain day is next.
That’s where a lot of deck projects go wrong in Phoenix.
A deck can look clean and still be a bad surface for stain. Arizona dust settles deep in the grain. Sun bakes the top fibers gray and brittle. Old sealer can stay behind even after a hard rinse. Then the new stain goes on, looks sharp for a short stretch, and starts peeling once heat, monsoon moisture, and foot traffic test it.
If you want a finish that lasts, you need to wash deck before staining the right way. Not just fast. Not just until it “looks clean.” The prep has to match the condition of the wood and the climate you’re working in.
Why a Perfect Stain Starts with a Perfect Wash
Most failed stain jobs don’t fail because the stain was bad. They fail because the wood wasn’t ready.
That’s the part homeowners underestimate. A deck wash isn’t cosmetic. It’s surface preparation. The goal is to remove everything that blocks penetration and adhesion, especially old residue, dead wood fibers, ground-in dirt, and biological growth hiding in the grain.
According to Legacy Painting’s deck staining guidance, inadequate preparation causes premature stain failure in over 80% of cases where decks need re-staining in less than two years. That lines up with what exterior cleaning pros see every season. The stain gets blamed, but the problem started before the first brush stroke.
What the stain is fighting against
On an Arizona deck, the surface usually has more going on than people realize:
- Sun-damaged wood fibers that have turned gray and weak
- Fine desert dust packed into the pores
- Leftover sealant or stain that stops new product from bonding evenly
- Mildew or dark organic staining in shaded areas, around planters, and near walls
If those contaminants stay in place, fresh stain can’t soak in the way it should. It sits too high, cures unevenly, or bonds to unstable material instead of sound wood.
Practical rule: If the deck only looks cleaner after washing, you’ve improved the appearance. If the wood is actually open, uniform, and free of residue, you’ve prepared it for stain.
That difference matters.
A proper wash also sets up every step that follows. Drying becomes more predictable. Color comes out more even. Touch-up work drops. If you’re also thinking long term about preserving the structure, guides on related maintenance like how to waterproof your deck are useful because waterproofing only works well when the surface underneath has been cleaned and prepped correctly.
Why pressure washing alone usually isn’t enough
A lot of homeowners treat pressure washing like a reset button. Spray hard enough and everything is fixed.
It doesn’t work that way.
Pressure alone can remove loose dirt. It often won’t remove embedded oxidation, neutralize the wood surface, or break down old coatings well enough for re-staining. In some cases it makes things worse by roughing up the wood while still leaving residue behind.
That same misunderstanding shows up on house exteriors too. The cleaning method has to match the material and the contamination, which is why surface prep matters so much in projects beyond decks as well. South Mountain’s guide on how to clean house exterior follows the same logic.
The expensive shortcut
The costly mistake isn’t washing the deck. It’s doing a partial prep job and calling it finished.
Homeowners usually lose time two ways:
- They stain over wood that still has contaminants in it.
- They end up stripping and redoing the work far sooner than expected.
A deck stain job that fails early is frustrating because the second round is harder. Now you’re not just cleaning wood. You’re removing failed stain, fixing blotchy absorption, and dealing with peeling edges.
A perfect finish starts before the stain can. The wash is what decides whether the stain bonds to healthy wood or to a layer that’s already coming loose.
The First Decision When to Wash and What to Use
It is 7:30 in the morning in Phoenix, the deck already feels warm, and a homeowner is standing there with a rental pressure washer and one bottle labeled deck cleaner. That is usually where the job starts going sideways.
The first decision is not pressure. It is diagnosis. You need to know what is on the wood before you choose the product, because each condition calls for a different approach. Dirt, sun-burned fibers, old stain, and mill glaze do not respond the same way.
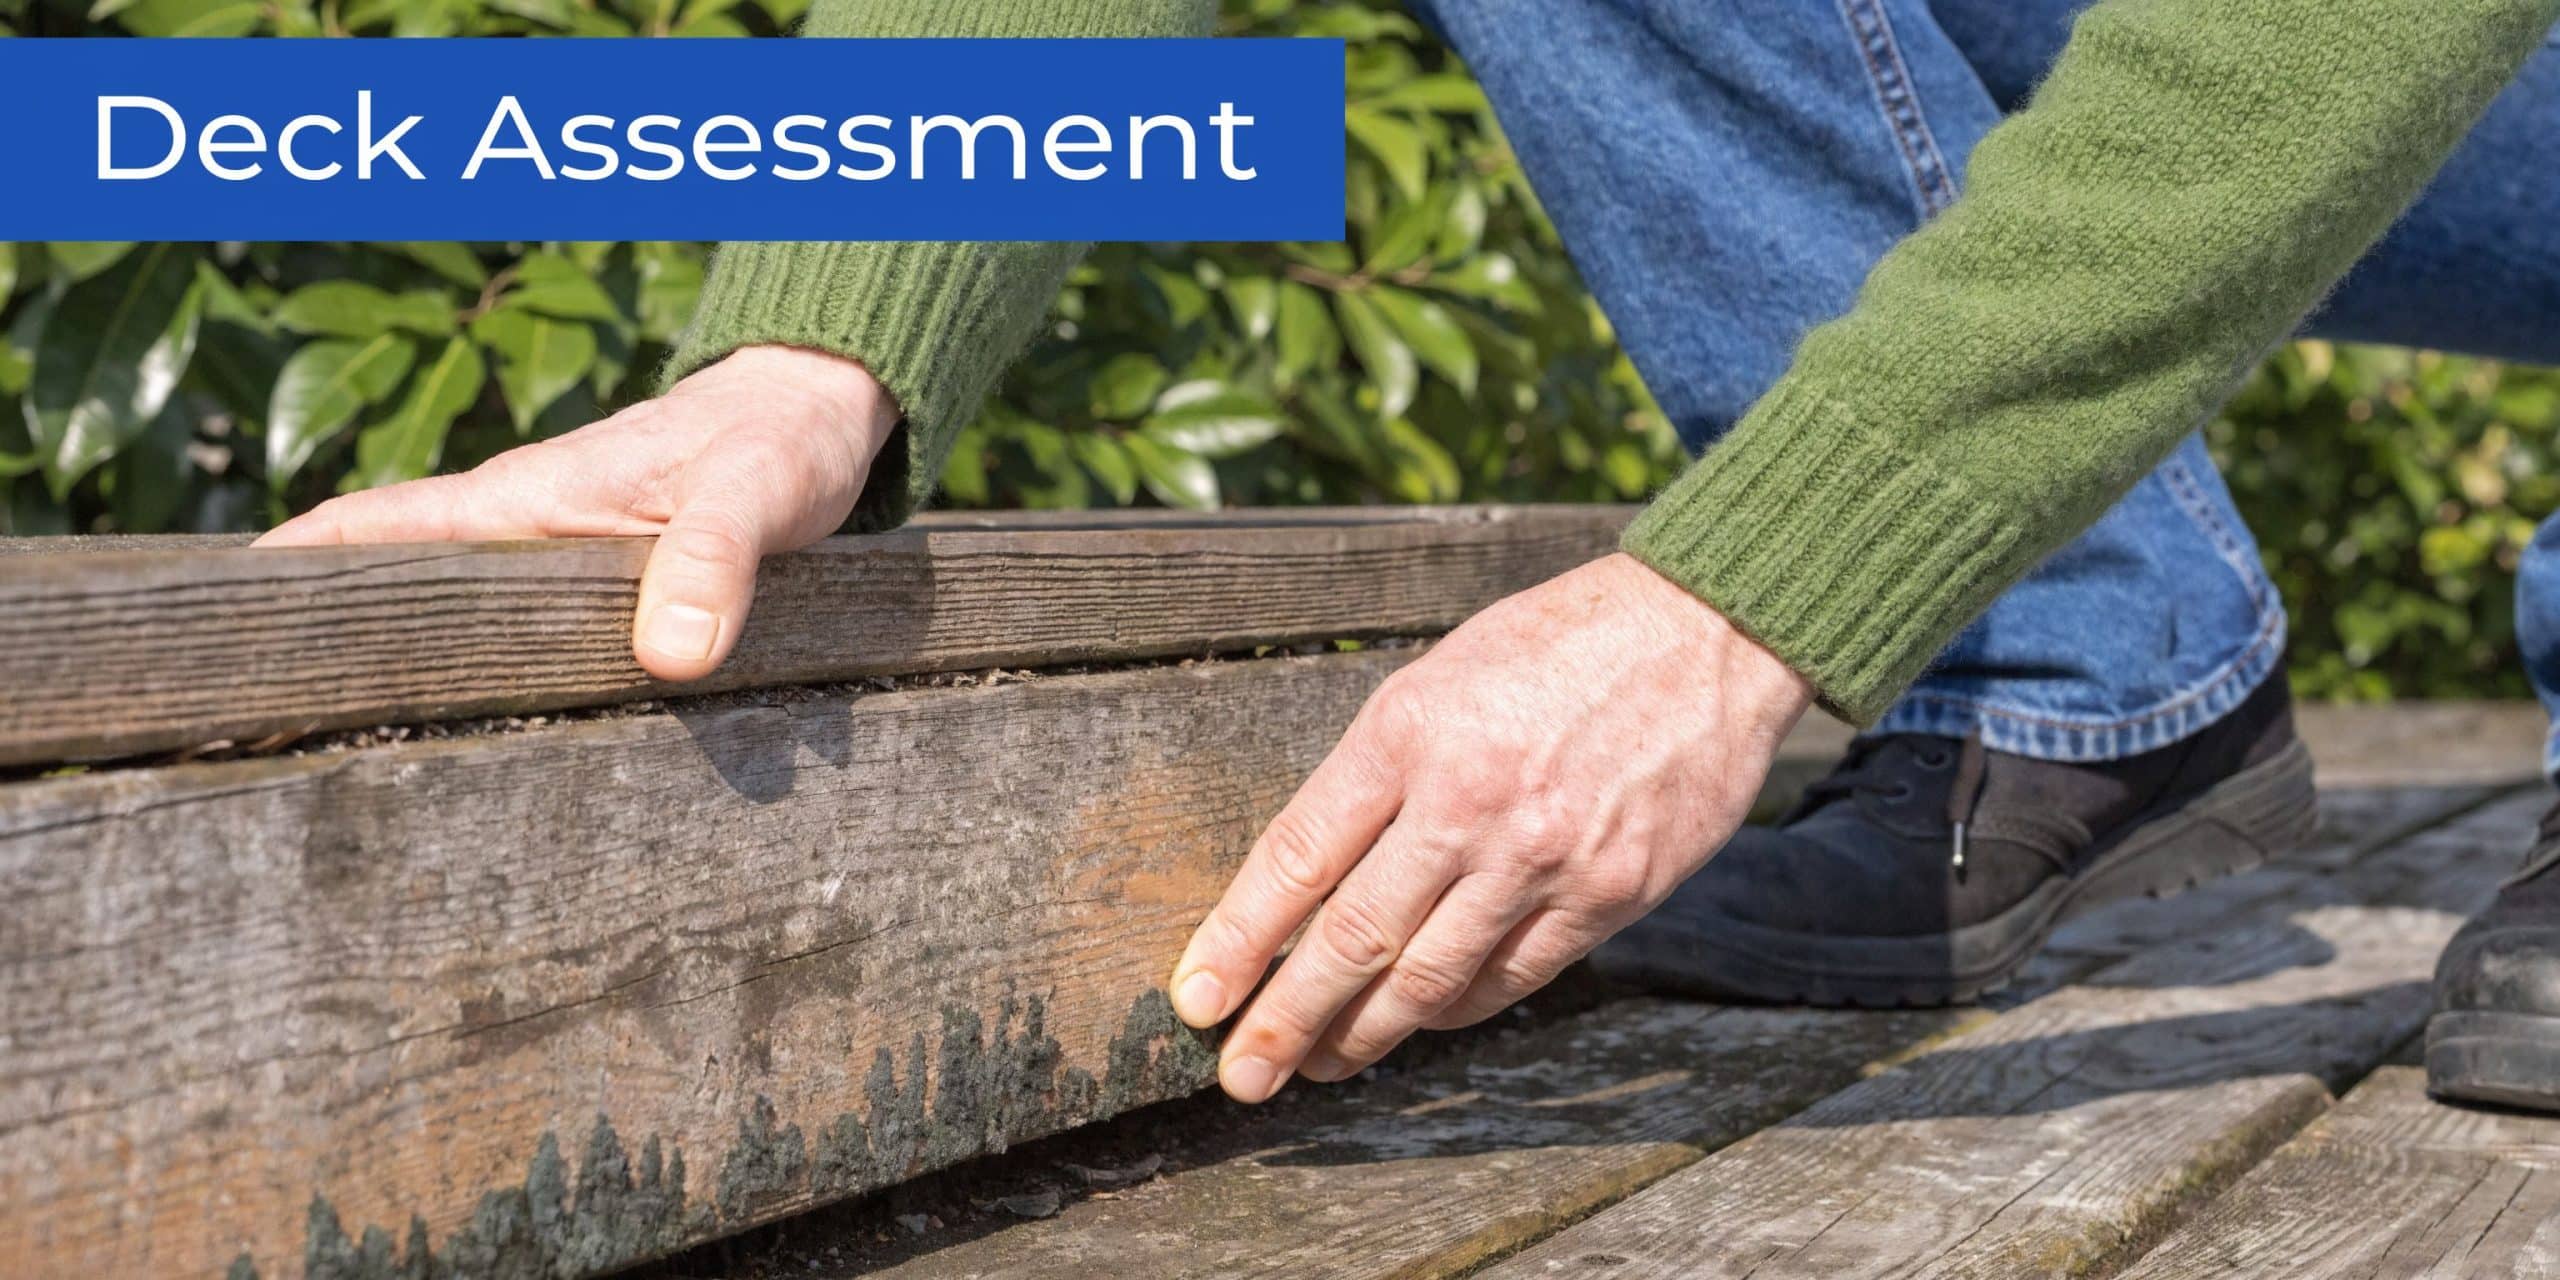
Start with a simple deck diagnosis
Get down close and inspect the boards at eye level. Standing on the patio and judging color from five feet up misses the details that decide the whole prep plan.
Check for these signs:
- New wood with a slick surface. Fresh lumber often has mill glaze and job-site residue that can block stain penetration.
- Gray, dried-out boards. That points to UV exposure, oxidation, and loose surface fibers.
- Leftover stain or sealer. Look for uneven color, shiny patches, or places where water beads instead of soaking in.
- Peeling or flaking finish. That means the old coating is already failing and has to be removed, not cleaned around.
- Planter stains, grill grease, or organic growth. These need targeted treatment, not a one-product guess.
A quick water test helps. Splash a few spots in sun and shade. If one area darkens fast and another beads up, the deck is not uniformly ready for stain.
What each product is meant to do
Homeowners waste money here all the time. They buy a cleaner when they need a stripper, or they skip brightener because the wood "looks clean enough."
Here is the simple breakdown:
| Solution Type | Best For | Primary Goal |
|---|---|---|
| Deck cleaner | Dirty wood, organic buildup, general prep | Remove grime, mildew, and surface contamination |
| Deck brightener | Weathered or darkened wood after cleaning | Restore a more uniform appearance and help open the wood surface |
| Deck stripper | Previously stained decks with remaining coating | Break down old finish so new stain can bond properly |
Cleaner and brightener often work as a pair. Stripper is a separate decision because it changes the whole prep process.
Match the product to the deck condition
For a new deck, use a prep product made for mill glaze and construction residue. New boards can look ready and still reject stain because the surface is too closed up.
For a gray, neglected deck, start with a cleaner. If the wood still looks dull, blotchy, or dark after rinsing, follow with a brightener to reset the surface and even out absorption.
For a re-stain project, inspect for any remaining finish before you buy chemicals. If old coating is still on the boards, a stripper is usually the right starting point. Washing alone does not solve that problem. It leaves you with a deck that looks cleaner but still has stain blocking the new coat from bonding.
If you can still see old stain after washing, the new stain is bonding to the old job, not the wood.
That is why re-stain work fails so often.
Arizona timing matters before product selection
Phoenix heat changes how these products behave. A cleaner that works fine in another climate can flash dry on hot decking before it has time to do its job. Then homeowners add more product, scrub harder, and still get uneven results.
Work early. Keep the surface damp before application if the boards are heating up. Treat smaller sections so the chemistry stays active long enough to clean properly. On second-story decks and full-sun exposures, this matters even more because the boards can heat fast and dry patchy.
If you are weighing stronger pressure against a lower-pressure chemical approach, it helps to understand the difference between pressure washing and soft washing methods. The right choice depends on whether you are removing dirt, breaking down leftover coating, or trying to avoid damaging weathered wood.
A short visual walkthrough can help before you commit to products and process:
What works and what doesn’t
A few field-tested calls matter here.
- What works: Testing one small section first, especially on older Arizona decks where sun exposure is uneven from one side to the other.
- What works: Reading the deck’s history. If no one knows what stain was used last time, check for leftover coating before assuming a basic wash will handle it.
- What works: Buying enough product to finish the job in one pass. Running out halfway through leads to mismatched results.
- What doesn’t: Using one all-purpose product on every deck condition.
- What doesn’t: Applying cleaner in direct afternoon sun and hoping you can keep up.
- What doesn’t: Treating peeling finish like simple dirt.
The right product choice saves hours of rework. In Arizona, it also buys you margin against the heat, which is one reason deck prep goes better when an experienced crew handles the chemistry and timing from the start.
The Great Debate Pressure Washer vs Manual Scrubbing
A lot of deck damage happens during washing, not staining.
Homeowners in Phoenix usually get into trouble one of two ways. They attack a sun-baked deck with too much pressure, or they spend hours scrubbing and still leave embedded dust, oxidized wood fiber, and old residue behind. Both mistakes show up after stain goes on.
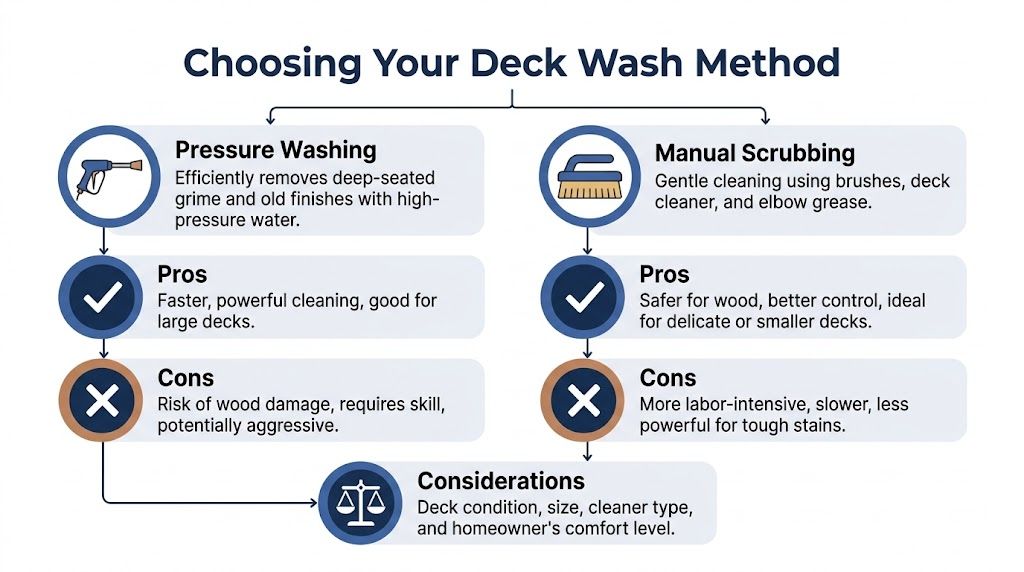
Manual scrubbing gives you the most control
On older Arizona decks, control matters more than speed.
A deck brush, pump sprayer, and hose let you work the cleaner into the grain without raising fibers or carving lines into soft boards. That makes hand scrubbing the safer choice for weathered wood, small decks, rail sections, stairs, and repairs where the surrounding boards are already uneven from years of heat and UV exposure.
Manual scrubbing makes sense when:
- The deck is small and setup time would eat most of the job.
- The wood is older or softer and likely to fuzz under mechanical force.
- You need detail work around balusters, corners, planters, or tight transitions.
- The soiling is moderate and the chemistry is doing most of the work already.
The trade-off is labor. Hand scrubbing is slower, more tiring, and harder to keep consistent across a big deck.
Pressure washing is faster, but less forgiving
Pressure washing has a place. It saves time on larger deck surfaces and helps rinse out contamination from the grain after the cleaner has done its job.
The problem is that wood is not concrete. A deck can look tough and still scar easily, especially after years of Arizona sun. Once the nozzle gets too close or the operator pauses too long, the board face gets striped, pitted, or furred up. Those marks do not disappear under stain. Stain usually makes them easier to see.
For routine deck prep, the safe approach is low pressure, a wide fan tip, and steady movement with the grain. If the machine needs to do the heavy lifting, something earlier in the process was missed.
How pressure washing goes wrong
I see the same errors over and over:
- Holding the wand too close. That cuts spring wood and leaves wash lines.
- Using a narrow tip. The stream is too aggressive for deck boards.
- Stopping mid-pass. One hesitation can leave a permanent mark.
- Trying to blast off failed stain without enough chemical help. The wood takes the abuse instead of the coating.
- Working in Arizona heat without adjusting pace. Cleaner dries fast here, so homeowners rush and start overusing pressure to compensate.
That last one is local and expensive. In Phoenix, product can flash off quickly on hot boards, especially in direct sun. Once that happens, people get impatient, squeeze the trigger harder, and turn a prep job into a repair job.
A safe washing sequence
A controlled process works better than brute force.
- Apply cleaner or stripper evenly. Let it loosen dirt, oxidation, or failing coating first.
- Agitate where needed. Scrub rails, edges, stairs, and stubborn patches by hand.
- Rinse with restraint. Use only enough pressure to flush the surface clean.
- Keep passes consistent. Follow the grain and avoid cross-cutting the board face.
- Test before committing to the full deck. Old cedar, pine, and replacement boards can all react differently.
If the wood starts looking fuzzy, rough, or lighter in narrow streaks, stop and reset. The washer is no longer cleaning. It is chewing up the surface.
The best choice is often both
On real jobs, a hybrid method usually gives the best result.
Manual scrubbing handles the delicate and detailed areas. Controlled pressure rinsing handles the field boards where coverage and speed matter. That combination is especially useful on Arizona decks with mixed wear patterns, where one side is baked by sun and the other side sits shaded near walls or planters.
If the deck is part of a larger exterior cleanup, protect nearby siding, painted trim, and doors from overspray and misuse of equipment. Homeowners who are also working on adjacent surfaces should understand the difference between deck prep and how to pressure wash a house safely, because the technique is not interchangeable.
Which method should you choose
Use manual scrubbing for smaller, older, softer, or lightly soiled decks.
Use pressure washing if the deck is large and you know how to control distance, tip selection, and pass speed.
Use both if the deck has broad open boards plus detailed areas, patchy old coating, or uneven weathering.
The costly mistake is treating the machine like a shortcut. Good deck prep still depends on judgment. That is why many homeowners get better results by hiring a crew that cleans wood surfaces every week, especially in Arizona where heat shortens your margin for error.
The Critical Drying and Inspection Phase
A washed deck isn’t ready for stain just because the surface feels dry under your hand.
That’s one of the biggest mistakes in deck prep. The outer face can look ready while the inside of the boards is still holding moisture.
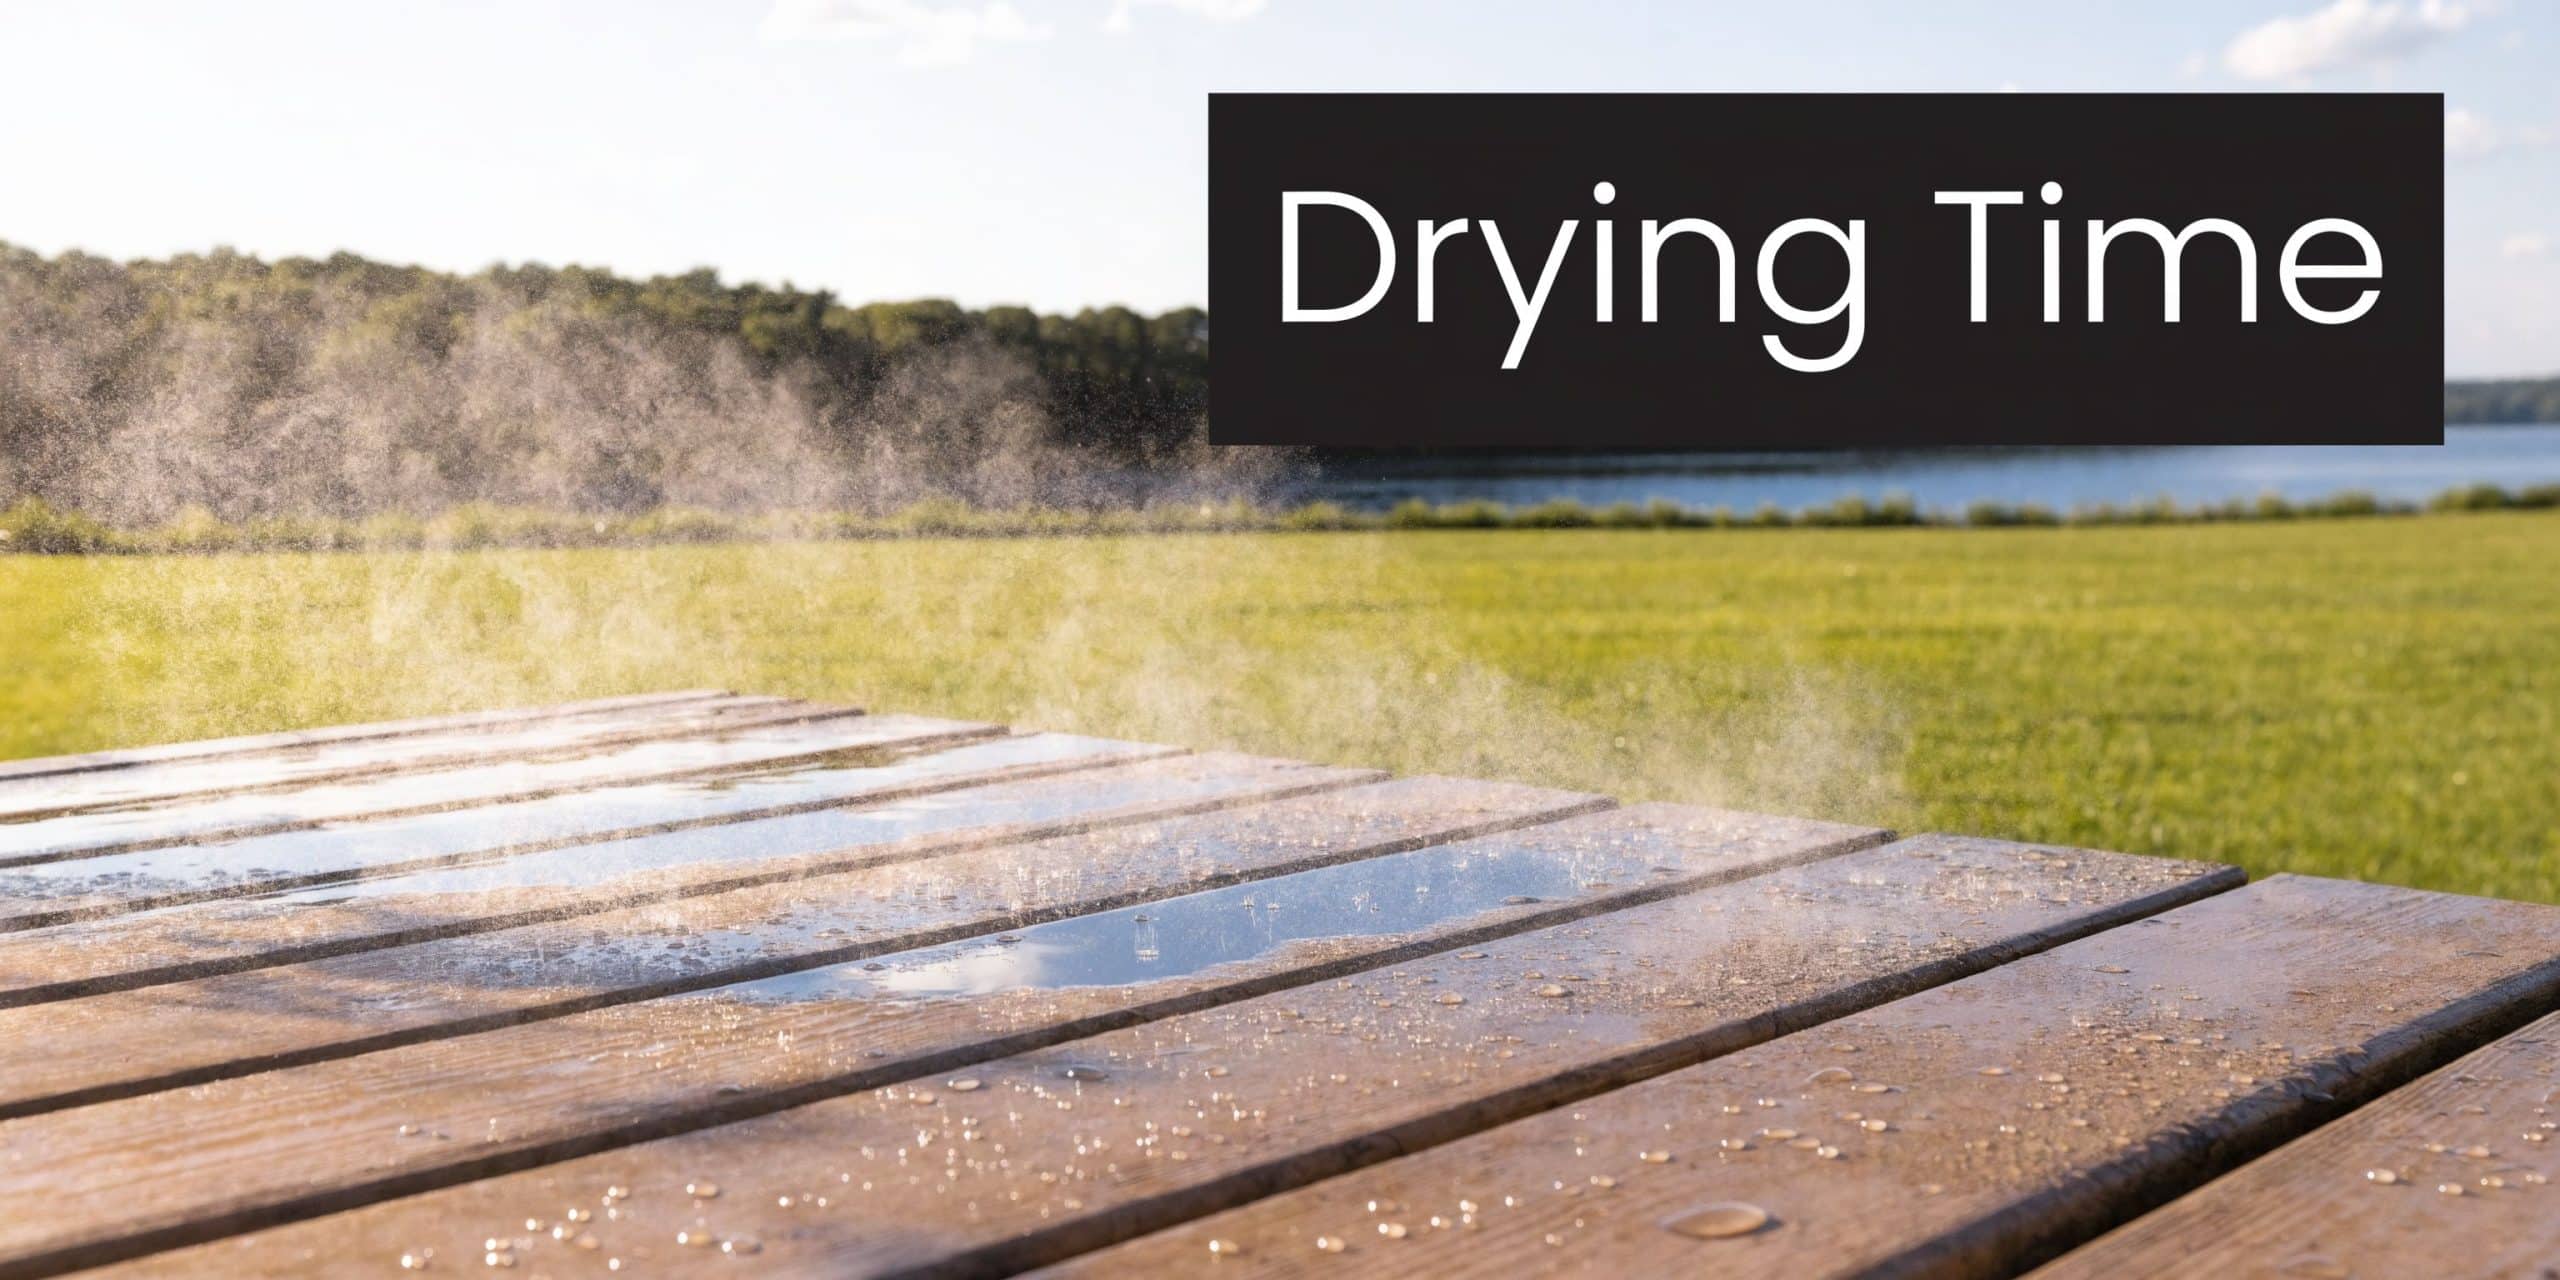
Dry to the touch is not dry enough
Industry standards call for a minimum of 48 hours after washing, and stain manufacturers specify wood moisture content of 12-17% or lower. Higher moisture can reduce finish lifespan by up to 50%, according to Paintzen.
That’s why professionals use a moisture meter instead of guessing.
Push the probes into multiple boards, not just one sunny spot. Check shaded sections, stair treads, and any area near walls or planters where moisture lingers longer. If readings are still high, wait.
What happens when you rush
Stain applied to damp wood usually shows problems in one of a few ways:
- Uneven color because absorption changes board to board
- Poor penetration because moisture is occupying the pores
- Peeling or bubbling when the finish can’t bond properly
- Mildew issues because moisture gets trapped under the coating
Those failures don’t always show up the same day. In Phoenix, they often reveal themselves after the next weather swing.
Wood that looks ready and wood that measures ready are not the same thing.
Use the waiting period well
Drying time isn’t downtime. It’s inspection time.
Walk the deck slowly and look for:
- Raised grain or fuzz from pressure washing
- Loose fasteners that need to be reset
- Splintered board edges
- Missed coating remnants in corners or between boards
- Dark patches that suggest more cleaning is needed
If the wash raised fibers, a light sanding can help. Keep it light. The goal is to knock down fuzz, not polish the wood smooth. Over-sanding can close the surface back up and work against penetration.
A practical inspection routine
A clean process looks like this:
- Let the deck sit through the drying window.
- Check moisture in several locations.
- Fix hardware and small defects.
- Sand only where surface texture calls for it.
- Remove dust before stain goes on.
This phase doesn’t look dramatic, but it protects the work you already did. Most stain failures that seem mysterious really aren’t. Someone skipped the moisture check, ignored the fuzzy grain, or assumed the deck would finish drying under the stain.
Patience is part of the prep. On deck work, it’s one of the few shortcuts that never pays.
Special Considerations for Deck Prep in Arizona
A lot of deck prep advice is written as if every climate behaves the same. Phoenix proves that wrong fast.
Arizona heat changes how cleaners dwell, how water evaporates, and how quickly boards go from wet to deceptively dry on the surface. If you follow a generic deck-cleaning routine written for a mild, humid climate, you can end up with residue on the wood even when the deck looks clean.
The Arizona problem most guides miss
In hot, arid climates like Arizona, deck cleaners can evaporate too quickly and leave residue that blocks stain adhesion. That can reduce stain life by 50%, according to Colin Can Help.
That point matters because homeowners often assume faster drying is always good.
It isn’t.
Fast drying helps only after the deck has been cleaned correctly. During the cleaning stage, heat can cut short the chemistry you need. The cleaner flashes off before it finishes loosening grime, oxidation, or leftover contamination. Then the rinse removes part of the mess, but not all of it.
What works better in Phoenix
Deck prep in Arizona should be paced around the sun.
A more reliable approach is:
- Work in the morning. Cooler deck boards give the cleaner time to work.
- Pre-wet the surface. Damp wood helps prevent the product from drying instantly.
- Clean in smaller sections. Don’t apply product to the whole deck if you can’t keep it active.
- Watch the board temperature. If the wood is hot to the touch, slow down and cool it first.
- Keep rinse timing tight. Don’t let cleaning residue bake onto the surface.
On a Phoenix deck, the weather is part of the jobsite. If you ignore it, the chemistry stops working the way the label assumes.
Dust and UV make prep less forgiving
Arizona decks don’t just deal with heat. They deal with constant fine dust and aggressive UV.
That combination creates two problems. First, the dust packs into texture and corners quickly. Second, UV breaks down exposed wood fibers fast enough that a deck can look dry and solid while the top layer is already weak.
That’s why local prep often calls for a little more caution and a little less brute force. Pure-water rinsing and soft brushing can help in some situations where harsh pressure would raise fibers too much. For homeowners who don’t want to manage cleaner dwell time, water control, and surface temperature on their own, South Mountain Window Cleaning, LLC is one local option that handles exterior cleaning work in Valley conditions.
Adjust your expectations for scheduling
In Phoenix, the right day matters.
Avoid the hottest part of the afternoon. Avoid staining right after any unexpected moisture event. Don’t assume a shaded section near a wall behaves like the open center of the deck.
If you’re serious about getting stain to last, Arizona deck prep isn’t just the standard process done faster. It’s the standard process done more carefully, with more attention to surface temperature, evaporation, and the way the desert leaves contamination behind.
When to Call the Pros for Deck Washing
Some decks are realistic DIY jobs. Some aren’t.
The dividing line is usually complexity, risk, and how expensive a mistake will be once stain goes on.
A simple self-check
It’s smart to call a pro if any of these apply:
- Multiple layers of failing stain are visible. That usually means chemistry, technique, and rinse control all matter more.
- The deck is large or multi-level. Consistency gets harder as square footage and detail work increase.
- The boards are already soft or rough. One bad pass with a pressure washer can leave permanent damage.
- You don’t have a moisture meter. Without one, you’re guessing at the most important checkpoint before staining.
- You don’t have time to monitor sections closely. In Arizona, timing and dwell control matter.
Why professional prep can be cheaper than a redo
A failed stain job costs more than a wash.
It means stripping, extra labor, more product, and more downtime before the deck looks right again. If you’re trying to budget the cleaning side of the project, a practical reference on cost to power wash a deck can help frame what homeowners usually compare before deciding whether to rent equipment or hire out the prep.
The cost question isn’t just what the wash costs today. It’s what it costs if the prep is wrong.
What pros bring that matters
A professional crew should bring three things homeowners usually don’t have:
- The right pressure and application equipment for cleaning versus stripping
- Experience reading the deck surface and choosing the correct product path
- Insurance and process control if something goes wrong around the property
If you’re weighing whether to DIY or hand it off, South Mountain’s page on hire a professional to pressure wash your property covers the broader value of bringing in trained help for exterior surfaces.
The best time to call a pro is before the wood gets damaged or the wrong stain goes over a poorly prepped deck. Once that happens, the job gets more expensive for everyone.
Frequently Asked Questions About Deck Prep
Can I stain the same day I wash the deck
Usually, no. A deck needs time to dry internally, not just on the surface. Use a moisture meter and wait until the wood is within the manufacturer’s acceptable range.
Is a brighter-looking deck always ready for stain
No. Brightness and readiness are different things. A deck can look cleaner and still have leftover residue, raised grain, or too much moisture in the boards.
Do I always need a stripper on an old deck
Not always. You need a stripper when old stain or sealer is still present and interfering with new adhesion. If the previous coating is gone, a cleaner and brightener may be enough.
Should I sand after washing
Only if the wash raised fibers or left rough areas. Light sanding is for smoothing the surface, not replacing proper cleaning.
Is pressure washing better than scrubbing
Not automatically. Pressure washing is faster and more effective on larger decks when the operator controls the settings and technique. Manual scrubbing gives more control and lowers the risk of damage.
What’s the biggest mistake Phoenix homeowners make
Working too late in the day and letting cleaner dry on hot boards. In Arizona, evaporation changes the whole prep process.
If your deck needs careful prep before staining, South Mountain Window Cleaning, LLC handles exterior cleaning work across Phoenix, Scottsdale, Paradise Valley, Chandler, Tempe, and Gilbert. When the deck has heavy buildup, old coating, or Arizona heat is making the process harder to control, professional washing can help you start the stain job on a surface that’s ready.