
That stump in the front yard usually starts as a small annoyance. Then it turns into the thing your eye lands on every time you pull into the driveway. It interrupts mowing, catches debris, and makes the entire yard look unfinished even when the rest of the property is tidy.
In Arizona, that leftover stump brings an extra layer of complication. Dry air can help wood cure out over time, but the same climate also makes any open flame a serious decision. In Phoenix, Scottsdale, Paradise Valley, Chandler, Tempe, and Gilbert, the question isn't just whether burning a stump can work. It's whether it can be done legally, safely, and without creating a bigger problem than the one you're trying to solve.
Is Burning a Stump the Right Move for Your Yard
A stump can make an otherwise clean yard feel neglected. If you're staring at one right now, burning may seem like the straightforward fix. Sometimes it is. Often, it isn't.
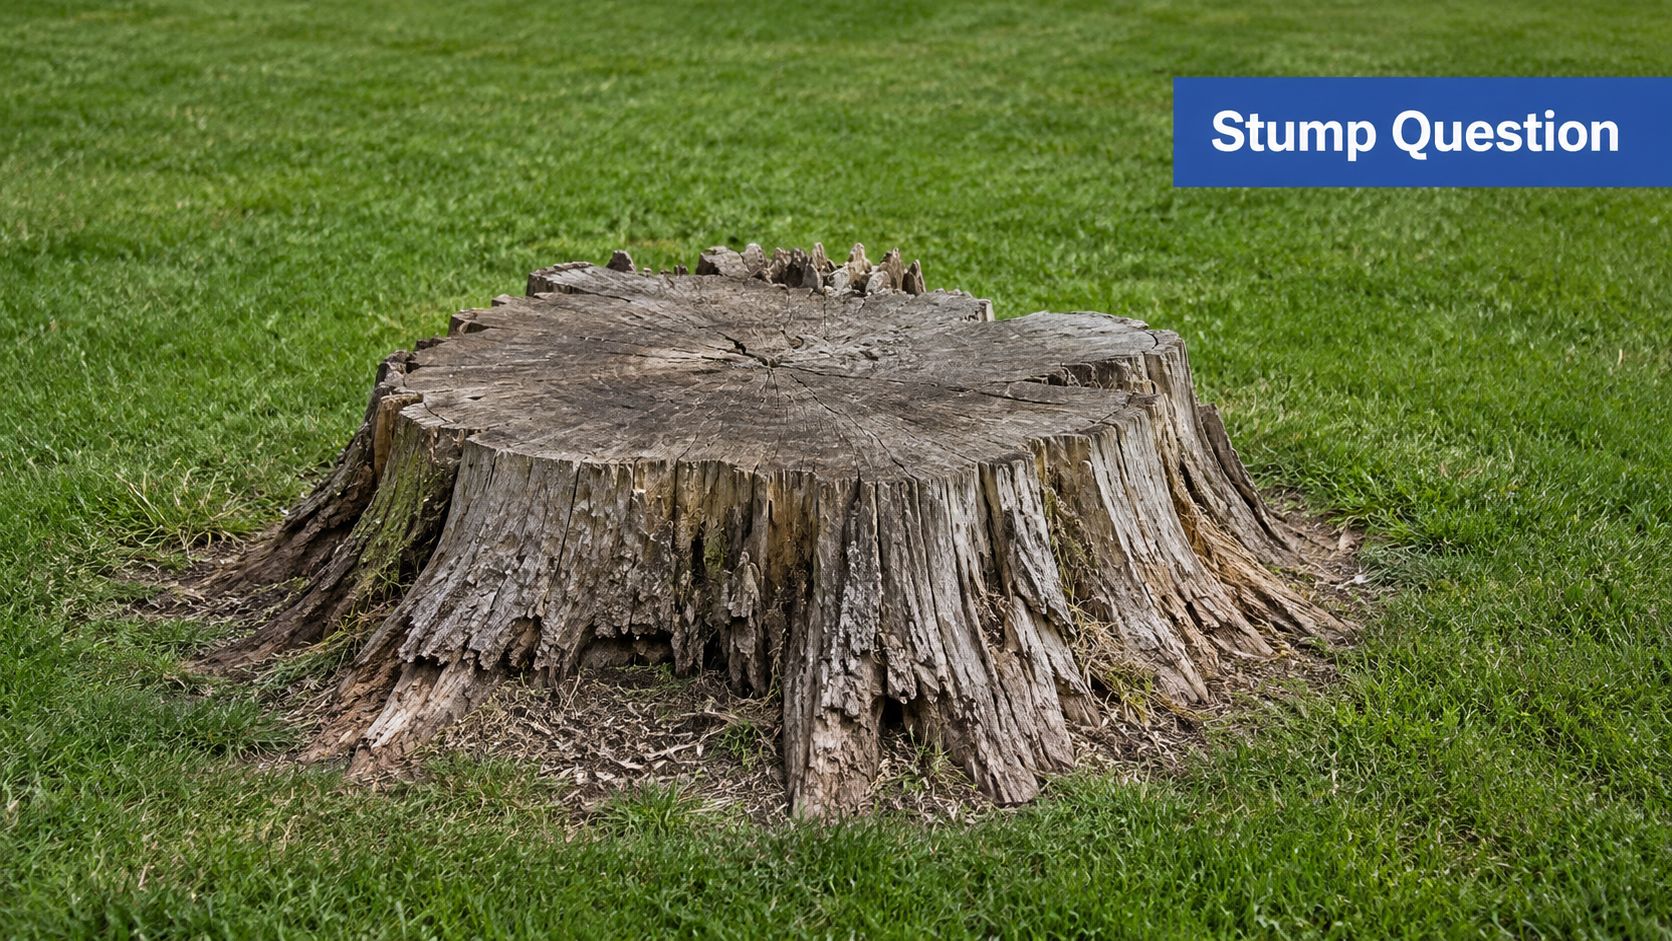
Before you think about fuel or tools, it helps to look at the stump itself. A fresh stump with damp interior wood, buried roots, and tight soil around the base is a different job from an older stump that's been exposed, drying, and starting to break down. If you've already been dealing with overgrown landscaping, timing your tree work correctly matters because the condition of the stump after removal affects what comes next.
When burning makes sense
Burning a stump is most realistic when the stump sits away from structures, fences, irrigation lines, decorative gravel borders, and low tree canopies. It also helps when the stump is already somewhat dry and you have room to clear around it.
A homeowner with patience can sometimes use burning to reduce a stump enough that the remaining cleanup is manageable with hand tools. That's the key point. Burning usually works best as a reduction method, not as a magic trick that makes every trace disappear.
When it probably doesn't
Some yards in the Valley just aren't good candidates for open burning.
- Tight lot lines: If neighbors are close, smoke and fire control become harder to manage.
- Rock-heavy desert landscaping: Heat can spread into roots, buried organics, or nearby material you can't fully inspect.
- HOA-governed communities: Even if city rules allow some burning, neighborhood rules may still prohibit it.
- Freshly cut stumps: Moisture is the enemy of a sustained burn.
Practical rule: If the stump sits where one mistake could scorch block walls, gravel beds, irrigation equipment, or a neighbor's yard, burning isn't the first method I'd choose.
Arizona homeowners also need to think beyond the stump itself. In a dry climate, a project like this affects the whole property. Smoke residue, ash, and blown debris can settle on windows, screens, patios, and exterior walls fast. That's part of why stump work should be treated like serious property maintenance, not a casual weekend fire.
Before You Strike a Match Check Local Rules and Safety
In Arizona, legality comes first. Technique comes second.
Phoenix, Scottsdale, and Chandler don't all treat outdoor burning the same way, and conditions can change with weather alerts, seasonal restrictions, and air-quality rules. If you're considering burning a stump, call or check the current guidance from your city fire department or municipal authority before you prep the site. Don't rely on what a neighbor did last year.
What to verify before any prep work
Start with a short checklist and get real answers.
- City permission: Ask whether residential open burning is allowed for stump removal in your area.
- County and air rules: Some locations restrict smoke-producing burns even on private property.
- HOA limitations: Communities in Scottsdale and Paradise Valley often have stricter standards than city code alone.
- Day-of conditions: If wind is up or fire restrictions are active, postpone.
A good parallel is backyard fire feature planning. If you want a practical read on safe outdoor fire pit practices, that guidance reinforces the same common-sense principle. Small outdoor fires still demand site control, weather awareness, and clearances.
Build your fire control zone first
One of the most useful hard rules for this job comes from field guidance. For safety and fire control, experts recommend a 1–2 m radius of bare mineral soil around the stump, with wet downwind barriers and a ready water or soil suppressant; this reduces the risk of fire escape to near zero in controlled trials when combined with wind-speed limits below 15 km/h and no active drought restrictions according to Lineage Tree Care's stump burning guidance.
That means scraping away mulch, leaves, bark, dry grass, and decorative debris until you're down to non-burnable ground. In Arizona, that often means exposed soil rather than just raking gravel smooth and calling it good.
Skip the idea that a garden hose somewhere nearby is enough. For this project, hose, shovel, and suppression material should already be in place before ignition.
Treat this like part of property maintenance
A stump burn isn't separate from the rest of your exterior upkeep. It's one item in a larger safety routine. If you already use a seasonal exterior checklist, adding checks for overgrowth, dead wood, ignition sources, and access paths is smart. A broader annual home maintenance checklist helps frame stump removal as part of responsible ownership instead of a one-off fix.
If you can't confidently answer the legal questions and set a clean control perimeter, stop there. That's usually the point where insured professionals earn their keep.
Essential Tools and Materials for Burning a Stump
A controlled stump burn depends more on preparation than flame. The right setup creates oxygen flow, internal heat, and a manageable work area. The wrong setup creates smoke, surface charring, and a half-burned stump that still needs removal.
Prep tools that make the burn possible
You need tools that open the stump up, not just tools that start a fire.
- Heavy-duty drill and large bit: Use a drill with enough torque to bore repeated deep holes into dense wood. A wide wood-boring bit helps create airflow channels and treatment paths.
- Digging shovel and mattock: These expose the root flare and scrape soil away from the stump base. If the root crown stays buried, the burn usually stalls at the surface.
- Steel rake: Useful for pulling back dry debris and maintaining your cleared perimeter during the burn.
- Pry bar: Handy for breaking out weakened sections after the burn cools.
Materials that support a steady burn
A lot of DIY attempts often go sideways. People try to substitute speed for heat management.
A potassium nitrate stump treatment is commonly used to help dry and condition the stump internally before ignition. It isn't an excuse to skip prep. It works best when the stump has been drilled and given time to absorb treatment.
For the actual burn, use charcoal briquettes or lump charcoal and dry scrap wood. Charcoal gives you a more stable heat source than a quick-flash fuel. Dry, resin-rich kindling and split wood help establish a deeper, longer-lasting fire.
Gasoline is not a stump-removal tool. It flashes, spreads risk, and doesn't solve the real problem, which is sustained internal combustion.
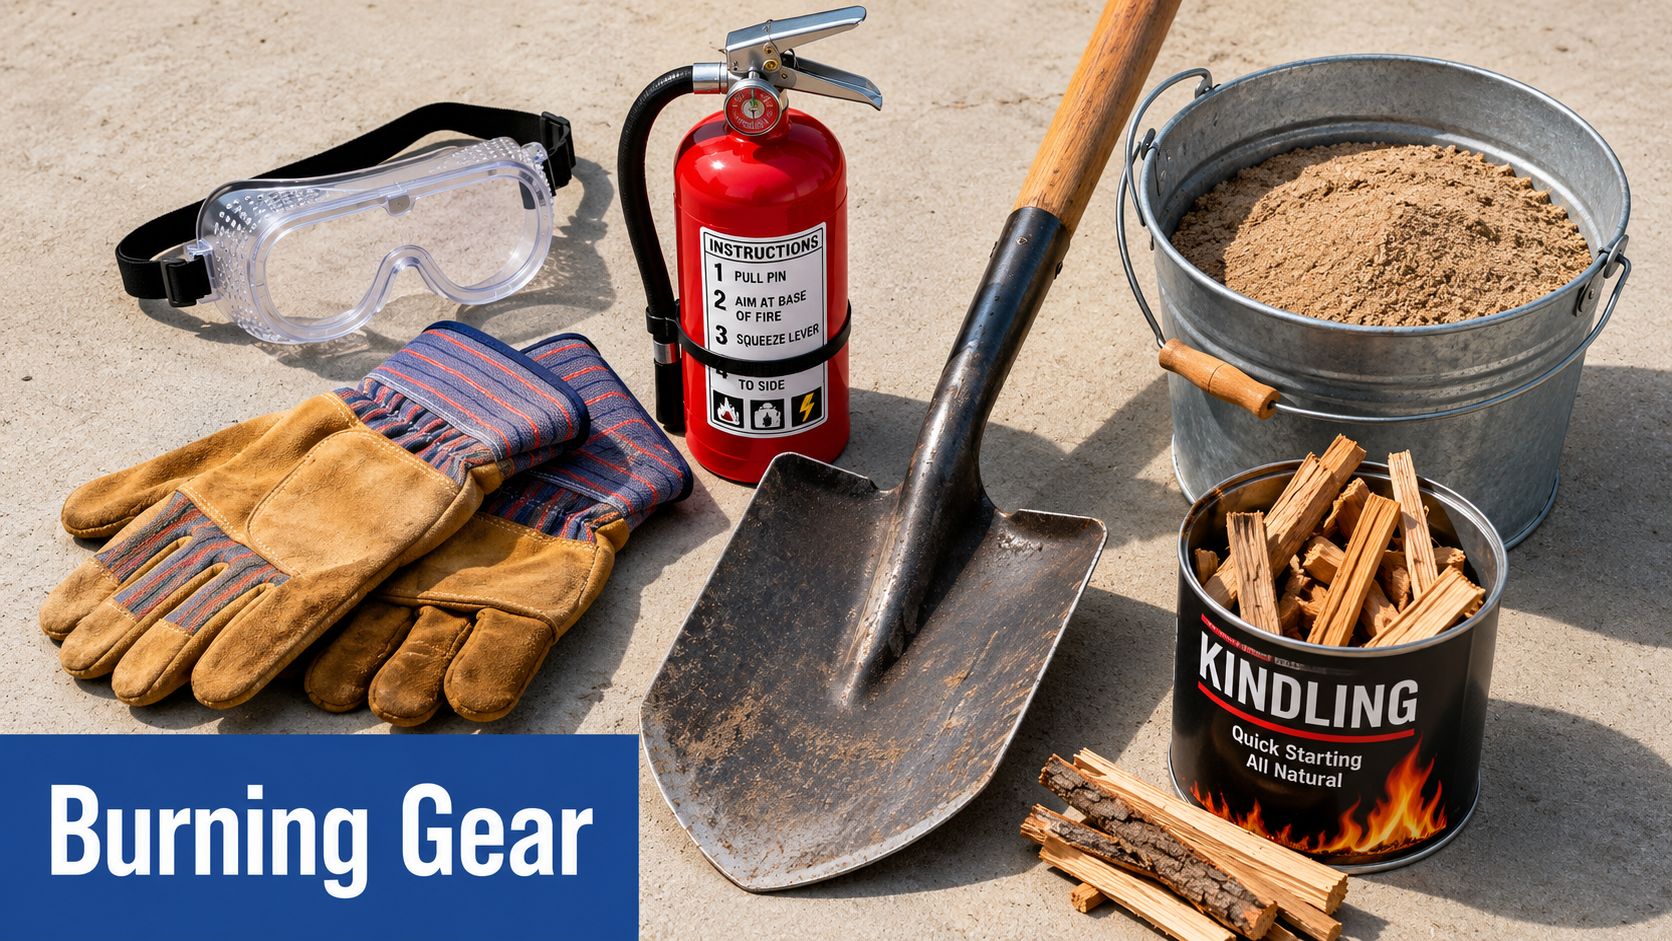
Safety gear and containment equipment
This is the gear I'd consider essential:
- Leather gloves: Better for handling hot tools, rough bark, and metal buckets.
- Safety glasses: Drilling and ash cleanup both throw debris.
- Long sleeves and durable work pants: Sparks and hot embers don't care whether the burn is "mostly done."
- Charged garden hose: Kept stretched out and pressurized, not coiled against the house.
- Shovel and buckets of soil: Fast for smothering edge flare-ups around roots.
- Fire extinguisher: A useful backup, especially near walls, fencing, or equipment.
What not to bring to the job
A short list matters here too.
| Avoid | Why it causes problems |
|---|---|
| Gasoline or ethanol | They create flash risk and poor sustained heat |
| Plastic sheeting | Heat damage and toxic fumes |
| Random household trash as fuel | Unpredictable smoke and residue |
| Lightweight gloves | Poor hand protection around heat and splinters |
If you're missing half the list and hoping to improvise the rest, pause. Burning a stump is one of those jobs where "close enough" usually leads to extra cleanup.
A Controlled Burn How to Burn a Stump Safely
Control wins this job. Heat, oxygen, and patience matter more than drama.
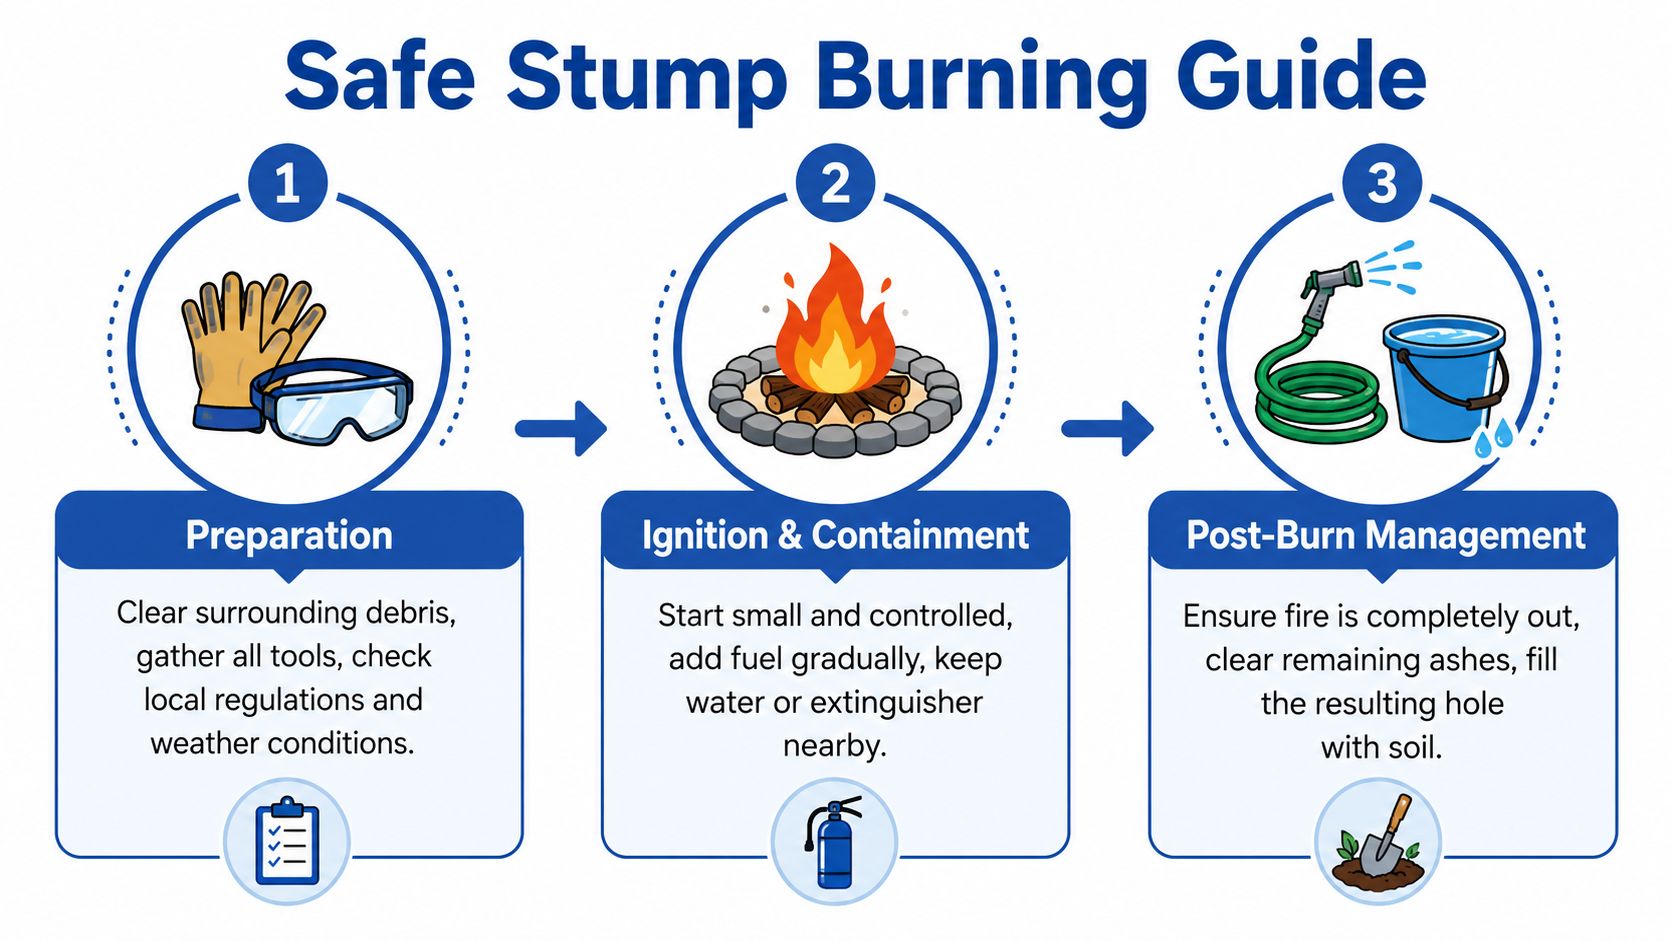
Prepare the stump for an internal burn
According to Angi's stump burning guide, the process begins by drilling multiple 25–30 mm diameter holes at 30–45° angles through the stump to about 200–250 mm depth. Success rates rise above 80% when pre-treated with potassium nitrate. A well-constructed stump fire can reach 600–800°C at the root collar, sustaining temperatures long enough to mineralize most root wood within 2–4 days.
Those details matter because they show what a successful burn requires. You're not trying to blacken the top. You're trying to get heat and oxygen down into the stump body and major roots.
Dig around the base enough to expose the root flare. Brush loose soil away from every place you expect flame to work. Then drill from the top and, where practical, from the side into larger root sections. Angle the holes so air and treatment can move inward rather than pooling at the surface.
Use a slow, hot fuel setup
Once the stump is prepared and any treatment has had time to work, build your fire around steady heat.
Create a charcoal bed around and partly under the exposed root crown. Then stack dry wood in a tent or chimney arrangement that encourages upward draft. This layout helps pull air through the drilled channels and keep combustion active below the surface.
Here's a visual walkthrough before you start tending a live burn:
A weak, smoky fire means the setup needs adjustment. Usually that points to damp wood, blocked airflow, too much surrounding soil, or fuel placed in a way that smothers the core.
Tend the fire instead of chasing flames
This part takes discipline. Don't keep throwing wood on top because the surface looks active. Watch whether the burn is settling inward.
Use a poker or shovel to reopen airflow paths as outer wood collapses. Add charcoal or dry wood gradually. Keep the perimeter clear, and watch the downwind side for drifting embers.
A practical burn sequence often looks like this:
- Expose and drill: Open the stump to air and create angled burn channels.
- Pre-treat if you're using potassium nitrate: Let the product do its work before ignition.
- Build a charcoal base: Start with stable heat, not a splashy flame.
- Add dry wood in a draft-friendly shape: Aim for chimney effect.
- Monitor continuously: Check heat, root flare activity, and perimeter conditions.
- Break down cooled remnants later: Don't rush ash removal while hidden heat is still present.
If the stump is only glowing on top and stays solid underneath, the fire isn't doing the real work yet.
Shut down carefully
When the main burn finishes, don't assume the job is over. Buried roots can hold heat long after visible flame is gone. Drench, stir, and check again. Then come back later and check once more.
That's especially important in Arizona yards with rock beds, dry organic material, and irrigation trenches nearby. A burn that looks finished at sunset can still hide heat where you can't see it.
When Burning Is Not the Best Option
Some stumps shouldn't be burned. Others can be burned, but still shouldn't be.
That distinction matters. A method can be possible and still be the wrong choice for your yard, your schedule, or your risk tolerance.
Why burning disappoints many DIY attempts
The biggest misconception is that flame equals removal. It doesn't.
The University of Illinois notes that direct open burning of in-ground tree stumps is often unsuccessful unless the wood is properly dried and treated. In one commonly cited scenario, stump-burning attempts on untreated, soil-embedded stumps failed to produce a sustained burn in more than half of observed cases, which is one reason many arborists prefer grinding or excavation in practice, as described in this University of Illinois stump removal article.
That lines up with what many property owners find out the hard way. They get smoke, char, and a weekend of babysitting, then still need to dig or grind what's left.
Better alternatives for many Arizona properties
If you're comparing methods, here's the practical view:
| Method | Best for | Main drawback |
|---|---|---|
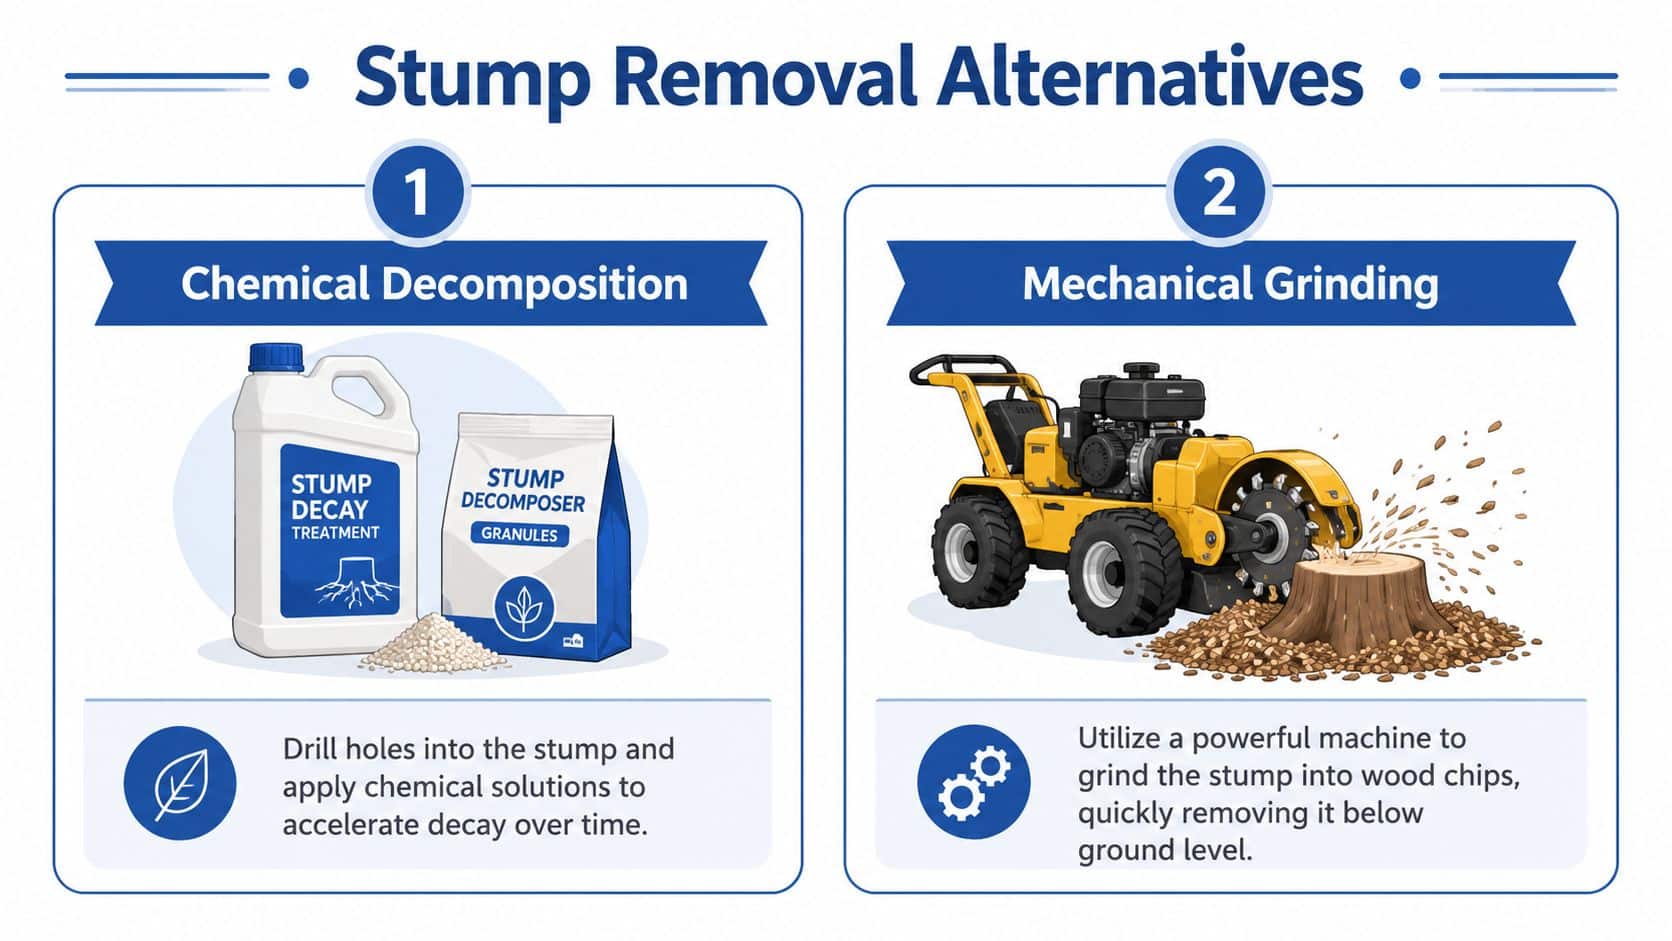
| Chemical decomposition | Homeowners who aren't in a rush | Slow process and unfinished look during decay |
| Mechanical grinding | Fast, clean removal with a professional finish | Usually needs specialized equipment |
| Excavation | Large removals or major landscape changes | More disruption to yard and hardscape |
| Leaving the stump in place temporarily | Low-traffic areas and phased projects | Doesn't solve appearance or mowing issues |
Chemical decay can work when you can tolerate a longer timeline and want to avoid open flame. Mechanical grinding is often the cleanest answer if appearance matters and access allows the machine in.
DIY versus pro
A handy homeowner can handle a lot of exterior work. But stump removal sits in the category where the finish quality depends heavily on tools, site judgment, and experience.
That's similar to other exterior tasks. A person can climb a ladder and clean one pane of glass. Getting a whole property thoroughly clean, safely and consistently, is a different standard. The same logic applies to stumps, especially near patios, walls, irrigation lines, storefront landscaping, or visible front-yard focal points.
If your project also includes dead branches, pest issues, or cleanup around rooflines and facades, it may be worth reviewing related exterior concerns such as bird nest removal around the home while you're planning the broader property reset.
A stump is easy to underestimate because it looks stationary and harmless. Removal gets complicated the moment roots, heat, smoke, or nearby structures enter the equation.
Final Steps for a Clean and Safe Property
Once the stump is gone or reduced enough to remove, finish the site properly. Shovel out loose ash, check for lingering heat, break out any brittle remnants, and backfill the depression with clean soil. If you leave a low spot, water will find it later.
Clean up the area like the job isn't over
The last part of burning a stump is housekeeping.
- Inspect nearby surfaces: Ash and soot can settle on walls, pavers, windows, and outdoor furniture.
- Check irrigation and edging: Heat and digging sometimes disturb lines, emitters, or yard borders.
- Restore curb appeal: Rake the area, refill the hole, and make the yard look intentional again.
A lot of homeowners focus on getting the stump out and forget the visual aftermath. Burn residue on masonry, dusty windows, and dirty screens can make the property look rough even after the hazard is gone. That's why broader exterior cleanup matters, especially in the Valley's dusty conditions. If you're refreshing the whole outside of the home, a guide on the best way to clean a house exterior can help you finish the project the right way.
Burning a stump can work when the stump is suitable, the site is controlled, and local rules allow it. But it isn't a casual backyard fire. In Arizona, good judgment matters as much as the burn method itself.
If you've cleaned up a stump and want the rest of the property to match, South Mountain Window Cleaning, LLC can help bring the whole exterior back into shape. The team provides residential, commercial, and high rise window washing services in Phoenix, Scottsdale, Paradise Valley, Chandler, Tempe, Gilbert, Arizona, along with exterior cleaning that helps homes and businesses look polished after dusty seasons, property improvement projects, and routine wear.