

The absolute best way to clean your windows at home comes down to three simple things: a professional-grade squeegee, a basic cleaning solution, and the right top-to-bottom technique.
If you take away only one thing, let it be this: using a squeegee with a fresh rubber blade is the single most important factor in getting that perfect, streak-free finish. It beats paper towels or old rags every single time, cleanly pulling all the dirt and solution right off the glass.
Achieving a Professional Streak-Free Shine

Staring through grimy windows can make even the most beautiful Arizona day feel a little dull. At South Mountain Window Cleaning, we get it. The endless fight against dust, hard water spots, and fingerprints is frustrating and often leaves you with a streaky mess for all your hard work. We're here to cut through the confusion and show you a proven method for that professional, streak-free look.
Forget the myths you've heard and the frustrating methods that just don't work. Think of this guide as your complete roadmap, covering everything from the exact tools our Phoenix-based professionals rely on to the simple, effective cleaning solutions you can mix up yourself.
The secret to a perfect shine isn't some expensive, complicated chemical. It's all about using the right tools—mostly a high-quality squeegee—and mastering the proper technique to get every last bit of water and grime off the glass.
Before you can achieve that flawless finish, you need the right setup. The table below breaks down the must-have components that separate an amateur job from a professional one.
Core Elements for Flawless Window Cleaning
| Component | Professional Recommendation | Why It Matters |
|---|---|---|
| Cleaning Tool | Professional-grade squeegee with a fresh rubber blade | This is non-negotiable for a streak-free finish. It removes water completely, which is the root cause of streaks. |
| Cleaning Solution | Simple mix: water, a few drops of dish soap, and maybe a splash of white vinegar | Harsh chemicals can leave residue and damage window seals over time. Simple is almost always better. |
| Absorbent Cloths | High-quality microfiber towels | Perfect for wiping the squeegee blade between passes and detailing the edges and sills without leaving lint behind. |
| Scrubber | A dedicated strip washer or a soft sponge | Effectively agitates and lifts dirt from the glass before you use the squeegee, preventing scratches and ensuring a deeper clean. |
Having these core items on hand is the first real step toward making your windows look like they were cleaned by a pro.
Your Path to Crystal-Clear Windows
This guide will walk you through the entire process for both inside and outside panes, helping you make every window in your home sparkle. Our team at South Mountain Window Cleaning will get you set up for success with techniques that deliver amazing results without the usual headache.
You’ll get a clear understanding of:
- Essential Tools: What you actually need for a professional result and what you can safely skip.
- Effective Solutions: Simple DIY mixes that cut through grime without leaving that annoying film behind.
- Proven Techniques: The specific methods we use in the field to avoid streaks and smudges every time.
- Complete Care: How to tackle screens, tracks, and stubborn stains for a truly finished job.
Whether you're in Scottsdale dealing with post-monsoon dirt or in Paradise Valley fighting hard water spots, these principles will work for you. Let's get started by gathering the right gear.
Choosing Your Window Cleaning Tools and Solutions
Using the wrong gear is a fast track to streaks, frustration, and wasted time under the hot Arizona sun. The best way to get your home windows truly clean starts with building a toolkit that looks a lot like what our professional team uses. So, you can forget the paper towels and that spray bottle of blue liquid; a few key items will completely change your results.
The single most important item in your arsenal is a high-quality squeegee. This isn't just a suggestion—it's the secret to a flawless, streak-free finish. Seriously. A cheap, flimsy squeegee or one with a nicked rubber blade is almost always the culprit behind those annoying lines left on the glass. Investing in a good one pays for itself the very first time you use it.
Assembling Your Pro-Level Toolkit
Beyond the squeegee, a few other pieces of equipment work together to make the job faster and much more effective. You don't need a truck full of gear, but you do need the right things.
A microfiber strip washer (sometimes called a scrubber or wand) is way better than a simple sponge or rag. Its design holds a ton of cleaning solution, letting you soap up the whole window evenly without messy drips running down the wall. This ensures the entire pane is wet and properly lubricated for the squeegee.
You will also need:
- Two Buckets: One bucket is for your cleaning solution, and the second is for clean rinse water. Dipping your dirty washer back into your main solution just contaminates it, spreading grime from one window to the next. A two-bucket system is a simple trick that keeps everything clean.
- Microfiber Towels: Have a good stack of clean, dry ones ready to go. You'll need one for wiping your squeegee blade after every single pull and a few more for detailing the edges of the glass and wiping down the sills. Their absorbency and lint-free nature are perfect for this final touch.
This simple setup—squeegee, washer, two buckets, and towels—is the foundation for a perfect clean. It's the same basic kit we rely on for residential and commercial jobs across the Phoenix area every single day.
Selecting the Right Cleaning Solution
Now that your hardware is ready, let's talk about what goes in the bucket. Many people assume a powerful, harsh chemical is necessary, but the opposite is often true. Simple, gentle solutions are incredibly effective.
For most routine cleaning, a homemade solution is all you'll ever need.
A simple mixture of cool water with a few drops of basic dish soap (like Dawn) is a potent degreaser. Add a small splash of white vinegar to help cut through mineral deposits from our hard Arizona water, and you have a professional-strength solution.
This DIY recipe works so well because it provides the lubrication your squeegee blade needs to glide smoothly. It has just enough cleaning power to lift dirt without leaving behind a sticky film that just attracts more dust.
Of course, some situations call for something a little more powerful. For homes in areas like Scottsdale or Phoenix that battle intense sun and dust, grime can get baked right onto the glass. If you're facing years of buildup or stubborn hard water stains, a professional-grade glass cleaning concentrate can be a worthwhile upgrade. These products are formulated to tackle the specific challenges we see in our climate.
Understanding when a simple DIY mix will do and when you need a commercial concentrate is a key part of the process. If you want a deeper dive into what the experts use and why, you can learn more about what professional window cleaners use to get consistent, high-quality results. This knowledge helps you decide when to stick with the basics and when to bring in more specialized products for tougher jobs, ensuring you always have the right solution for the task at hand.
Mastering the Professional Squeegee Method
Got your tools and solution ready? Good. Now you're ready to learn the technique that really separates the pros from the amateurs. Getting that perfect, streak-free finish means moving beyond a simple wipe-on, wipe-off approach, and it all comes down to the professional squeegee method. This is where the magic really happens.
Honestly, this process turns window cleaning from a frustrating chore into a pretty satisfying skill. It's not about scrubbing hard or moving fast; it’s about a deliberate, practiced set of motions that leave nothing behind but sparkling, clear glass. Think of it less like mopping a floor and more like laying down a perfect coat of paint—consistency is your best friend here.
Prepare the Area Before Touching the Glass
One of the most common mistakes we see is people jumping right into cleaning the glass. But the best way to clean your home windows starts with a crucial first step: always clean the frames, sills, and tracks before you even think about the glass.
Picture this: you've just spent ten minutes getting a large picture window absolutely perfect. Then, as you finish, you accidentally drag your squeegee or cloth across the dirty top frame, smearing a line of black grime right across your work. All that effort, instantly wasted.
By wiping these surrounding areas first with a damp microfiber cloth, you completely eliminate that risk. You’re essentially creating a clean workspace, making sure no loose dust or dirt gets dragged onto your freshly washed pane. This one simple habit will save you a massive amount of time and frustration.
This infographic breaks down the essential toolkit that makes the professional method possible.
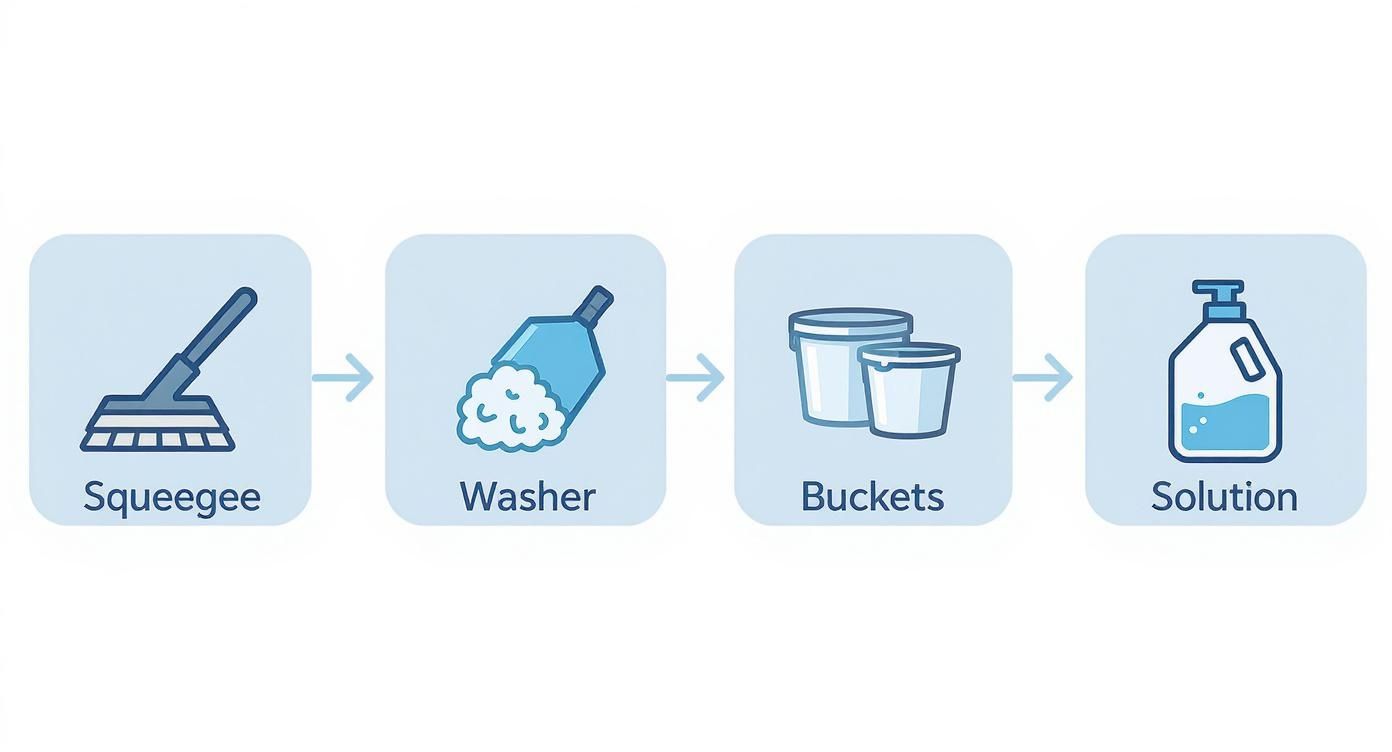
This visual guide shows the core tools—squeegee, washer, buckets, and solution—that all work together to give you that flawless result.
Applying Your Solution the Right Way
With the frames clean, it's time to get the glass wet. Your strip washer is the tool for the job. Dunk it into your bucket of soapy water, then wring out just enough of the excess so it’s saturated but not dripping all over the place.
Apply the solution to the glass using broad, overlapping strokes. The goal is to get complete, even coverage so the entire surface is wet. This does two critical things: it starts breaking down all the dirt, and it provides the lubrication your squeegee needs to glide smoothly without skipping or chattering.
A well-lubricated surface is non-negotiable for a streak-free finish. If the glass isn't wet enough, the squeegee blade will drag and judder, leaving behind ugly lines and streaks no matter how good your technique is.
For really grimy windows, especially exterior ones in dusty areas like Chandler or Gilbert, don't be shy about scrubbing a bit. Just work the strip washer in gentle circles to agitate any stubborn spots before you pull out the squeegee.
Mastering Squeegee Control and Pressure
Now for the squeegee itself. How you hold it and move it is the make-or-break part of the whole process. You want a firm but relaxed grip that allows for smooth, fluid movement.
The angle of the blade is everything. You need to maintain a consistent 45-degree angle to the glass. Too steep (closer to 90 degrees), and the blade will chatter. Too shallow (almost flat), and it will just skim over the water instead of clearing it.
Pressure is just as important. You don't need to jam the squeegee against the window; just apply light, consistent pressure and let the tool do the work. You're aiming to create a clean, crisp seal between the rubber blade and the glass.
Learning the Essential Squeegee Strokes
Pros generally stick to two main techniques, depending on the window.
- The Straight Pull: This is the easiest method and is perfect for smaller panes. Start at a top corner, overlap the dry edge by about an inch, and pull the squeegee straight down in one smooth, continuous motion.
- The S-Stroke (or Fanning): For bigger panes like sliding glass doors, this is the way to go. It’s a more efficient technique where you move the squeegee back and forth across the glass in an 'S' pattern, cleaning the whole surface without ever lifting the blade.
No matter which method you use, here’s the most important habit to build: wipe your squeegee blade with a clean, dry microfiber cloth after every single pass. This tiny step is what truly separates an amateur job from a professional one. It stops you from dragging dirty water back onto the clean glass, which is the number one cause of streaks.
Once the main glass is squeegeed, grab another clean microfiber cloth to "detail" the window. This just means carefully wiping the very edges of the pane where little beads of water tend to collect. It’s the final touch that ensures a perfectly clean and dry finish. If you want to see these moves in action, our guide on how to clean windows like a pro offers a deeper dive. It takes a little practice, but the flawless results are worth it.
Cleaning Window Screens, Tracks, and Tough Stains
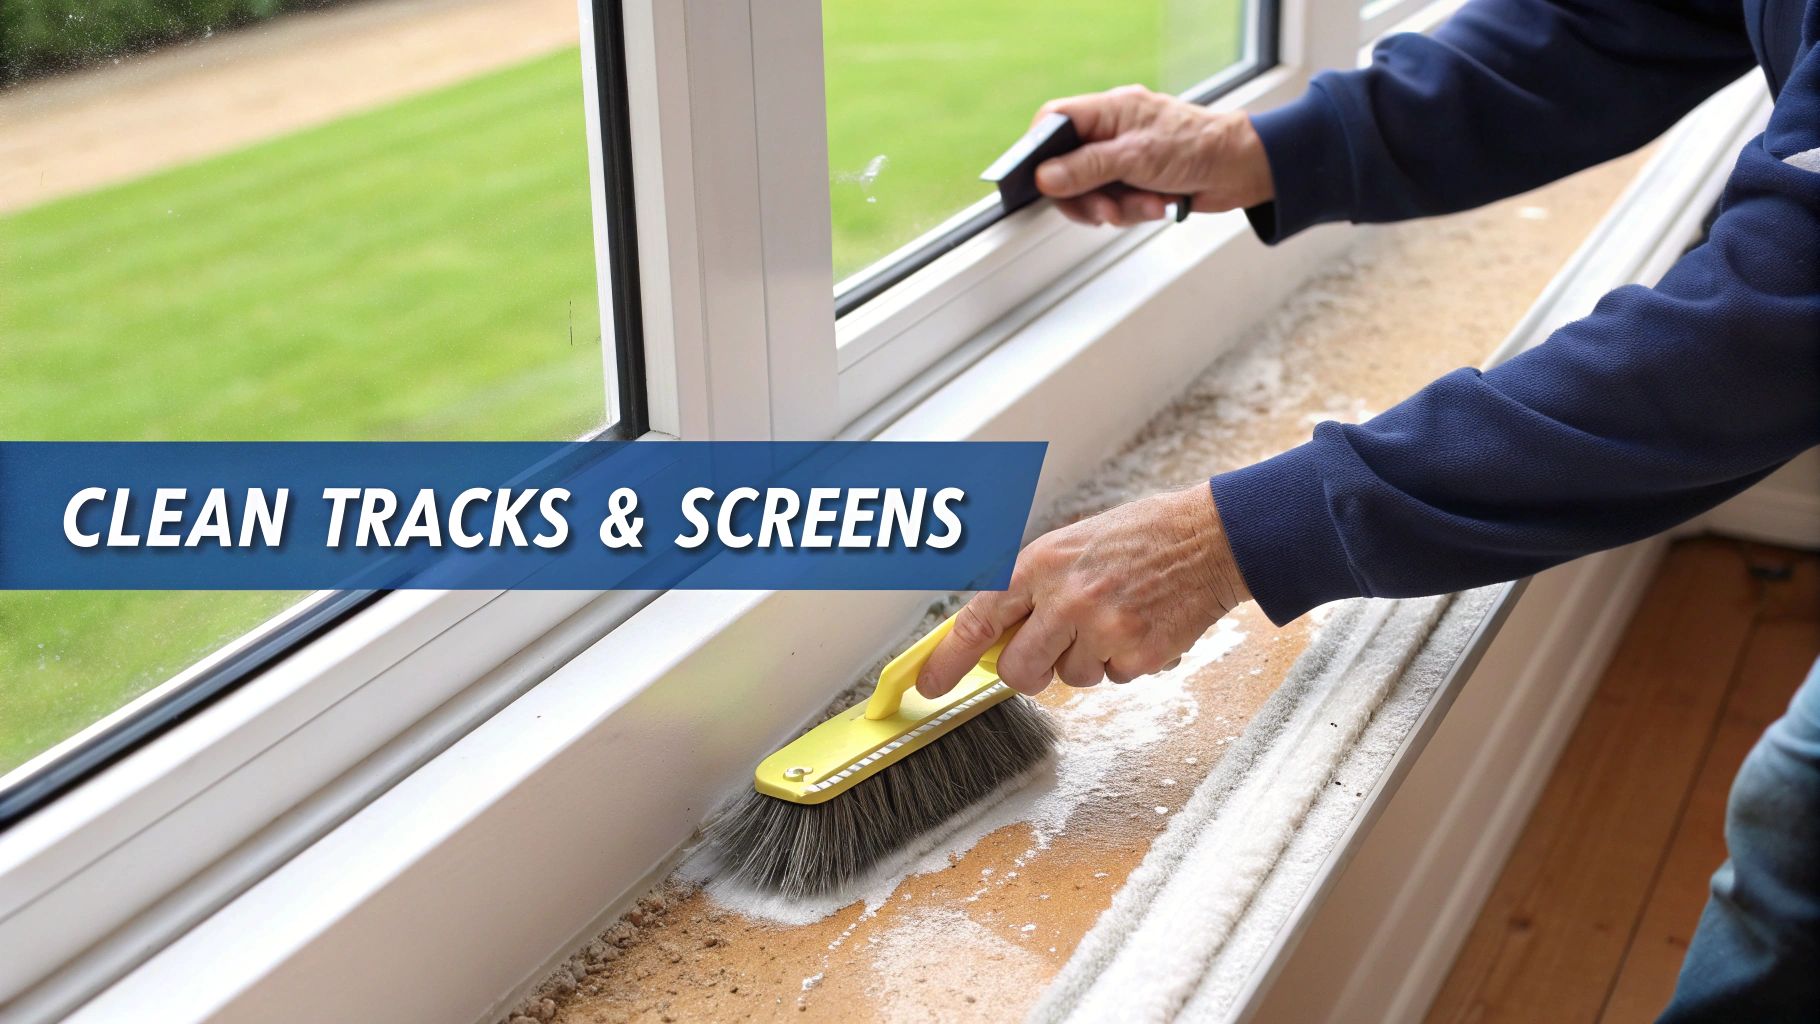
A truly clean window is more than just sparkling glass. It’s all in the details—the screens, the tracks, the sills. Overlooking them is kind of like washing your car but leaving the tires caked in mud; it just feels incomplete.
Here in Arizona, our window screens and tracks take a serious beating from dust, monsoon storms, and that relentless sun. Cleaning them isn't just an extra step; it's a critical part of the job that keeps your freshly cleaned glass from getting dirty the second you open a window.
Tackling Dusty Window Screens
Think of your window screens as the first line of defense against dust and pests. Naturally, they get pretty grimy. The good news is, cleaning them is usually easier than you'd expect and makes a huge difference in your home's air quality and the view.
For a light touch-up, you can often get away with just removing the screen and giving both sides a quick wipe with a damp microfiber cloth. That’s usually enough to handle a fresh layer of dust.
When the screens have seen better days, though, they'll need a deeper clean.
- Pop the Screen Out: Carefully remove the screen from the window frame and find a good spot to work outside, like on your driveway or patio.
- Give It a Gentle Rinse: Use a garden hose on a low-pressure setting. You're just trying to rinse away loose dust and debris, not blast a hole in the mesh.
- Scrub with Soapy Water: Mix a few drops of dish soap into some water. Grab a soft-bristle brush and gently scrub both sides, working from top to bottom.
- Rinse It Clean: Use the hose to thoroughly rinse off all the soap residue. You don't want any film left behind.
- Let It Air Dry: The final, crucial step. Stand the screen up against a wall or fence and let it dry completely before putting it back. A wet screen can lead to mildew issues.
If you want a more detailed guide, we put together a complete walkthrough on how to clean window screens to get them looking brand new.
Clearing Out Gritty Window Tracks
Window tracks are magnets for grit, dead bugs, and all sorts of other gunk. Cleaning them out doesn't just look better—it helps your windows slide open and shut smoothly.
Our go-to method is a simple two-part process. First, we grab a vacuum with a crevice tool and suck up all the loose stuff. Seriously, this does about 80% of the work in just a few seconds.
After vacuuming, we spritz a little all-purpose cleaner into the track, use an old toothbrush to scrub into the corners and loosen up any caked-on grime, then wipe it all clean with a paper towel. It leaves a perfectly spotless finish.
Removing Stubborn Stains and Blemishes
Even after the glass is clean, you might notice a few stubborn spots that just won't budge. These require a more targeted approach. If you find your screens and tracks are constantly caked in dust, it’s worth understanding the causes of house dust and easy fixes to tackle the problem at its source.
The key to removing tough spots is to use the least aggressive method first. Always test a small, inconspicuous area to ensure the method won't scratch or damage the glass.
- Hard Water Spots: Those chalky white deposits are a common headache here in Phoenix and Paradise Valley. A 50/50 mix of white vinegar and water often does the trick. Just apply it, let it sit for a few minutes to dissolve the minerals, and wipe away. For really tough cases, you might need a specialized hard water stain remover.
- Paint Splatter: Little specks of latex paint can usually be removed with a new, sharp razor blade. The secret is to hold it at a 45-degree angle and always wet the glass first. This lubricates the surface and helps prevent scratches.
- Adhesive and Sticker Residue: For that sticky stuff left behind by tape or old stickers, rubbing alcohol or a citrus-based cleaner on a cloth works wonders. Let it sit for a moment to break down the adhesive, and it should wipe right off.
By paying attention to these details, you're ensuring every part of your window—from the screen to the tracks to the glass itself—is impeccably clean.
When to Call in a Professional Window Cleaning Service
Mastering the DIY squeegee method is a fantastic feeling, but let's be honest—sometimes the best tool for the job is your phone. Knowing when a window cleaning project is beyond your reach, either literally or skill-wise, is key. It's about protecting yourself and getting those truly flawless results your home deserves.
For homeowners here in Phoenix, Scottsdale, and across the Valley, some challenges just make calling an insured team like South Mountain Window Cleaning the smartest play.
The Safety Factor: High and Awkward Windows
This is the big one. The most obvious reason to hire a pro is for windows that are tough or downright dangerous to get to. We're talking about second-story windows, skylights, or that beautiful pane of glass high up in a stairwell.
Trying to juggle a bucket, a squeegee, and your balance on an extension ladder is a recipe for disaster. Professional technicians live and breathe ladder safety. They often use specialized gear like water-fed poles to clean high windows safely from the ground. Plus, they carry the right insurance, which protects you from any liability if an accident were to happen. Your safety is not worth the risk just to save a few bucks.
When You’re Facing Stubborn Buildup
Sometimes the problem isn't how high the window is, but how stubborn the grime is. The Arizona climate can be especially tough on glass, leaving behind problems that your bottle of Windex just can't handle.
It's probably time to call for backup when you're dealing with:
- Severe Hard Water Staining: That chalky, white film from our local water can actually etch itself into the glass over time. Professionals have access to special compounds and polishing equipment to safely buff these stains out without scratching the pane.
- Post-Construction Mess: Just finished a remodel? Your windows are likely covered in paint overspray, silicone, or a film of construction dust. This stuff requires very specific techniques to remove without causing permanent damage.
- Years of Neglect: If it’s been a while, the dirt, dust, and pollen can bond to the glass, forming a thick layer of grime. A professional crew has the experience—and stronger, yet glass-safe, solutions—to cut through it efficiently and restore that clarity.
More and more homeowners are choosing to go the professional route. The window cleaners market, which covers both products and services, was valued at around USD 2.68 billion in 2023 and is expected to more than double by 2031. This just shows the growing demand for professional results.
The Value of Your Time and Professional Efficiency
At the end of the day, it often comes down to simple efficiency. A professional team can clean every single window in your home in a fraction of the time it would take the average homeowner. They show up with every tool they need, a proven system, and the experience to work quickly without cutting corners.
Understanding what a professional window cleaning includes really highlights the value you get—from screen and track cleaning to a guaranteed streak-free shine.
If you decide professional help is the way to go, it's important to choose a company you can trust. For some general pointers, you can learn more about how to find a reputable home service company. When you hire a team like South Mountain Window Cleaning, you’re not just paying for clean glass. You’re buying back your weekend and getting the peace of mind that the job will be done right the first time.
Answering Your Top Window Cleaning Questions
To wrap things up, let's tackle a few of the most common questions we get from homeowners around Phoenix. Getting these details right is what separates a decent job from a perfect, crystal-clear view you can be proud of.
Even when you feel like you've done everything right, some little frustrations can pop up. Knowing why they happen is the key to fixing them for good.
How Often Should I Clean My Windows in Arizona?
For most homes in places like Phoenix or Chandler, a good rule of thumb is to clean your exterior windows twice a year. This keeps the typical dust and grime from building up too much.
But, as we all know, our climate here is a bit unique. The spring windy season and our summer monsoons can leave a serious film of dirt on the glass. Because of that, a lot of Arizona homeowners find a quarterly cleaning schedule is the sweet spot. It keeps the view pristine and stops that heavy, caked-on gunk from ever taking hold.
Your inside windows are a different story. They're protected from the elements, so a deep clean once a year is usually plenty. The main exception? If you have kids or pets, you'll probably be spot-cleaning those little fingerprints and nose smudges a lot more often.
Is It Better to Clean Windows on a Sunny or Cloudy Day?
This one goes against what most people think, but an overcast day is always the better choice for washing windows. It might seem like bright sun would help you see the dirt, but it's actually working against you.
The intense Arizona sun heats up the glass like an oven, making your cleaning solution evaporate in seconds. That's the #1 cause of streaks and residue—the water and soap dry before you have a chance to squeegee it off properly.
A cool, overcast day is your best friend. It keeps the glass temperature down, giving you plenty of time to apply your solution, scrub away the grime, and squeegee everything off for a flawless finish without feeling like you're in a race.
Why Am I Still Getting Streaks After Cleaning?
Streaks are the absolute worst, aren't they? The good news is they’re almost always caused by a few simple, fixable mistakes. If you're still seeing lines after you've finished, just run through this mental checklist.
Here are the usual suspects:
- A Worn-Out Squeegee Blade: That little strip of rubber is the most critical part of your kit. If it's old, nicked, or has lost its sharp edge, it's pretty much guaranteed to leave lines. A fresh blade is a small price to pay for a huge difference in results.
- Not Using Enough Solution: You need that glass to be nice and wet. This creates a layer of lubrication that lets the squeegee blade glide smoothly. If the surface is too dry, the blade will skip and chatter, leaving ugly streaks behind.
- A Dirty Blade: This is a habit you have to build. After every single pull with the squeegee, wipe the blade clean with a microfiber cloth. If you skip this, you’re just dragging dirty water right back across the glass you just cleaned.
- Hard Water Minerals: The water here in Arizona is notoriously hard. If you're just using tap water for your cleaning mix, those minerals can get left behind as a hazy residue. The simple solution is to switch to distilled water for a pure, spot-free rinse.
Nailing these little details will help you fine-tune your technique and get that professional-looking result every single time.
For those really high windows or stubborn jobs that just feel like too much, the team at South Mountain Window Cleaning is always ready to step in. We offer licensed, insured, and guaranteed window washing services for residential, commercial, and high rise properties across Phoenix, Scottsdale, Paradise Valley, Chandler, Tempe, and Gilbert. Schedule your free, no-obligation estimate today!