
So, what's the best way to get a concrete driveway sparkling clean? It really comes down to a few key things: good prep work, the right cleaning mix, and knowing how to handle a pressure washer. For most driveways we see, a pressure washer pushing 2,500 to 3,000 PSI paired with a solid concrete cleaner does wonders.
Your Pre-Cleaning Game Plan for a Perfect Finish
A grimy, stained driveway can really hurt your home’s curb appeal, especially here in Arizona where the dust and intense sun are relentless. But the secret to a spotless finish isn't just about blasting away dirt. It all starts with what you do before you even pull the trigger on a pressure washer. Think of it as setting the stage for a professional-level clean.
This prep phase is a must-do, whether you’re going the DIY route or hiring a pro service like South Mountain Window Cleaning. It’s what makes the difference between a quick, effective job and a day full of frustration.
Clear and Inspect the Area
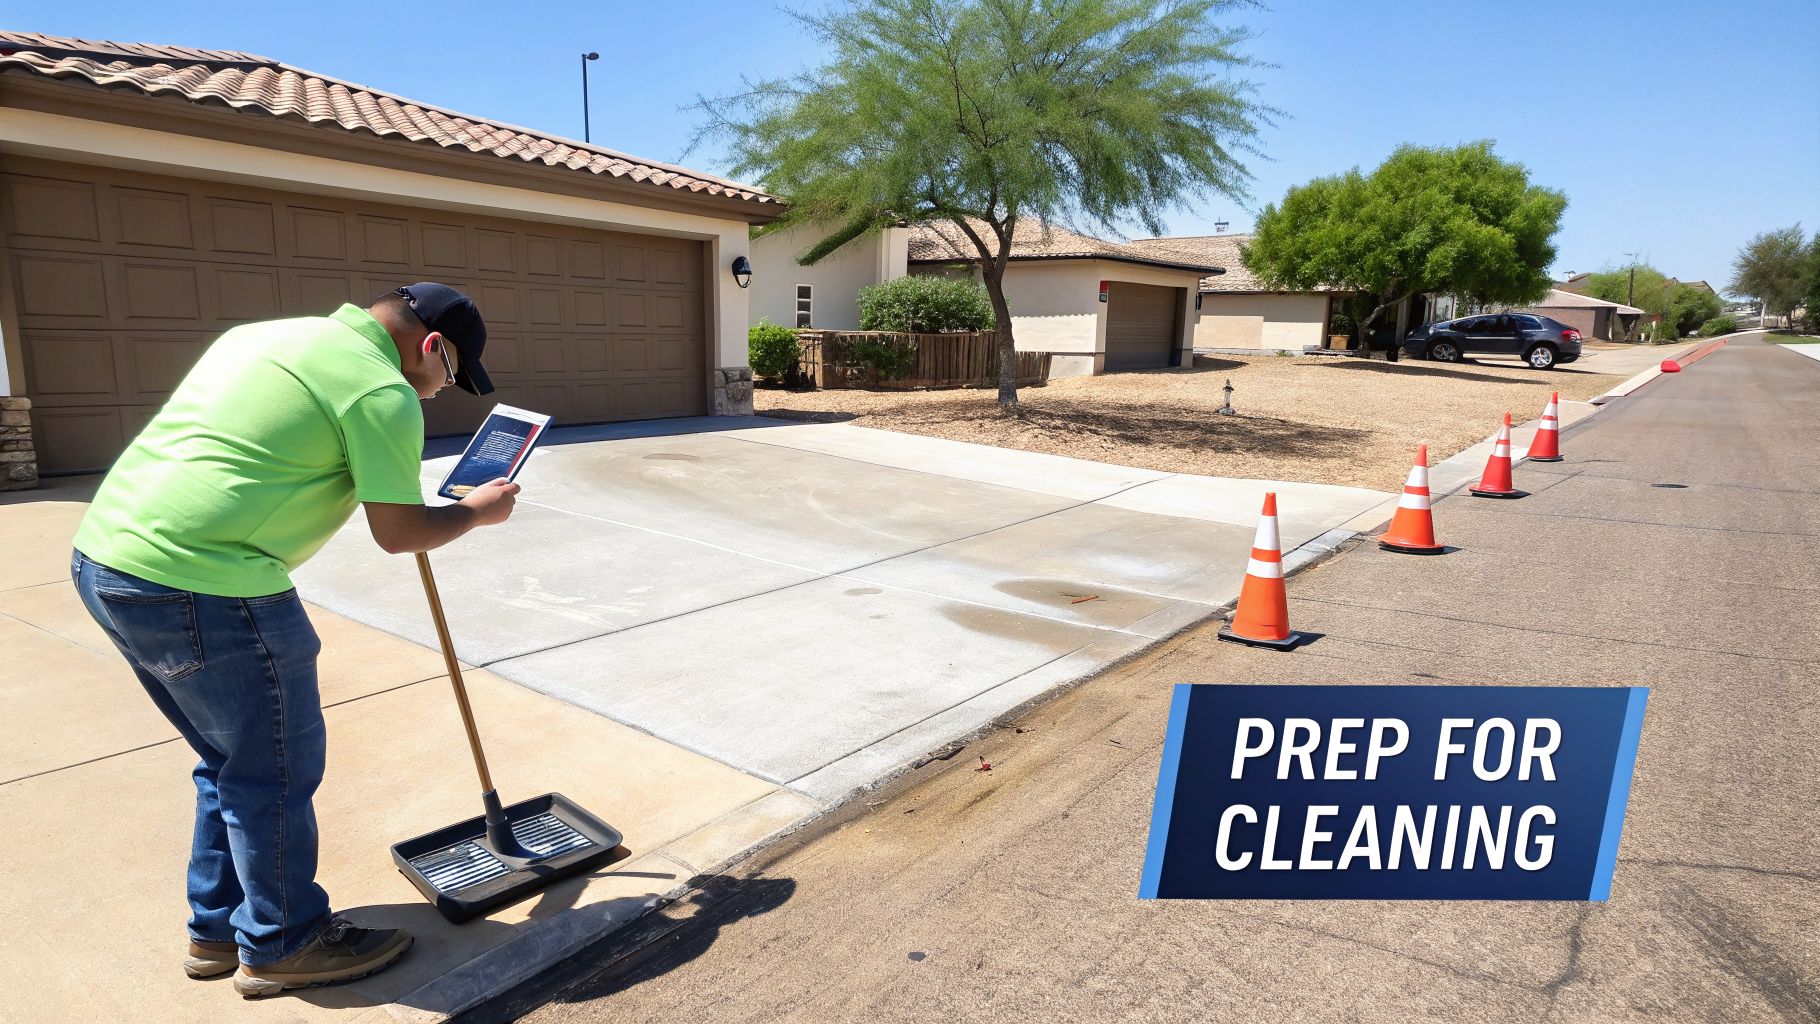
First things first, get everything off the driveway. That means cars, potted plants, patio furniture, and the kids' toys. A completely clear space is safer to work on and lets you clean in smooth, even passes without stopping.
Next, grab a stiff broom or a leaf blower and get rid of all the loose stuff—leaves, dirt, little rocks, you name it. This isn't just about being tidy. A pressure washer can turn a tiny pebble into a high-speed projectile, which is a risk you don't want to take. It also lets you get a good look at the concrete itself.
Pro Tip: While the driveway is clear, give it a quick once-over. Keep an eye out for any big cracks, crumbling spots, or areas where the surface is flaking away. Hitting damaged concrete with high-pressure water can make things a lot worse, so it's good to know where the problem spots are ahead of time.
Check the Weather and Protect Your Surroundings
Here in the Valley—Phoenix, Scottsdale, Paradise Valley, Chandler, you know the drill—the weather dictates your project's success. Trying to clean on a blazing hot, sunny, or windy day is a recipe for a streaky, uneven mess.
- Intense Sun: When the Arizona sun is beating down, water and cleaners evaporate in a flash. This leaves behind ugly chemical streaks and makes it impossible to keep the surface evenly wet for a consistent clean.
- High Winds: A windy day can spray your cleaning solution all over your cars, plants, or house siding. It also makes it tough to control where the pressure washer spray is going.
Before you start, take a few minutes to cover up any nearby plants, flowerbeds, and siding with plastic sheeting. Make sure the garage door and any close windows are shut tight to keep water and soap from getting inside.
To give you a bird's-eye view, here's a quick cheat sheet for getting your driveway ready.
Quick Guide to Driveway Cleaning Success
This table breaks down the entire process into manageable phases, offering our best advice for getting great results right here in Arizona.
| Phase | Key Action | Pro Tip for the Arizona Climate |
|---|---|---|
| Preparation | Clear all items and sweep the surface. | Plan your cleaning for an early morning or a cooler, overcast day to prevent cleaner from drying too quickly. |
| Inspection | Check for cracks or significant damage. | Mark any deep cracks; you'll want to avoid hitting them directly with the high-pressure stream. |
| Protection | Cover plants, doors, and windows. | Wet down landscaping before and after cleaning to dilute any chemical overspray that gets past your tarps. |
Taking these steps seriously sets you up for a fantastic result. This kind of prep work is just as important for your driveway as it is for the rest of your home's exterior. For a bigger picture on property maintenance, you might want to look at our guide on how to clean your house exterior. A little planning goes a long way in making your home’s entrance look brand new again.
Choosing the Right Tools and Cleaning Solutions
Alright, you’ve cleared the area and you're ready to tackle the grime. Now comes the part where the real magic happens: picking your equipment. Choosing the right gear is the secret to getting a fantastic clean without spending your entire weekend on the project.
It’s not just about grabbing the most powerful pressure washer you can find. It’s about matching the tool and the cleaning solution to your specific driveway.
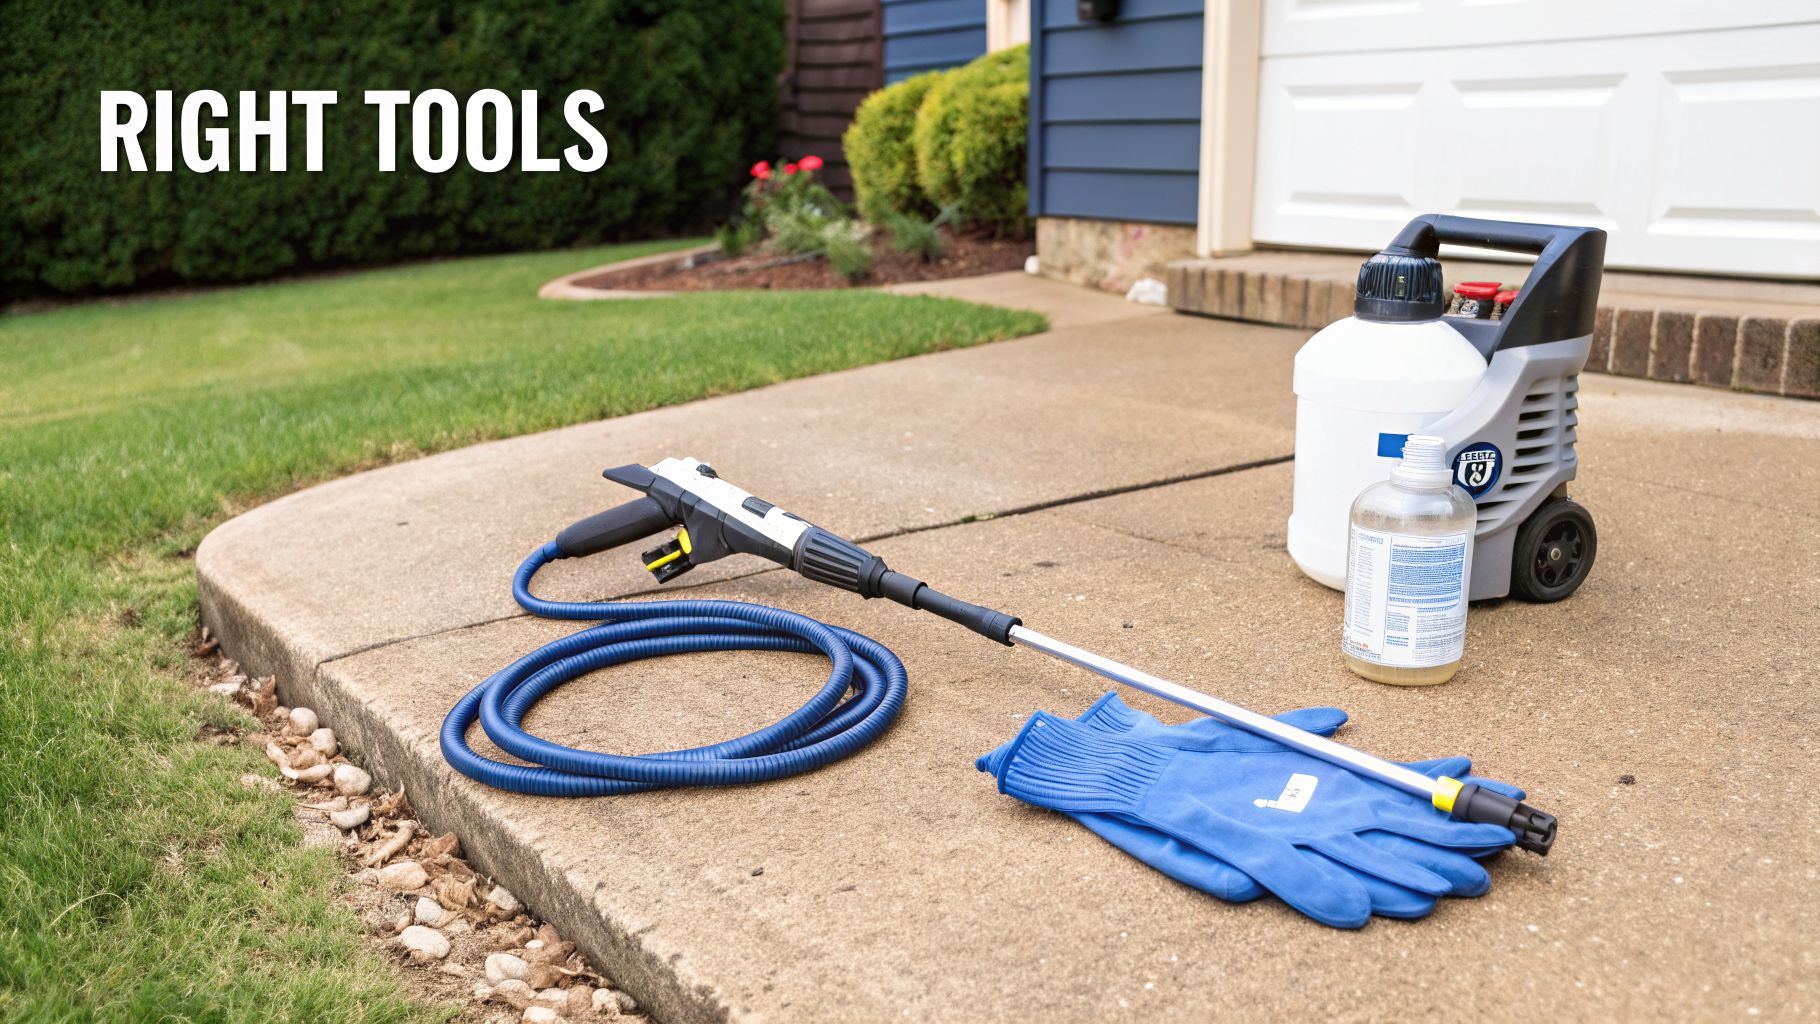
Getting this right is the difference between a driveway that looks brand new and one that’s left with ugly streaks—or worse, permanent damage from using too much power. Let's break down the gear you'll need.
Decoding the Pressure Washer
The pressure washer is obviously the main event, but you have to respect its power. There are two numbers you absolutely need to pay attention to: PSI and GPM.
- PSI (Pounds Per Square Inch): Think of this as the sheer force. It’s the muscle that gets deep into the pores of the concrete to blast out dirt and lift tough stains.
- GPM (Gallons Per Minute): This is all about flow. A higher GPM means more water is hitting the surface, which helps rinse away all the gunk the PSI just broke loose. It’s what makes the job go faster.
The goal is to find the perfect balance. Too much PSI can literally etch your concrete, leaving marks that will never come out. Not enough, and you’ll just be pushing dirt around.
Finding the Right Pressure Setting
There isn’t one magic number here. The right setting really depends on how old your driveway is and what kind of shape it's in.
For most concrete driveways we see, a pressure between 2,500 to 3,000 PSI is the sweet spot. It’s strong enough for a deep clean but not so aggressive that it causes damage.
If you have newer concrete (less than a year old), be more gentle. It’s still curing, so stick to a lower pressure around 1,500–2,000 PSI. On the other hand, if you're dealing with ancient, set-in oil stains, you might need to carefully bump it up toward 3,500–4,000 PSI.
The real game-changer is the GPM. Most rental units you'll find at a hardware store max out around 4 GPM. Professional rigs, like the ones we use at South Mountain Window Cleaning, can put out 5.5 GPM or more. That extra water volume makes a huge difference in speed and rinsing power.
Selecting Your Cleaning Solution
While the pressure does the heavy lifting, a good cleaner is what breaks everything down. It loosens the grip of oil, grime, and organic stains, making it way easier for the water to flush them away for good.
You generally have two paths you can go down.
1. Commercial Concrete Cleaners and Degreasers
These are the heavy hitters. If you have nasty oil spots or fluid leaks, a good degreaser is a must. They’re formulated to break down petroleum-based stains that water alone can't touch. Just make sure the label says it's safe for both concrete and pressure washers.
2. DIY and Eco-Friendly Options
For general dirt, mildew, or light staining, you don't always need to bring out the harsh stuff. A simple mix of biodegradable soap and water does a great job. Here in the Phoenix area, we also see a lot of success with simple vinegar solutions. It’s great for killing mold and mildew without being a threat to your landscaping.
Knowing when to go strong and when to be gentle is key. We get into this a lot more in our article explaining the difference between pressure washing vs. soft washing. It’s a great read if you want to understand which approach is best for different parts of your home.
Alright, you've got your gear and the driveway is prepped. Now for the fun part—the actual cleaning. This is where the magic happens, and it’s all about using the right technique to get that perfect, uniform finish that pros deliver. It’s less about brute force and more about working smart.
We’ll break down the exact process we use, from spot-treating stubborn stains to the sweeping motion that prevents those ugly stripes. Follow along, and you’ll be cleaning like a seasoned pro in no time.
Tackle Tough Stains Before You Start
You know those stubborn spots—the fresh oil drip from a visiting car, rust marks from the sprinklers, or those dark patches of mildew in the shady corner. Hitting them with the pressure washer alone often won't cut it. You have to pre-treat them.
Giving these stains some dedicated attention first is a non-negotiable step for a flawless result. By applying a targeted cleaner and letting it sit, you're allowing it to penetrate deep into the concrete and break down the stain from the inside out. This is what we call "dwell time," and skipping it is a rookie mistake.
- For Oil and Grease: A good commercial-grade concrete degreaser is your best friend here. Apply it right on the spot and let it sit for 15-20 minutes. You'll know it's working when you see it start to lift the oil. Just be sure it doesn't dry out.
- For Rust Stains: Grab an oxalic acid-based cleaner. It’s made specifically to dissolve the iron oxide that creates those orange blemishes. Dwell time can differ, so always read and follow the product's specific directions.
- For Mold and Mildew: You can often get great results with a simple 50/50 mix of white vinegar and water in a spray bottle. For really tough growth, a bleach-based outdoor cleaner will do the trick. Let it sit for about 10-15 minutes to kill everything off.
After your chosen solution has had time to work, give the area a quick scrub with a stiff-bristled brush. This agitation helps lift the stain right before you begin the main wash.
The Art of the Pressure Washing Sweep
This is it—the main event. Your technique with the pressure washer wand is what will make or break the final look. The biggest amateur mistake we see is "zebra stripes" or "tiger lines," which are permanent etch marks left by an unsteady hand and inconsistent pressure.
The secret isn’t complicated: maintain a consistent distance and use broad, overlapping sweeps.
- Start at the Top: Always begin at the highest point of your driveway and work your way down. Gravity is a great assistant, pulling the dirty water and grime away from the areas you’ve already cleaned.
- Keep Your Distance: Hold the nozzle about 12 inches from the concrete. This is crucial. Getting too close is how you damage the surface, as the focused stream is powerful enough to etch the concrete itself.
- Use a Sweeping Motion: Think like you're spray painting. Move the wand in a steady, side-to-side motion for even coverage. Never just point and blast one spot.
- Overlap Your Passes: Your next sweep should overlap the last one by about a third. This is the key to avoiding those dreaded lines and ensuring a perfectly blended, uniform clean.
This methodical approach is exactly how you get a professional-level clean without leaving behind a map of every move you made.
Work in Sections to Maintain a Wet Edge
Here in Arizona, the dry air and intense sun are your biggest enemies when cleaning concrete. Water evaporates in what feels like seconds. If one area dries before you clean the section next to it, you're guaranteed to get ugly lines and a patchy finish. The pro-level solution is to always maintain a "wet edge."
A "wet edge" is a continuous wet border between the area you've just cleaned and the area you're about to clean. This technique prevents streaking and ensures a seamless, uniform appearance once the entire surface is dry.
To make this happen, just divide your driveway into small, manageable grids in your mind—maybe 4×4 or 5×5 feet. Clean one section completely, then immediately start on the next, making sure your spray overlaps into the section you just finished while it’s still wet.
This isn't just a "nice-to-do"; it's an absolutely essential technique in places like Phoenix, Scottsdale, and Tempe. For our team at South Mountain Window Cleaning, keeping a wet edge is second nature. It's a core part of how we deliver the high-quality, seamless results our clients expect every single time.
How to Remove Tough Stains Like Oil, Rust, and Mold
Sometimes, a standard pressure wash just won't cut it, especially with the kinds of stubborn stains we see all over the Phoenix area. Marks from a leaky car, orange streaks from an irrigation system, or green patches in a shady corner need a more targeted game plan. This is your go-to guide for tackling the most common stains that wreck concrete and hurt your home’s curb appeal.
This simple visual breaks down the core technique for cleaning almost any surface.
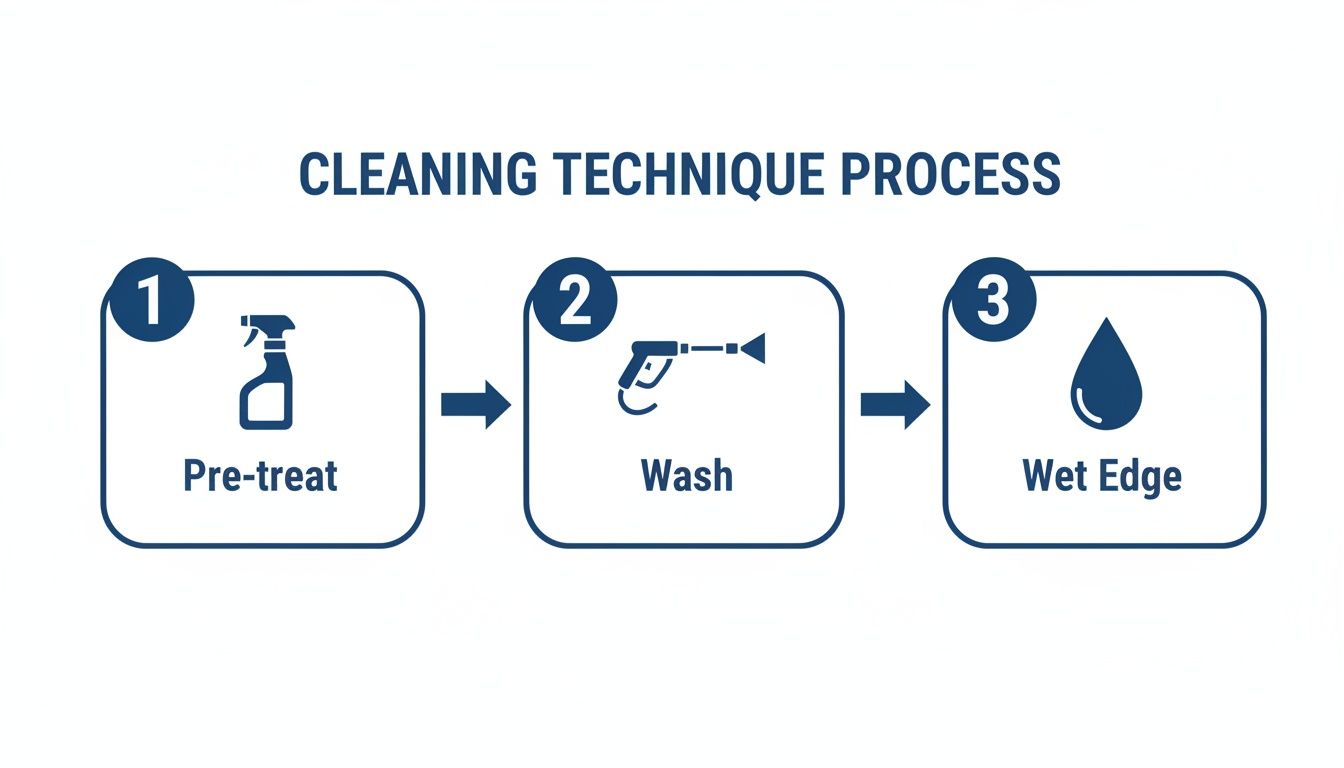
It’s a great reminder that getting a fantastic result is all about the right technique, not just blasting away with raw power.
Attacking Oil and Grease Spots
Oil and grease are easily the most common culprits on driveways. Because concrete is porous, those fluids soak right in, leaving behind dark, ugly spots that plain water can't touch. The best way to get these out really depends on how long the stain has been there.
If you catch a spill when it's fresh, act fast. Whatever you do, don't rub it or hit it with the hose—that will only make it worse. Instead, generously cover the spot with an absorbent material like kitty litter, sawdust, or even baking soda. Let it sit for a few hours, or even overnight, to pull as much oil out as possible before you sweep it all up.
For older, set-in stains, you'll need to bring out the heavy hitters: a poultice or a powerful degreaser.
- Make a Poultice: Mix a powdered absorbent (kitty litter works great here too) with a strong solvent like acetone until you have a thick, peanut-butter-like paste.
- Apply and Cover: Slather the paste over the stain, about a quarter-inch thick. Cover the whole thing with plastic wrap and tape down the edges to seal it.
- Let It Work: Leave it alone for 24 to 48 hours. As the solvent slowly evaporates, it pulls the oil up from deep inside the concrete into the absorbent powder. Once it's totally dry, just scrape it away.
This method is fantastic for drawing out even ancient oil stains, making them much easier to finish off with a final pressure wash.
Erasing Rust and Hard Water Stains
In so many Arizona neighborhoods, from Chandler to Gilbert, our hard water is the main source of those rusty orange stains on concrete. The iron deposits in the sprinkler water build up over time and require a specific chemical reaction to break them down.
A word of warning: Never use bleach on rust stains. It can react with the iron and set the stain permanently. You need an oxalic acid-based cleaner, which is made specifically to dissolve iron oxide without eating away at your concrete.
Here’s a simple, targeted approach that works every time:
- Start by wetting the stained area with some water.
- Apply the oxalic acid cleaner exactly as the manufacturer’s directions say.
- Let it sit for 5-10 minutes, giving it a light scrub with a nylon brush.
- Rinse it all away thoroughly with your pressure washer on a low-pressure setting.
It's a surprisingly simple process for the incredible results it delivers. For a more in-depth look, check out our complete guide on how to remove rust stains from concrete.
Killing Mold and Mildew
See those slippery, greenish-black patches in damp, shady spots? That's usually mold, mildew, or algae. They're not just ugly—they're a serious slip-and-fall hazard, especially right after it rains.
The key isn't just to wash the surface clean but to kill the organic growth for good. For light buildup, a simple mix of one part white vinegar to one part water in a garden sprayer can do the trick.
For more stubborn patches, you’ll need a specialized outdoor cleaner with a mildewcide. Just spray the solution on, let it dwell for about 15 minutes to kill everything at the root, and then wash it away. And for those really tough marks like tar that get tracked from the road onto your driveway, a specialized tar remover guide has some great solutions.
Protecting Your Driveway After Cleaning
Don't turn off that pressure washer and call it a day just yet. After you’ve blasted away all that grime, the next couple of steps are what really lock in that fresh, clean look and protect your driveway for the long haul. This post-cleaning care is what separates a good job from a great one.
Think of your freshly cleaned concrete as a blank slate. It’s pristine, sure, but it's also wide open to new stains, moisture, and the relentless Arizona sun. The last, and arguably most important, part of the job is giving it a protective shield.
The Importance of Complete Drying
This part is all about patience. Before you even think about applying a sealer, your concrete driveway has to be 100% dry. I can't stress this enough. If you rush it, you'll trap moisture under the surface, which is just asking for trouble later on.
So, how long does it take? Here in the dry Arizona climate, you’re usually looking at a full 24 hours. It might take even longer depending on the humidity or if your driveway is in a shady spot. The best way to tell is to wait until the concrete is a light, uniform color again, with no dark or damp-looking patches anywhere.
Trapping moisture under a sealer is one of the most common DIY mistakes we see. It can leave a cloudy, hazy finish and might even cause the sealer to peel and fail, meaning you have to strip it all off and start over.
Sealing Your Concrete for Long-Term Defense
Once your driveway is bone dry, it's time to seal it. This is the most critical step for long-term protection. A quality concrete sealer is like applying both a rain jacket and sunscreen to your driveway. It’s an invisible barrier that offers a ton of benefits.
A good sealer will:
- Block Stains: It gets into the pores of the concrete, so things like oil, dirt, and other spills can't soak in and leave a mark.
- Prevent Moisture Damage: It repels water, which is huge for preventing cracks and spalling that happen when moisture gets in and temperatures fluctuate.
- Resist UV Rays: In sunny places like Phoenix and Scottsdale, a UV-resistant sealer is a must. It stops the sun from fading and breaking down the concrete surface over time.
Understanding the different types of concrete patio finishes can also give you insight into what kind of sealer will work best for your specific surface and its long-term durability.
Creating a Simple Maintenance Schedule
Protection isn’t a one-and-done deal. The real secret is setting up a simple maintenance routine. A little consistency goes a long way in extending your driveway’s life, keeping it looking great, and saving you from expensive repairs.
Most driveways around here do well with a good cleaning once or twice a year. This keeps the dirt, mold, and grime from building up. From what we've seen, pressure washing annually or semi-annually and then reapplying sealer every 2-3 years is the magic combination. This simple schedule dramatically extends the life of the concrete. For homeowners and businesses across the Valley, it’s the most effective and affordable way to keep concrete surfaces in top shape.
For a deeper look into the sealing process and timing, you might want to check out our article on how often you should you seal your driveway. Taking this proactive approach ensures your driveway stays a clean, welcoming part of your home for years to come.
When to Call in a Professional Cleaning Service
Taking on a big DIY project can feel great, but sometimes, cleaning a concrete driveway is a job best left to the pros. Knowing when to hand over the pressure washer isn't giving up; it’s just being smart about protecting your property and getting the job done right.
Honestly, knowing the best way to clean a concrete driveway sometimes means knowing when you’re outmatched. This is especially true for jobs that are more than just a simple rinse-down, like massive driveways, deep chemical stains, or when you just don't have the heavy-duty equipment needed.
Is the Job Too Big to Handle?
The size of your driveway can be the biggest clue. Cleaning a standard two-car driveway is one thing. Tackling a long, winding driveway or a big commercial lot is a completely different ballgame. A project that would eat up your entire weekend could be wrapped up by a professional crew in just a couple of hours.
Think about calling for help if your project involves:
- A huge surface area: For those large residential properties you see in Paradise Valley or commercial lots in Tempe, the time and sheer physical work can be a dealbreaker.
- Steep slopes: Driveways with a big incline are tough to clean evenly. More importantly, they can be a serious safety hazard when you're trying to manage a powerful pressure washer.
- Complex layouts: If your driveway has custom patterns, different levels, or is right up against delicate landscaping, you need a level of precision that’s hard to get with a rental machine.
If your driveway ticks any of these boxes, hiring a service is almost always the faster and safer choice.
When Stains and Damage Are Beyond a DIY Fix
Some stains are just plain stubborn. They won't budge with store-bought cleaners and the pressure washer you can rent from the local hardware store. Deeply set oil, hydraulic fluid, or other chemical spills often need special cleaning agents and know-how that only trained technicians have.
Trying to tackle certain chemical stains without the right experience can go wrong fast. You might not only fail to remove the stain but could end up with permanent discoloration or even damage the concrete itself. A pro knows how to identify the stain and use the right method to lift it.
Also, if your driveway already has damage like major cracks, spalling (where the surface is flaking off), or crumbling edges, blasting it with high pressure is a recipe for disaster. A professional will know how to clean around these fragile spots safely or recommend you get repairs done first.
The Pro Equipment and Expertise Advantage
There's a huge difference between a rental pressure washer and the commercial-grade equipment a company like South Mountain Window Cleaning uses. Our machines have a higher PSI, but the real secret is the GPM (gallons per minute). A high GPM is what really does the heavy lifting, delivering a deeper, faster, and more even clean without blasting your concrete into oblivion. While our name says window cleaning, our expertise extends to all exterior surfaces, including residential and commercial driveways.
Hiring a licensed and insured pro isn't just a cost—it's an investment in your home. Professional driveway pressure washing usually runs between $0.30 and $0.55 per square foot. For a typical 600-square-foot driveway, that's often around $180 to $330. It’s a small price to pay to prevent long-term damage from things like mold and car fluids, which can eat away at concrete over time.
For homeowners in places like Phoenix and Scottsdale, an annual professional cleaning is one of the best ways to protect your property value and keep your curb appeal looking sharp in our dusty, sun-baked climate. You can explore more concrete cleaning facts to see the benefits and costs.
Ultimately, it’s about balancing your time, budget, and what you want the final result to look like. DIY is fine for light touch-ups, but for the tough jobs, calling a professional guarantees a flawless finish and protects one of your home’s biggest features.
When the job is too big, the stains are too tough, or you simply want a guaranteed professional result, the team at South Mountain Window Cleaning is here to help. Serving Phoenix, Scottsdale, Paradise Valley, Chandler, Tempe, and Gilbert, we bring the right equipment and expertise to restore your driveway's beauty. Schedule your free, no-hassle quote online today!