
When you pressure wash a house, the secret isn't just brute force. It's about matching the right pressure, nozzle, and technique to your home's specific siding to sidestep costly damage. For a truly professional, streak-free finish, you have to follow a proven system: prepare the area meticulously, apply a cleaning solution from the bottom up, and then rinse everything from the top down.
Your Guide to a Spotless Home Exterior
A professional pressure wash can be a game-changer for your home's curb appeal, instantly blasting away built-up grime and making your siding look new again. Here in Arizona, it’s practically essential maintenance. The combination of stubborn dust and intense sun team up to bake dirt right onto your walls.
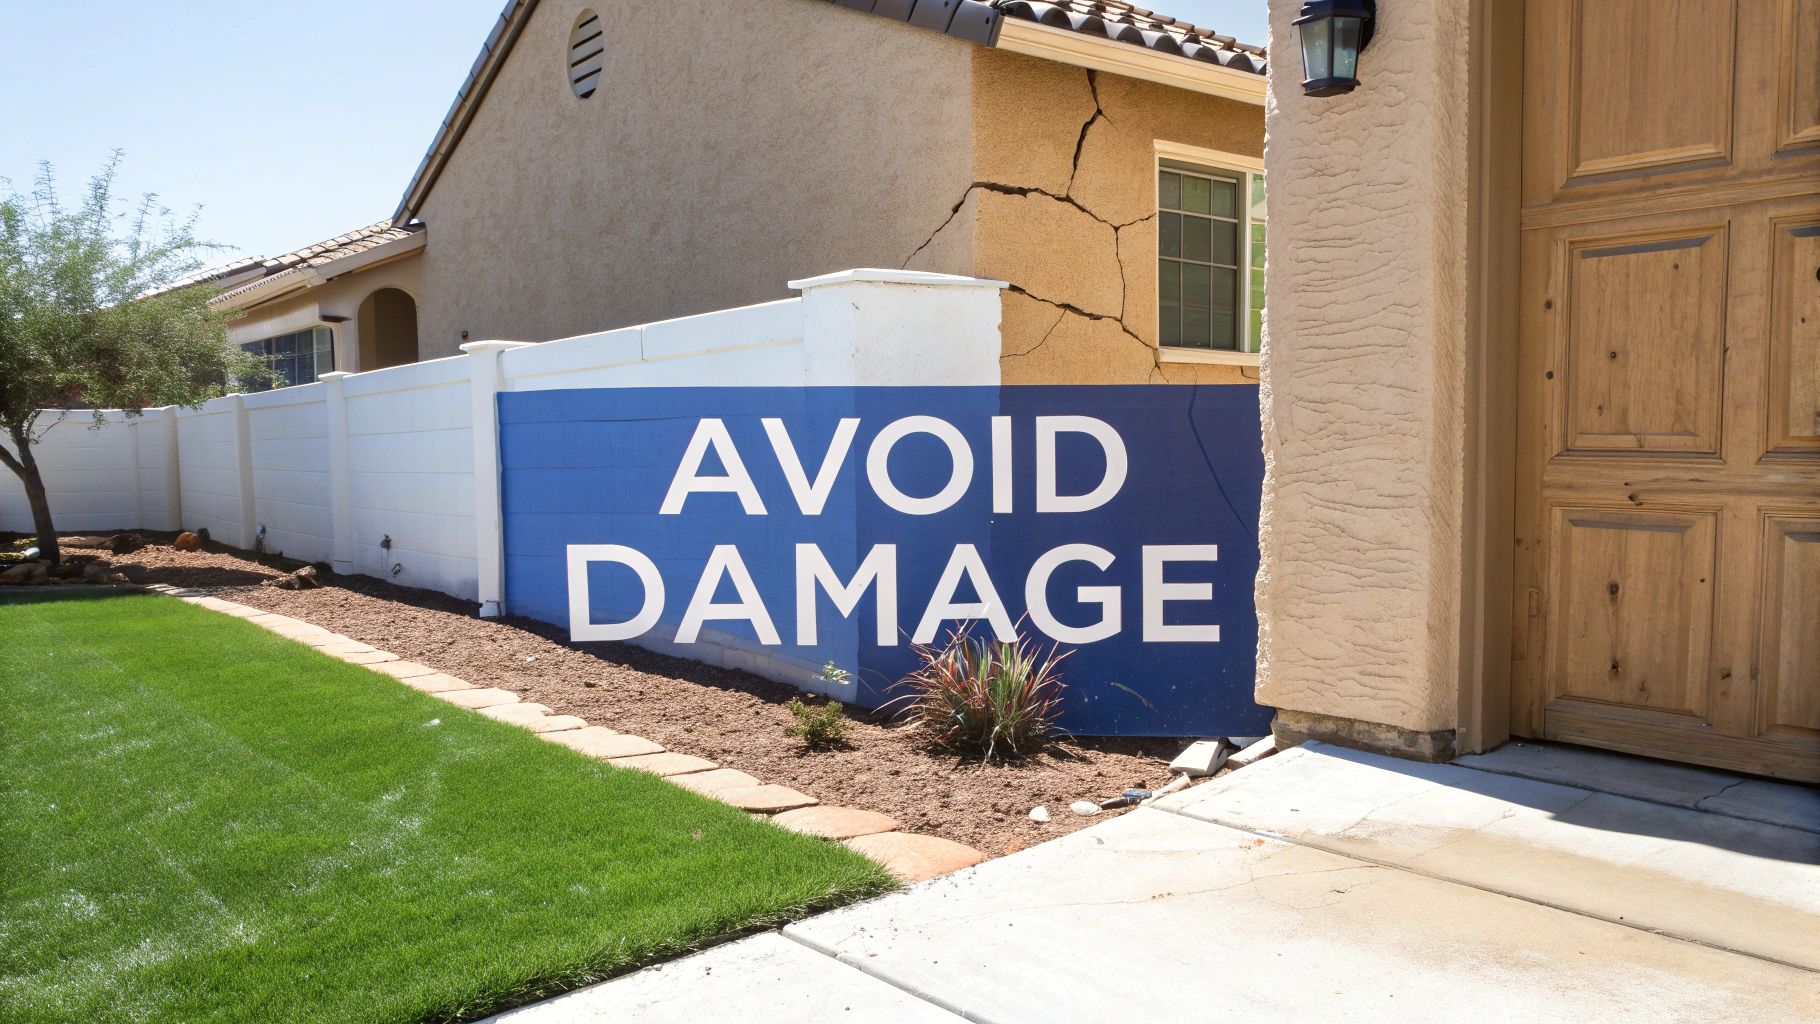
But getting brilliant results is about more than just pointing a high-pressure wand and pulling the trigger. This is a job that demands a smart approach to protect your biggest investment. Think of this guide as your roadmap to getting it done right—safely and effectively.
It's no surprise that the pressure washing industry has seen significant growth, with its market size valued at over $2 billion. This jump shows just how many homeowners are turning to this method for a deep clean that nothing else can match.
Why a Strategic Approach Matters
Just grabbing a rental from the hardware store and going for it is a recipe for disaster. Different sidings require different approaches. The method you’d use for tough, durable brick is worlds away from the gentle touch needed for stucco or vinyl.
One wrong move, and you could be looking at:
- Permanent Siding Damage: Think ugly etching lines carved into your wood or vinyl siding.
- Water Intrusion: Forcing water behind siding is a fast track to mold, mildew, and structural rot.
- Stripped Paint: Blasting off paint chips can turn a simple cleaning job into a much larger repair project.
Knowing the right way to pressure wash a house is absolutely crucial. For a broader look at cleaning methods, check out our overview on the best way to clean a house exterior, which covers more than just high-pressure washing.
In this guide, we’ll walk you through the practical, real-world steps to pressure wash your house like a pro, ensuring you get those brilliant results without the risk. We'll also help you spot the signs that tell you when it’s time to call in an expert like South Mountain Window Cleaning for a guaranteed perfect finish.
Setting the Stage for a Flawless Wash
A truly successful pressure washing job begins long before you ever pull the starter cord. The real success is rooted in thoughtful prep work. Taking the time upfront prevents costly mistakes and ensures you get a smooth, damage-free finish. Think of it as creating a safe zone around your entire home.

Before you think about mixing detergents, do a thorough walk-around. Your mission is to spot any potential trouble areas where high-pressure water could cause chaos. This isn't just a quick glance; it's a careful inspection that will save you a world of headaches later on.
Your Pre-Wash Checklist
Get into the habit of running through this essential checklist. This simple routine can mean the difference between a pristine exterior and a weekend spent on repairs. Here’s what we always check before firing up the machine:
- Seal the Gaps: Look for any cracks or gaps around window and door frames. A bit of exterior caulk now can prevent water from being forced into your walls, which is a fast track to mold and rot.
- Protect Vulnerable Fixtures: Water and electricity are a disastrous mix. Use thick plastic sheeting and painter’s tape to completely cover all exterior electrical outlets, light fixtures, and vents. Don’t cut corners here—make sure they are sealed tight.
- Clear the Area: Move everything away from the house. That means patio furniture, grills, potted plants, yard decor, and kids' toys. You need at least 10 feet of clear space to work safely and avoid tripping hazards.
- Safeguard Your Landscaping: Your prize-winning roses won't appreciate a blast of cleaning solution. Gently cover delicate plants, shrubs, and flower beds near the foundation with lightweight tarps or plastic sheeting.
A Quick Inspection Saves Big Money
The final step before washing is to check the condition of the siding itself. You're looking for any loose panels, peeling paint, or cracked mortar in your brickwork.
Pro Tip: If you find significant damage, like large cracks in stucco or badly chipped paint, hold off on pressure washing. Blasting these areas will only make the problem worse. It's better to address the repair first and wash later.
Taking these 15-20 minutes to prepare your home properly is non-negotiable. It protects your property, ensures a better final result, and makes the entire process of pressure washing your house much safer and more efficient. It’s the kind of methodical approach that separates the pros from the amateurs.
Picking Out Your Pressure Washing Gear
When it comes to pressure washing your house, having the right tools is what separates a job well done from an expensive mistake. Your setup doesn't have to be complicated, but each piece has a specific job to do, and getting it right is key to working safely and effectively.
For most homeowners in the Phoenix area, an electric pressure washer is often the go-to for DIY projects. They’re lighter, quieter, and require minimal maintenance. A gas-powered machine has more raw power, which is great for large concrete driveways, but it's often too much—and frankly, a little risky—for most types of home siding.
Getting a Handle on PSI and GPM
Once you have a washer, you need to be familiar with its two most important stats: PSI (pounds per square inch) and GPM (gallons per minute). The easiest way to think about it is that PSI is the force that knocks the grime loose, and GPM is the flow of water that washes it all away.
- PSI is your power. Too much of it will gouge wood, strip paint right off, or even crack your stucco.
- GPM is your speed. A higher GPM means you can rinse surfaces much more quickly.
When cleaning siding, you almost never need to exceed 1,500 to 1,900 PSI. The real secret is to let your cleaning solution do the hard work, not raw power from the machine. This is the whole idea behind gentler, more effective cleaning methods. If you want to dive deeper into this, check out our guide on what is soft wash house cleaning, which relies on detergents instead of high pressure.
Making Sense of Nozzles and Detergents
The final items for your toolkit are your nozzles and cleaning solution. Those colorful tips that come with every pressure washer aren't just for looks—they control the angle of the water spray, which directly changes the amount of pressure hitting the wall.
It's absolutely essential to pick the right nozzle tip to avoid damaging your home's exterior. Below is a quick rundown to help you choose. Our advice? Always start with the widest angle (the white tip) and only move to a narrower one if absolutely necessary.
Quick Guide to Pressure Washer Nozzles
| Nozzle Color | Spray Angle | Primary Use | Safety Note |
|---|---|---|---|
| White | 40-degree | The safest bet for siding, windows, and vehicles. Perfect for rinsing. | Start here. This is your go-to for almost all house washing. |
| Green | 25-degree | Good for general cleaning on tougher surfaces like decks and patios. | Use with caution. Keep a safe distance from whatever you're spraying. |
| Yellow | 15-degree | Meant for stubborn stains on hard surfaces like concrete or brick. | You’ll almost never use this on house siding. It can easily cause damage. |
| Red | 0-degree | Creates a tiny, destructive laser beam of water. | NEVER use this on your house. It will shred siding and break glass in an instant. |
Finally, grab a detergent specifically made to pressure wash a house. These cleaners are designed to cut through classic Arizona dust, algae, and grime without damaging your siding or landscaping. Just be sure to follow the mixing instructions on the bottle to get the best results.
Mastering Your Pressure Washing Technique
Now that your gear is set up and your house is prepped, it's time to get down to business. Mastering the right technique is what separates a satisfying weekend project from a costly mistake. It all boils down to control, consistency, and taking a methodical approach to the job.
The way you handle the spray wand is everything. Your main goal is to keep a consistent distance from the siding, usually between 12 to 18 inches. Getting too close is a classic rookie mistake that can easily gouge wood, chip paint, or etch stucco. Think of it like spray painting—use smooth, overlapping sweeps, ensuring each pass overlaps the last one by about 50%. This is the key to avoiding harsh, visible lines on your siding.
This simple diagram shows the essential sequence for getting your equipment ready to go.
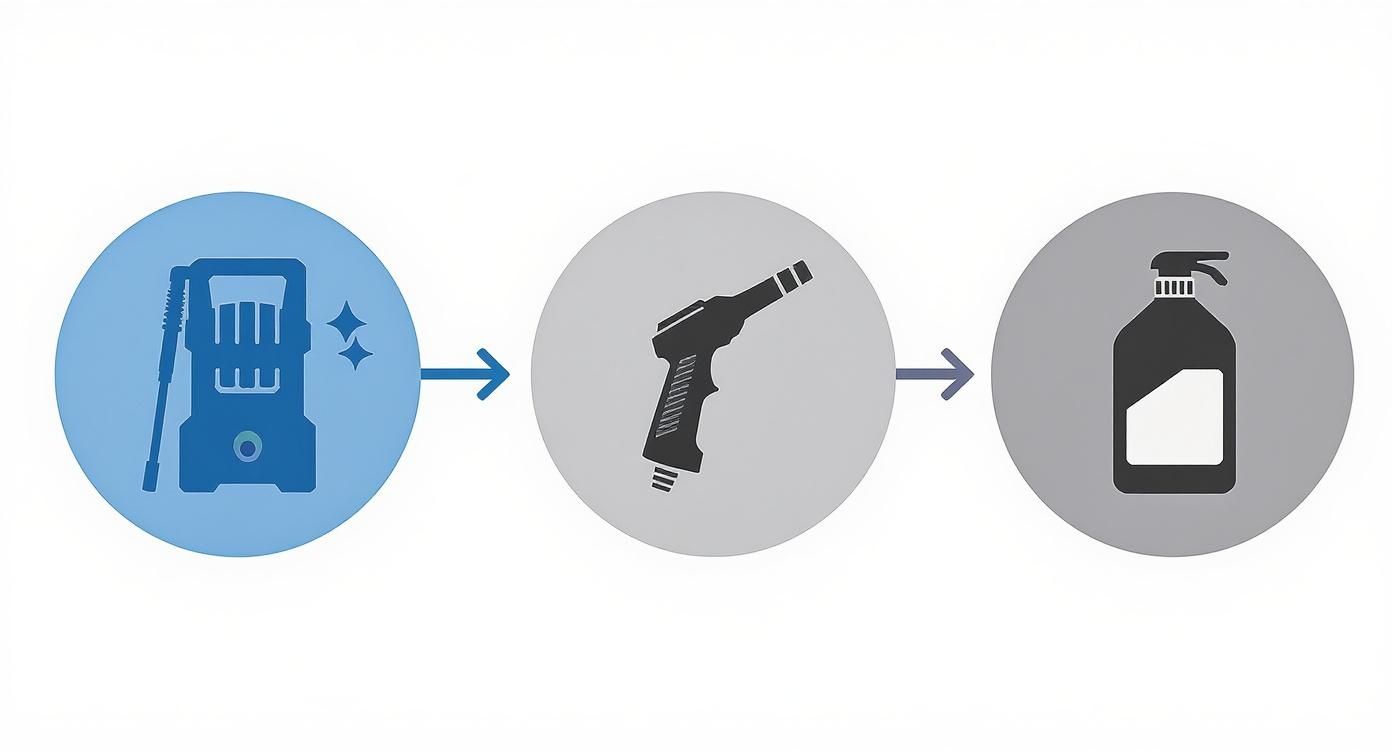
As you can see, choosing the right nozzle and cleaning solution is just as critical as the pressure washer itself for a safe and effective clean.
The Pro Method: Soap from the Bottom, Rinse from the Top
There's an industry-standard method that pros use to prevent streaks and ensure every bit of detergent is rinsed away. It might feel a little backward at first, but trust us, it works.
First, apply your detergent starting from the bottom of a wall and working your way up. Why? Applying soap from the bottom up prevents clean streaks from forming as the solution runs down over the still-dirty surface below. Let that detergent sit and do its thing for about 5-10 minutes—long enough to break down the grime, but never long enough to dry on the siding.
Next, rinse everything off from the top down. Switch to a rinsing nozzle (the white or green tip is usually perfect for this) and wash all the soap and dirt away. Start at the highest point of the wall and work your way down. Gravity becomes your best friend here, pulling all the dirty, soapy water down and away from the freshly cleaned surface.
Key Takeaway: Soap up, rinse down. This single technique is one of the biggest things that separates a professional job from an amateur one. It’s the best way to guarantee you won't be left with ugly streaks and residue.
Adjusting Your Technique for Arizona Siding
Here in the Valley, we have specific types of siding that demand extra care. Using the wrong technique can be a very expensive error.
- Stucco: This is the big one for homeowners in Phoenix and Scottsdale. Stucco is surprisingly delicate. You should always use a wide fan spray (the 40-degree white nozzle) and keep the pressure low—definitely under 1,500 PSI. The idea is to let the cleaning solution dissolve the dust, not blast it off with raw power, which can easily chip or etch the textured finish.
- Vinyl Siding: While vinyl is pretty tough, it has one major weak spot: the seams. Never spray water directly upward into the seams. Doing so can force water behind the panels, trapping moisture and leading to mold and rot. Always keep your wand angled slightly downward to prevent this.
- Wood and Brick: With wood siding, always wash with the grain to avoid splintering the surface. For brick, the main thing to watch out for is the mortar. Keep a safe distance and don't use a concentrated stream that could erode the joints between the bricks.
By tailoring your technique to each surface, you protect your home while getting that deep clean you're after. For more complex jobs, especially on two-story homes in places like Paradise Valley or Chandler, remember that a professional service like South Mountain Window Cleaning has the specialized equipment and experience to get perfect results safely.
Common Mistakes and Arizona-Specific Challenges
Even with the best intentions, a few common slip-ups can turn a satisfying DIY project into an expensive headache. Learning to sidestep these mistakes is just as important as mastering the right technique. Here in Arizona, we also have to contend with our own unique hurdles—the relentless sun and layers of dust create a whole different ball game.
That powerful tool in your hands can cause serious problems if used incorrectly.
Avoiding DIY Disasters
We've seen it time and time again: the most common—and costly—mistake is simply using way too much pressure. It's so tempting to just blast away the grime with a narrow, high-PSI jet, but that's exactly how you end up with gouged wood, chipped paint, or permanent "etching" lines on your siding.
Another classic blunder is spraying vinyl siding at an upward angle. This forces a ton of water up and behind the panels, trapping moisture right against your home's structure. It's the perfect recipe for mold and rot to take hold where you can't even see it. As you get the hang of it, always put safety first; reviewing some general tips to protect yourself and your property can prevent both injuries and expensive damage.
A Word of Caution: Never, ever use a pressure washer while standing on a ladder. The kickback from the wand is surprisingly strong and can easily throw you off balance. There's a reason the pros use scaffolding or lifts for second-story work—it's just not worth the risk.
Tackling Arizona’s Unique Cleaning Hurdles
Washing a house in Phoenix, Scottsdale, or Chandler is a whole different beast than doing it in a milder climate. Our environment demands a special approach if you want to get the job done right.
The two biggest opponents you'll face are the sun and the dust.
- Managing Intense Heat: The Arizona sun can bake your siding, making it scorching hot to the touch. If you spray detergent on a surface that hot, it’ll evaporate almost instantly. You'll be left with a chalky, streaky film that’s a nightmare to get off.
- Dealing with Thick Dust: Those infamous haboobs don't just make a mess; they coat everything in a thick layer of fine dust. Hitting that dry dust with high pressure can turn it into a muddy paste that just smears and resettles unevenly.
To beat these issues, plan your work for the cooler parts of the day. Early morning is perfect. This gives your detergent enough time to do its job before the sun bakes it onto the wall.
And before you even think about soap, always do a light pre-rinse on the dusty surface. This knocks off all the loose debris and prevents that mud-caking problem, setting you up for a much cleaner, more uniform finish.
Knowing When to Call a Professional
There's a real sense of accomplishment in a good DIY project, no doubt about it. But a smart homeowner also knows when to hang up the tool belt. Some jobs just aren't worth the risk, and pressure washing can definitely be one of them. Knowing your limits here can save you a ton of money in potential damage and keep you safe.
So, when is it time to pick up the phone? A few situations should be an immediate red flag. If you're looking up at a second story and thinking about pressure washing it from the ground—or even worse, from a ladder—it’s time to stop. The wand has a serious kickback, and a fall is a very real, very dangerous possibility.
Expert Insight: The pros have gear specifically for this. We use things like telescoping extension wands, scaffolding, and sometimes even lifts to clean multi-story homes safely. It’s all about having the right tool for the job to get a safe, uniform finish without a single streak.
Beyond just height, some surfaces and stains are just plain tricky. Those deep-set oil stains on the driveway, stubborn rust marks bleeding down from a fixture, or the siding on a historic home—these all demand more than a rental machine can offer. They require specific know-how and commercial-grade solutions to treat them right.
The Professional Advantage in Arizona
Bringing in a trusted local company like South Mountain Window Cleaning is an investment in getting the job done right, safely, and without the headache. We serve communities all over the Phoenix metro area—from Scottsdale and Paradise Valley to Chandler, Tempe, and Gilbert—and we know exactly what it takes to deal with Arizona's unique brand of grime.
Here’s what a professional service brings to the table:
- Commercial-Grade Equipment: Our machines are a world away from what you can rent. They deliver the perfect mix of pressure and water flow to deep clean without blasting your stucco or siding into oblivion.
- Specialized Solutions: We use effective, eco-friendly detergents that are formulated to break down that caked-on desert dust and grime.
- Guaranteed Results: With years of hands-on experience, we know how to approach any surface, whether it's delicate stucco or tough-as-nails brick. The result is a flawless clean, every time.
If you're on the fence, learning a bit more about when you should hire a professional to pressure wash your property can help make the decision clearer. When you add up the time you save, the guaranteed safety, and the superior results that last, calling in a pro is often the smartest move for your home.
Answering Your Pressure Washing Questions
When you're thinking about how to pressure wash a house, a few common questions always seem to pop up. Getting straight answers can make all the difference in deciding whether this is a project you want to take on yourself or if it's better left to the pros.
How Often Should I Pressure Wash My House in Arizona?
Here in the Phoenix metro area, a good wash every 12 to 18 months usually does the trick. That’s a solid baseline.
However, life in Arizona has its own quirks. If a big haboob just rolled through and dumped a layer of dust on everything, or if you live near a busy road, you might need to clean more often. Keep an eye out for any green or black stuff growing on the shaded sides of your home, too—that's a clear sign it's time to wash and protect your siding.
Can I Really Damage My Siding If I Do It Myself?
Oh, absolutely. It's probably the biggest risk you take when you DIY a pressure washing job.
It's shockingly easy to cause damage. Grabbing the wrong nozzle, like a powerful red 0-degree tip, or just getting too close to the wall can splinter wood siding in an instant. It can also chip paint right off or force a torrent of water behind vinyl siding, which is a perfect recipe for mold. Always, always start with a wide-angle nozzle and test it on a spot that nobody sees first.
The most common mistake we see is people trying to blast away dirt with pure pressure. A real professional soft wash is different—it lets the specialized detergents do the hard work, safely lifting the grime off without hammering your home's exterior.
Is It Okay to Pressure Wash My Windows?
Please don't. You should never aim a high-pressure stream at your windows. It's a quick way to break the glass, but what's even more common is damaging the seals between the panes. Once that seal is broken, moisture gets trapped inside, and you're left with permanently foggy windows.
Windows need a completely different approach—a gentle, low-pressure wash and a specific squeegee technique that only a professional window cleaning company is trained to do safely.
For a guaranteed safe and spotless finish on your home's exterior and windows, trust the experts at South Mountain Window Cleaning. Schedule your free, no-obligation quote online today!